10 Best Web Hosting Services: Tested and Reviewed in 2024
The most comprehensive web hosting test ever conducted
We tested the world’s most popular web hosting services to see which ones really live up to their claims. We launched actual websites on each provider’s servers and recorded loading speeds and uptime. We also evaluated features and pricing, and challenged the support teams to see if they could provide adequate help – even when things got tricky.
Our team spent long months carefully testing and collecting data on hundreds of web hosts from all over the world, and now, the results are in. We had quite a few surprises along the way – some of the hosts we were betting on ended up performing poorly, while others greatly exceeded our expectations. Let’s take a closer look at the best of the best.
-
![Detail of Hostinger's homepage, with information on hosting plan features and a Black professional woman giving a double thumbs-up]()
- Lowest prices on the market for long-term plans
- Uses LiteSpeed technology for top loading speed
- Simple user experience with a proprietary control panel
- Supports WordPress and hundreds of other CMSs
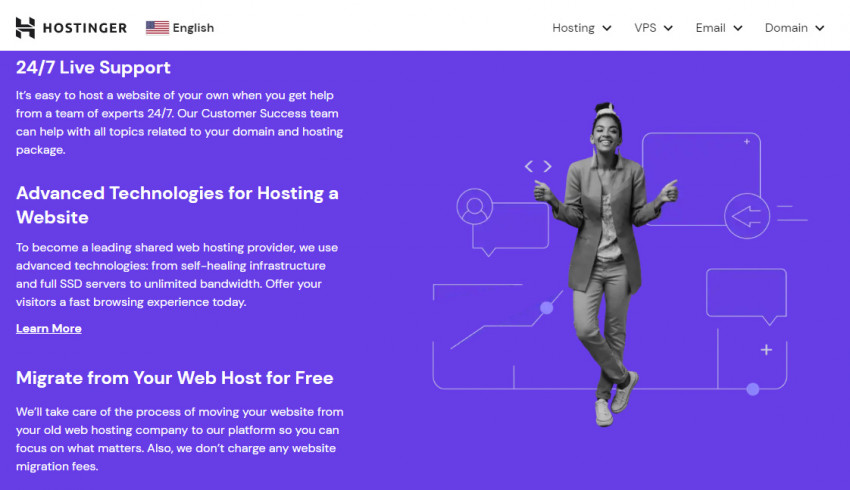
Hostinger is known for its aggressive marketing, so I was particularly curious to see if it was all just talk. My expectations were not very high, but what can I say? I was truly surprised. With such low prices, I never thought I’d see such excellent performance test results.What do I mean by excellent? Well, our testing shows that even on Hostinger’s basic plan, which costs only $2.99 per month if you sign up for a year, loading speeds almost equaled what we saw from much more expensive services.
If you want to host anything from a personal blog to a business page and you’d like to get your website online as quickly and as cheaply as possible, you really can’t go wrong with Hostinger. Before you sign up, visit our Hostinger coupon page to see the best deals currently available.
-
![Feature list for IONOS]()
- Dedicated support advisor and instantly scalable performance
- One-click installation for WordPress and other popular apps
- Low prices and a free domain with every plan
- Daily automatic backups
Despite being a budget-friendly host, IONOS offers premium features that you’d usually only find with expensive managed solutions. For example, every customer is assigned a dedicated personal advisor at no extra cost. They will get to know your experience level and the goals you hope to achieve with your website, tailoring support accordingly. If you’re a beginner to web hosting, this can be incredibly helpful.
IONOS’ shared hosting plans also offer scalable resources, allowing you to temporarily or permanently improve the performance capabilities of your website. In contrast, most other budget hosts would require you to upgrade to an entirely new plan if you need more resources.
It’s worth noting that IONOS commonly offers big discounts – sometimes it’s one of the cheapest options available. That said, watch the renewal fees! While the prices may be great for your first hosting term, IONOS’ plans will renew at a higher price.
-
![InterServer_Im3]()
- The best choice for hosting on a month-to-month basis
- Data centers on both US coasts let you serve American audiences quickly
- Multiple security protocols included, including a malware scanner
InterServer is one of the best options if you’re targeting a North American audience. When we tested its US data centers, the loading speeds all over the US and Canada were great. Even in many Western European countries, speeds were still acceptable – but keep in mind that visitors in other parts of the world may have to wait longer for your site to load.
There are other things to like about InterServer, though. I personally like how there’s only one shared plan, and it comes with unlimited resources. You get a generous allocation of server space and bandwidth, and InterServer doesn’t even limit the number of domains you can connect on a single account. This makes it ideal if you’re looking to build multiple small websites.
The fact that InterServer’s monthly rates are among the lowest on the market doesn’t hurt either. The basic plan costs only $2.50 for the first month right now.
-
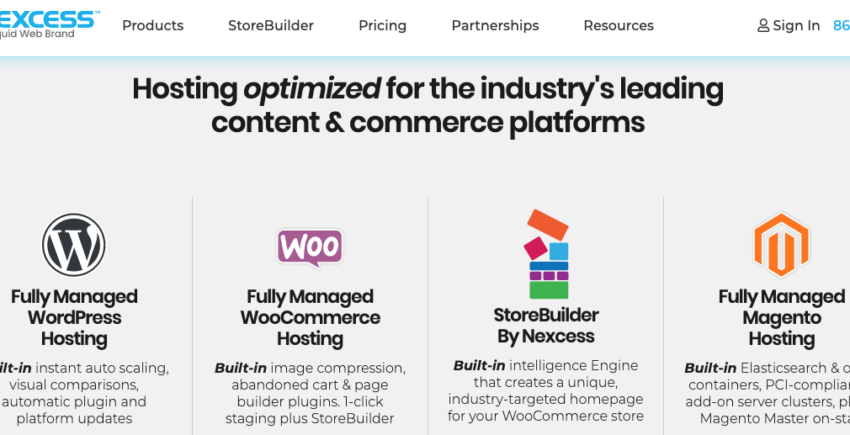
![Nexcess hosting]()
- Best managed hosting for multiple platforms, from WordPress to Magento
- Streamlined, custom-built control panels for maximum efficiency
- Excellent worldwide speeds on a cloud-based network
- Automatic full-website backups to a remote server
While Hostinger is a great cost-effective solution, you’ll have to make your own optimizations and reconfigurations to get the most out of it. The alternative is managed hosting, and Nexcess (part of the Liquid Web family) provides just that. It’s more expensive to have a true professional do the hard work for you, but it’s the easiest, safest, and most worry-free way to host a website.
Nexcess primarily offers premium shared hosting with autoscaling technology. This allows Nexcess to increase or decrease your available resources in response to traffic surges – this service is included in all plans free for 24 hours per month. You get an optimized hosting environment right out of the box – all you need to do is build your website and get traffic.
-

![Kinsta_Im4]()
- Fastest, most consistent loading speeds in our testing
- Easy-to-use, minimum-fuss control panel
- 30+ worldwide data center locations built on Google Cloud
- Specifically designed for WordPress hosting
Let me say this right away: if price wasn’t an issue, Kinsta would absolutely be #1 on this list. There’s so much to love about the service, from the stylish and ultra-easy-to-use panel to the phenomenal page loading speeds we recorded every time we tested it.
Much like Nexcess, it’s a fully-managed service – but with a few key differences. It only supports WordPress, its professional support team is more readily available (responses in under one minute, 24/7), and performance is even better.
I’ll let you in on a little insider secret. Kinsta doesn’t really care about affiliate deals, advertising, or any of the things that providers like Hostinger spend so much time and money on. It’s clear that they focus on one thing, and one thing only – delivering the best product possible.
So, what’s not to like? First, there’s no email hosting. Second, the price. It’s even more expensive than Nexcess (which in itself isn’t cheap), but if your budget allows it, Kinsta should definitely be your choice.
-
![FastComet_Im7]()
- Best for reaching audiences in Asia and Oceania
- Decent performance and uptime
- Great management dashboard with smart cPanel integrations
- A great support experience almost all of the time
FastComet’s use case is simple – if you want to reach audiences in Asia without paying a premium, it’s one of your best and most reliable options. You also won’t have to risk it with a local host, where bureaucracy and the language barrier are bound to be an issue. FastComet offers a streamlined and easy-to-use service that makes it easy to serve audiences from India to Japan.
FastComet’s deployment and performance in the US and Europe are nothing to scoff at either, but it’s the extra locations that make it a true gem. Don’t even try serving South-Asian visitors from a data center located in Europe – they’ll jump ship long before your website loads.
Another great part of the service is FastComet’s highly-trained support agents, which I’ve had mostly fantastic experiences with. The only issue is that occasionally you might get matched up with a less enthusiastic agent who will waste your time and say, “I’m sorry, that issue isn’t covered by our support service.” But mysteriously, I’ve found that the next agent I speak with is almost always more eager to help.
-
![InMotion_Im5]()
- US and European data centers
- 90 Day money-back guarantee
- Excellent 24/7 support
- A detailed knowledge base, superior to most other hosts
InMotion Hosting used to have only US-based servers but has recently expanded into the European market. That’s good news for big and small website owners on both sides of the Atlantic, as it gives you more options for reaching your audience.
InMotion doesn’t perform quite as well as some of our other top 10 hosts, but it has something few of the others do: stellar customer support. This makes it a great option for new website owners, as you can get all the help you need when you need it. InMotion provides no fewer than 6 channels to contact support: live chat, email, ticket, snail mail, Skype, and phone.
The support experience doesn’t end there. InMotion has amassed one of the most detailed knowledge bases around, filled with countless tutorials on how to perform every hosting-related task you can think of. If you’re a beginner, you should have all the resources you need to build your first site.
-
![SiteGround_Im8]()
- A hybrid between shared and managed hosting, offering the best of both worlds
- Powerful features, much more streamlined than cPanel-based hosts
- Very user-friendly
- Generous resources, even on starter plans
SiteGround has quite an interesting story. Up until lately, it was simply a very good and very dependable cPanel-based provider, meaning it did pretty much what every other shared host does, although usually better. After the hosting industry shakeup caused by cPanel raising its license fees, SiteGround became a different beast altogether.
After months of intense testing and development, SiteGround launched Site Tools, a ridiculously easy-to-use control panel. It lets you set up all important aspects of your hosting quickly, even if you’re a total novice.
But…server performance could do with an improvement. In our testing, page loading speed was consistently slower than the average. Not by much, but it’s worth noting. Still, SiteGround offers an attractive set of features that make it one of the easiest platforms to work with.
-

![-web-hosting-category-page-1.png]()
- Impressive features
- Fast loading speeds
- Great uptime score
- Intuitive user interface
HostArmada is a fairly new host, but it has managed to catch up to, and in some cases surpass, its older competition. It’s done so by offering great features such as strong security measures across all its plans and a 45-day money-back guarantee. And it’s turned in some really impressive performance scores.
Our testing showed that HostArmada returned great speeds for both time to first byte (TTFB) and fully loaded. The host fully loaded our test site, on average, in 1.1 seconds. Notice that’s an average score, which means there were often shorter, faster loading speeds.
Speed doesn’t count for much, though, if your server is constantly down. Fortunately, that’s not the case with HostArmada. It promises a 99.9% uptime guarantee, and our test site surpassed this mark with a 99.98% uptime score. HostArmada also offers credits for downtime due to server maintenance, whether scheduled or incidental. All in all, not bad for a newbie on the hosting scene.
-
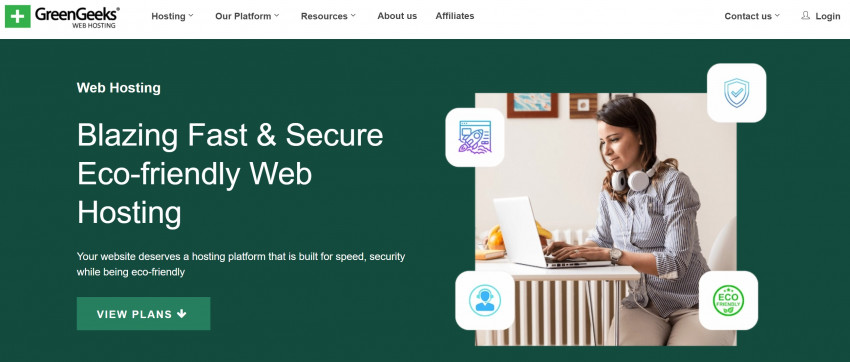
![greengeeks-web-hosting-page]()
- The best support you can find for shared hosting
- Dedicated and well-trained support agents that always go the extra mile
- Bargain prices and free domain with long-term plans
- Green, environmentally-conscious hosting that invests in renewable energy
GreenGeeks is best known as a low-priced and eco-friendly web host, but there’s so much more to its service beyond a noble commitment to the environment.
We love GreenGeeks for many reasons, from its multiple data centers that deliver surprisingly fast speeds, to the powerful cPanel features it includes with every plan. And yet, the best part of GreenGeeks is – hands-down – the support experience.
Even premium hosts may struggle to maintain a professional live support service 24/7. GreenGeeks’ team outperforms them all, and it’s a real pleasure to work with them. They really know what they’re doing, go way beyond what’s expected when lending a hand, and are always a live chat away.
Popular Hosts That Didn’t Make the Cut
Some big names that you’ve probably encountered in your online travels are missing from my top ten list. While some of them actually have a place in the “Worst 10 Hosts” list I’ll get around to writing one day, others were simply not good enough. A2 Hosting – A2 Hosting is a great shared hosting provider. It has some of the fastest loading speeds available for a budget host, and its “anytime” refund policy makes it easy to see if it’s a good fit for your site. Unfortunately, on a Top 10 list, there isn’t room for a deserving #11. ScalaHosting – ScalaHosting is another great hosting provider, but we prefer its VPS plans over its shared web hosting. ScalaHosting makes an ideal “next step” when your site outgrows its shared hosting provider and needs to upgrade to a VPS host. For this reason, we consider ScalaHosting to have more niche appeal, though it’s still a great choice for new VPS users thanks to its beginner-friendly setup. Kamatera – While we like ScalaHosting for the newbie who needs to upgrade, Kamatera is our top choice for the advanced or experienced site owner. So why didn’t it make the top 10? Kamatera’s VPS hosting is some of the best around, but it’s for the techie crowd. If you’re just looking to host a basic site, or not that great with your server management skills, Kamatera may be too much to handle. Namecheap – Namecheap is one of the best options for buying, selling, and registering domain names. But you may not know that NameCheap is also a fairly decent shared hosting provider. Still, it’s not quite good enough to make our top ten list – but it does make the “next-best” list. Bluehost – We tested Bluehost’s hosting service and found it to be pretty decent. In fact, Bluehost would make a solid budget host for the first-time site owner, as its platform is fairly non-techy and easy to use. Bluehost plans are also generously discounted for your first term and very well priced – especially the entry-level options for shared and WordPress hosting. GoDaddy – It’s the most famous web host of all time, but who cares? I signed up to see if it has a place on this list, and when I tested it for three months, what I discovered was a weak service offered at prices that will get you a better service. HostPapa – I’ve actually liked HostPapa in the past, and found it to be a generally dependable host. I signed up again to check how it’s doing today, and despite the fact that nothing was horrendous, nothing was very good either. Speeds were disappointing, features were missing, and it offers poor value for money compared to the competition.The Global Web Host Comparison Project: How We Did It
Now, I try to be trusting. When people tell me they can do something, I want to believe them. But when each and every host in existence claims to be the very best, how can anybody take their word for it? Some hosting providers use the term “blazing speeds” loosely, but in reality, it often translates to a slow loading time of three seconds for a basic landing page. Similarly, claiming to offer “24/7 expert support service” can be misleading, as the support staff is occasionally available and may not be experts in their field. The only way to really size these companies up is to test them. And so, I set out on a journey to find the answer to the most important question: Which web hosting services are actually the best ones today? The process wasn’t easy, as the competition was fierce. I broke my analysis down into three smaller questions:- Which are the most popular and most appreciated web hosts today?
- What am I looking for in a quality hosting service?
- After signing up to and thoroughly testing the contenders, how do they compare in terms of features, performance, ease of use, prices, and support?
Who Are the Top Web Hosts Available Today?
To find my contenders for the coveted spot of the world’s #1 host, I looked for versatile companies that offer hosting for the widest range of clients – from simple shared hosting and managed WordPress to cloud instances, VPS machines, and dedicated servers. First on the list was the obvious Hostinger. It’s a host that just keeps on growing, with many millions of customers. Personally, I didn’t think this industry giant would score highly, as oftentimes big companies cruise along on name recognition alone, forgetting about trying to be the best. Still, real testing had to be done to determine this. I had to delve deeper to find my other hosts, as I didn’t want to choose according to popularity alone. I convened with our Website Planet experts from all over the world (Zoom meetings!) to get their opinions on the best services available today. I also asked around in various web development communities, groups, forums, and subreddits. Basically, every place I could think of. We all discussed our past experiences with dozens of web hosts and debated which ones have been a disappointment, which ones have continuously exceeded our expectations, and which ones were just… meh. We also compared feedback from actual clients to understand which providers they’ve chosen as the most reliable ones. The hosting companies that came up the most often during this research phase make up the bulk of my list. I’ll explain the testing process and discuss the results in a short moment, but first of all, let me introduce Website Planet’s final list of contenders. You can click each web host’s name to read a full, honest review.- Hostinger – Full Review
- IONOS – Full Review
- InterServer – Full Review
- Nexcess – Full Review
- Kinsta – Full Review
- FastComet – Full Review
- InMotion Hosting – Full Review
- SiteGround – Full Review
- HostArmada – Full Review
- GreenGeeks – Full Review
If You Want To Test a Web Host, You Have To Build a Real Website
It isn’t possible to evaluate the quality of a web host without using it for real, and to use it for real, you need to build a website. WordPress was my obvious go-to platform, but my website still needed to be about something… Which brings us to a dark and rainy February night. I was waiting for the bus when I realized my head was a bit stuffy and my throat a bit sore. I was catching a cold! Then I remembered an article I’d read about how vitamins and good nutrition could boost your immune system and possibly avoid the dreaded common cold. Out of my misery and regret, I hit upon a brilliant website idea. I’m honored and pleased to introduce you to my very own fictional startup, Nutritionistica!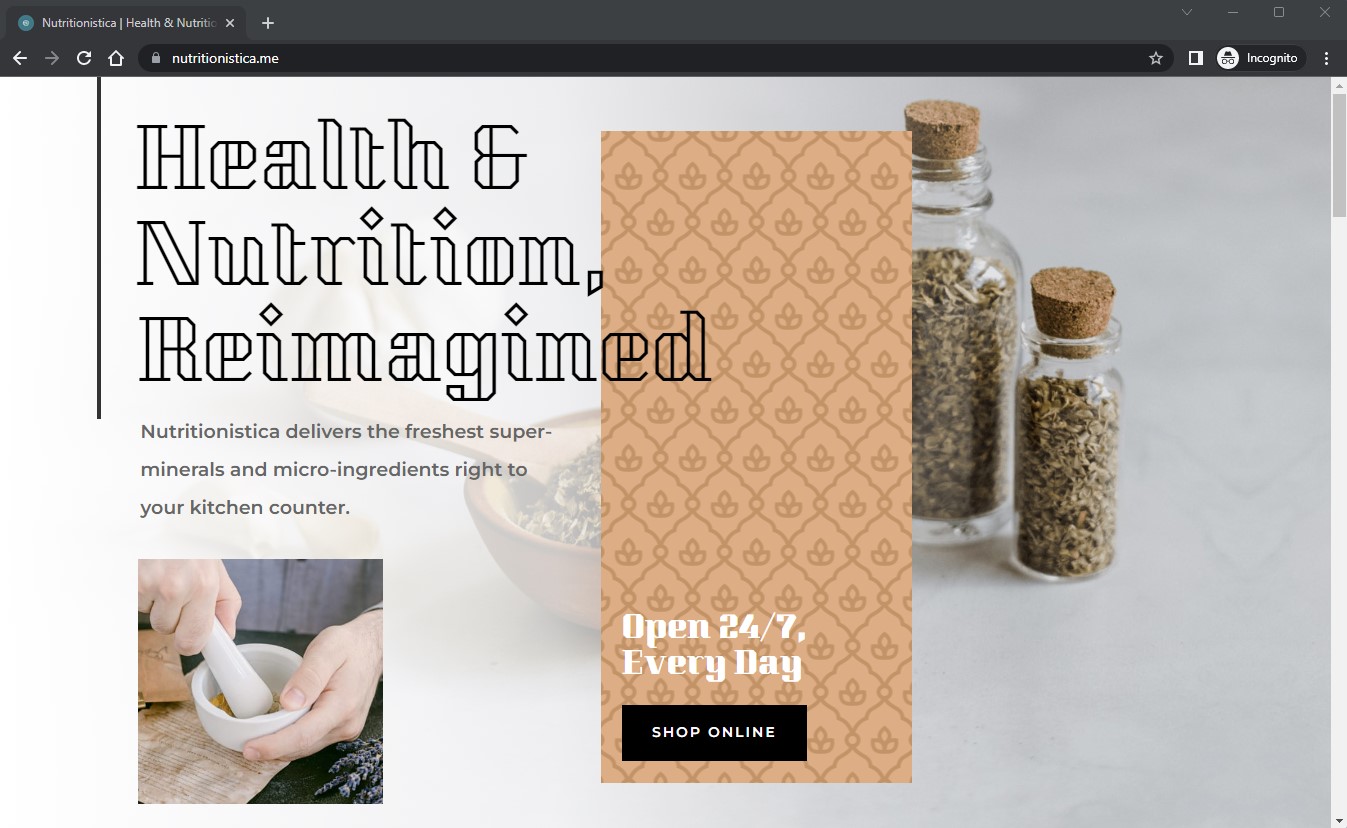
- GTmetrix PRO
- Sucuri Load Time Tester
- UptimeRobot’s Pro plan
Results and Analysis: How Did Each Host Fare?
After months of experimenting with the hosts and gathering data, I was finally able to complete my mission – to compare all these hosting providers and find the best one. I’ve ranked each service in five categories:- Features
- Ease of Use
- Performance
- Support
- Pricing
Features
Features are what each service gives you. This consists of the options, resources, tools, services, perks, and bonuses that are provided as part of the plan.| Hostigner | IONOS | InterServer | Nexcess | Kinsta | FastComet | InMotion Hosting | SiteGround | HostArmada | GreenGeeks | |
| Disk Space | 100 GB | 10 GB | Unlimited | 15 GB | 10 GB | 15 GB | Unlimited | 10 GB | 15 GB | 10 GB |
| Bandwidth | Unlimited | Unlimited | Unlimited | 2 TB | ~ 25,000 visits | Unlimited | Unlimited | Unlimited | 3 GB to 30 GB | Unlimited |
| Control Panel | hPanel (proprietary) | IONOS (proprietary) | cPanel | Nexcess (proprietary) | Kinsta (proprietary) | cPanel | cPanel | Site Tools (proprietary) | cPanel | cPanel |
| AutoInstallers | AutoInstaller | Click and Build | Softaculous | Pre-installed | Pre-installed | Softaculous | Softaculous | App Manager | Softaculous | Softaculous |
| SSL Certificates | ✔ | ✔ | ✔ | ✔ | ✔ | ✔ | ✔ | ✔ | ✔ | ✔ |
| Backups | Automatic weekly | Automatic daily | Automatic weekly | Automatic daily | Automatic daily | Automatic daily | Paid add-on | Automatic daily | Automatic daily | Automatic daily |
| Number of Domains | 1 | 1 | Unlimited | 1 | 1 | 1 | 2 | 1 | 1 | 1 |
| Number of Email Accounts | Unlimited | 1 | Unlimited | Unlimited | ✘ | Unlimited | Unlimited | Unlimited | Unlimited | 50 |
| CDN | Cloudflare | Cloudflare | Cloudflare | Nexcess CDN | Kinsta CDN | Cloudflare | Cloudflare supported (not included) | Cloudflare | Cloudflare | ✘ |
| Caching | ✔ | ✔ | ✔ | ✔ | ✔ | ✘ | ✘ | ✔ | ✔ | ✔ |
| Security Tools | ✔ | ✔ | ✔ | ✔ | ✔ | ✔ | ✘ | ✔ | ✔ | ✘ |
| Final Features Score | 4.8 | 4.8 | 4.6 | 4.8 | 4.0 | 4.6 | 4.5 | 4.7 | 4.3 | 4.1 |
Disk space
Everything you host is going to take up space. From your WordPress (or any other platform) installation to your text, images, videos, and files, it all counts towards your allotted disk space. InterServer and InMotion Hosting provide unlimited space. IONOS, Kinsta, GreenGeeks, and SiteGround provide the smallest amount of space, with Nexcess, FastComet, HostArmada, and Hostinger doing slightly better. Still, don’t jump to the conclusion that more is always better. 10GB is certainly enough for blogs, business pages, and even e-commerce stores with thousands of HD pics. “Unlimited space” sounds amazing, but it’s always bound to some “fair use agreement” and you’re never the one who gets to decide what’s fair.Bandwidth or data transfer
When people visit your website, the host sends them the page they requested. In the same way that all your hosted data counts towards your disk space limit, your bandwidth is how much data you’re allowed to send in a month. The more visitors you have, the more bandwidth you’ll require. SiteGround and Kinsta provide the least amount, although they will still do well for small-to-medium audiences. Most of the other hosts do significantly better, offering unlimited bandwidth. However, much like with disk space, these “unlimited” claims are often misleading. You’ll likely encounter restrictions if your site uses too many resources. For this reason, Nexcess is the true bandwidth champion, guaranteeing an obscene amount of traffic.Control panel
Do you speak Linux? Nope. That’s why control panels were invented. They allow you to easily edit and configure your hosting solution, from DNS records to databases and email accounts. Most hosts offer cPanel, which is the most popular option out there. As far as basic hosting management is concerned, you can never go wrong with it. Hostinger, IONOS, and SiteGround developed panels of their own, and while all of them mimic cPanel in some ways, they fail to deliver an equally powerful solution. Kinsta and Nexcess completely did away with the idea of a fully-fledged control panel. They don’t offer nearly as many options as the contenders, but there’s a reason for that – both services are managed, meaning most configuration is already taken care of for you.Auto-installers
Installing CMSs (content management systems) like WordPress used to be a tedious manual process, but today, most providers offer an easy-to-use automatic installation. Most hosts went with Softaculous, a very capable auto-installer that offers easy installation for hundreds of CMSs. Hostinger, IONOS, and SiteGround have self-developed solutions that work similarly. Kinsta and Nexcess, true to their promise of managing things for you, don’t give you access to such a service. Instead, your CMS of choice comes pre-installed.Platform support
What CMS can you actually install with each service? WordPress is popular, but it’s far from the only website platform available today – hundreds of options exist, from Joomla and Magento to self-developed PHP-based projects. Almost all hosts provide “full” platform support, meaning that you can run any CMS you desire. SiteGround is slightly more limited, offering a few dozen options or so. Nexcess supports the most popular platforms, but servers are highly-optimized for each type; or, you can opt for a Flexible Cloud Plan and host whatever you wish. Kinsta is strictly a WordPress service, and can’t be used for any other CMS.SSL certificates
I can’t stress the importance of an SSL certificate enough. It secures and encrypts your visitors data, guaranteeing their safety if they are logging in to or submitting data on your site. It’s a must for e-commerce sites, and is also known to positively affect Google rankings and SEO in general. While SSL certificates used to be quite expensive, today there’s a much cheaper solution. Let’s Encrypt SSL certificates are free to use, and any host can easily choose to provide them. That is exactly what almost all of these hosts have done.SSL Qualys score
Qualys tests the strength of your website’s SSL protection, ranking it on an A to F scale. Care about your visitors, your SEO, and about being a responsible adult? Anything less than an A ranking is cause for concern. Apart from FastComet and InMotion Hosting, all other hosts scored an A or above, guaranteeing you complete peace of mind. What should you make of the B score? That these hosts could’ve done better, but for reasons unknown, chose to neglect this aspect of the service. That’s bad news.Backups
While all auto-installers can be configured to run a CMS backup onto your disk space, I’m looking for full system backups that are automatically made and stored on a remote server. So if your hosting space was compromised by hackers, an untouched backup still exists. Most hosts only provide these backups as a paid add-on, which is a crying shame. It’s absolutely necessary. InterServer doesn’t provide such a service at all for its shared plans. GreenGeeks performs nightly backups that are available in the event of a service malfunction, but you can’t access them yourself. The only saints are IONOS, Nexcess, Kinsta and SiteGround. They provide you with easy access to backups, and let you freely restore them. You can also run more backups on demand.Number of domains
This does not refer to the domain names you’ve registered, but to the number of separate websites you can host with your plan. One domain is obviously the minimum, and is usually what basic plans offer. Pay more for advanced plans, get more domains. This is true of all the hosts on this list except InMotion Hosting and InterServer. InMotion Hosting gives you 2 domains on the basic plan, while InterServer’s plan comes with unlimited domains – which is undoubtedly the host’s biggest selling point. Just remember that behind-the-scenes computing resources are still limited, so use this plan for running multiple landing page sites and average-sized blogs – not resource-hungry megastores.Number of email accounts
If you want a domain-specific email account, and are planning to use this address for business purposes, be sure to check what your host offers. Hostinger and IONOS, for example, offer just a single email account with their basic plans. GreenGeeks does better, with 50. All others, except Kinsta, let you open unlimited accounts. Kinsta, sadly, has no email hosting at all, meaning you’ll have to shell out for a separate email service such as G Suite.CDN
Your website is hosted on a physical server somewhere in the world. The farther your visitors are from this location, the longer it will take them to load your website. Looking to offset this? Enter a CDN (content delivery network). A CDN caches (creates copies) of your website’s assets (images, code, and rendered versions of your site’s pages) and spreads them over a global network of servers, speeding up content delivery. Nexcess and Kinsta excel here, giving you access to premium CDN services. Most other hosts offer easy, one-click integration with the 3rd-party Cloudflare. Cloudflare has a free service, but it’s not the fastest. Hostinger hides this easy integration behind a paywall, which is truly ridiculous.Caching
A CDN isn’t the only thing that can cache your website pages. Your hosting server can do it too! Why let your server “rebuild” your homepage every time a visitor arrives, when it’s the exact same homepage every time? A caching tool creates ready-to-send versions of your pages, significantly reducing the load on your server. Almost all of these hosts offer some form of server-level caching, which allows site pages to be delivered more promptly. Sadly, A2 Hosting and InMotion offer no such option, limiting you to the vastly inferior client-level caching plugins. FastComet only includes caching in its advanced plans.Security tools
A malware scanner, WAF (web application firewall), and any other tool that helps you secure your hosting, are highly recommended. It’s a dangerous world online, and it’s better to be safe than sorry. Most hosts turned out to be disappointing on this front, not providing a single security tool out of the box. Among the ones that do, it’s usually a basic cPanel malware scanner. InterServer takes the prize here by letting you access a full range of scanners and security suites, all pre-installed and easy to use.Features – Bottom Line
InterServer and Nexcess share the win. InterServer wins by using cPanel, going the “unlimited” route, and including powerful security measures. Nexcess and its custom panel might not have as many security tools, but the inclusion of automatic 30-day backups generated a lot of appreciation on my side.Ease of Use
Not enough companies take the time to plan out the user experience and make it as seamless as possible. Still, ease of use is of the utmost importance. Learning how to play nice with a badly designed service can cost you hours, even days.| Hostinger | IONOS | InterServer | Nexcess | Kinsta | FastComet | InMotion | Siteground | HostArmada | GreenGeeks | |
| Ease of Signup | 4.5 | 4.8 | 5.0 | 4.0 | 5.0 | 4.7 | 4.0 | 4.5 | 4.5 | 4.0 |
| Account Activation | Immediate | Immediate | Immediate | Immediate | Immediate | Immediate | Immediate | Immediate | Immediate | 2 days |
| Connecting Domain | 5.0 | 4.5 | 3.0 | 5.0 | 3.5 | 4.5 | 5.0 | 5.0 | 5.0 | 5.0 |
| Installing CMS | 4.5 | 4.5 | 5.0 | 4.0 | 5.0 | 4.5 | 3.5 | 4.7 | 4.7 | 4.0 |
| Using the account area | 3.5 | 4.0 | 5.0 | 3.0 | 5.0 | 4.5 | 3.5 | 4.7 | 5.0 | 4.0 |
| Final Ease of Use Score | 4.9 | 4.8 | 4.3 | 4.7 | 4.7 | 4.7 | 4.0 | 4.9 | 4.7 | 4.5 |
Easy signup
Nobody wants signing up to a service to feel like high school homework. I’ve ranked each service on a 1-5 scale according to how easy it was to get on board, which in a perfect world consists of me inputting my email address, choosing a password, and entering payment information. If they asked me annoying questions, requested irrelevant data, or in any way complicated this process – I took points off. Most hosts did pretty well here. Some had me going through extra pages and were slightly confusing, but that’s a relatively minor offense. Still, Nexcess and Kinsta asked for the least amount of details, did not hinder my progress in any way, and basically let me finish the whole process in under a minute.Immediate account activation
Silly me, thinking that after signing up and entering my very legitimate payment information, I’d immediately be activated. How wrong I was. Many hosts have “anti-fraud” protocols in place, and these protocols were very quick to block my purchase and send me back to the drawing board. You might not get tagged by the protocols, but in many cases, I was. Hostinger, IONOS, Kinsta, and InMotion Hosting were the only hosts to immediately activate me. SiteGround and InterServer made small charges to my credit card, which took a while to show up. I then had to confirm these to be verified successfully. FastComet asked for a screenshot of my credit card charge. GreenGeeks blocked my order on account of “fraud.” The process of getting in touch with the sales team, providing a copy of my passport (which I didn’t feel comfortable at all with), and finally switching to PayPal, took two days.Connecting the domain
Ranked on a 1-5 scale. It’s really easy to score highly here. All a host has to do is to put the nameservers or server IP in a visible spot, and include a quick guide on what to do. How can you fail this super-basic step that every client has to go through? Kinsta made this surprisingly difficult, and had me manually configuring DNS records. This is something that almost all other hosts automatically do for you, and it took me an hour I’m never getting back. With InMotion Hosting, I needed to change my primary domain. It took me time to find out this extra step was required, but the process itself was relatively easy.Installing a CMS
From 1 to 5. As long as an auto-installer is included, this is easy. Just click it, enter your new website details, and go live. SiteGround and Hostinger did well, letting me install WordPress automatically right after signup. IONOS, Nexcess, Kinsta, and InMotion Hosting were the best – WordPress was already pre-installed and waiting for me on WordPress hosting plans.Using the account area
Ranked from 1 to 5. Between the hosting control panel and you stands the account area. This is usually some weird twilight zone that lets you view your plans, go over billing, purchase more stuff, or really, sometimes, just be there. The more complicated it is to navigate, or the more it’s filled with annoying upsells, the less happy I get. InterServer scores very low here as its account area is an under-designed mess, filled with upsells and links to products you don’t have. Hostinger is very sleek, but constant upsell popups pushing you to upgrade your plan or purchase more add-ons are a pain. InMotion Hosting’s account area looks like it was designed by my grandma, who despite being a phenomenal person, is not a user interface expert. Kinsta and Nexcess offer what is basically a perfect user experience, seamlessly integrating an easy-to-use account area with the hosting control panel. That means less time loading pages, navigating menus, or making wild guesses about what lies where.Ease of Use – Bottom Line
Kinsta and Nexcess, despite suffering from some silly issues that could’ve easily been remedied, still win this one. Pre-installed CMSs and super easy-to-use account areas mean you’ll be able to enjoy the full power of your hosting while wasting the least amount of time trying to fiddle with it.Performance
This is the most important aspect of a web hosting service. My test website is very similar to the blog, business page, or portfolio you might want to host, so these results are a very close approximation of your actual performance. You might’ve seen other “testing” websites that offer performance metrics of various web hosts. I’m sad to say that most of them are going about it entirely the wrong way. If you’re interested in learning how to do it right, we’ve written a full article on the subject.| Hostinger | IONOS | InterServer | Nexcess | Kinsta | FastComet | InMotion | SiteGround | HostArmada | GreenGeeks | |
| Data Center Locations | 2 in the US, 4 in Europe, 2 in Asia, and 1 in South America | US, UK, Germany, France, and Spain | 6 in the US | US, UK, NL, AU | Global GCP cloud servers | US, CA DE, NL, SG, JP, IN, AU | US, EU | US, NL, SG | 4 in North America, 2 in Europe, 2 in Asia, 1 in Australia | US, CA, NL |
| Web Server | LiteSpeed | Apache | LiteSpeed | NGINX | NGINX | Apache | Apache | NGINX | NGINX | LiteSpeed |
| GTmetrix Typical Fully-Loaded Time | 0.78 seconds | 0.78 seconds | 1.2 seconds | 0.55 seconds | 0.82 seconds | 1.2 seconds | 1.9 seconds | 1.1 seconds | 1.1 seconds | 1.2 seconds |
| Uptime | 100% | 100% | 100% | 100% | 100% | 100% | 99.96% | 100% | 99.98% | 100% |
| Uptime Guarantee | 99.9% | 99.9% | 99.9% | 100% | 99.9% | 99.9% | ✘ | 99.9% | 99.9% | 99.9% |
| Final Performance Score | 4.9 | 4.8 | 4.6 | 4.8 | 4.9 | 4.3 | 4.3 | 4.7 | 4.8 | 4.6 |
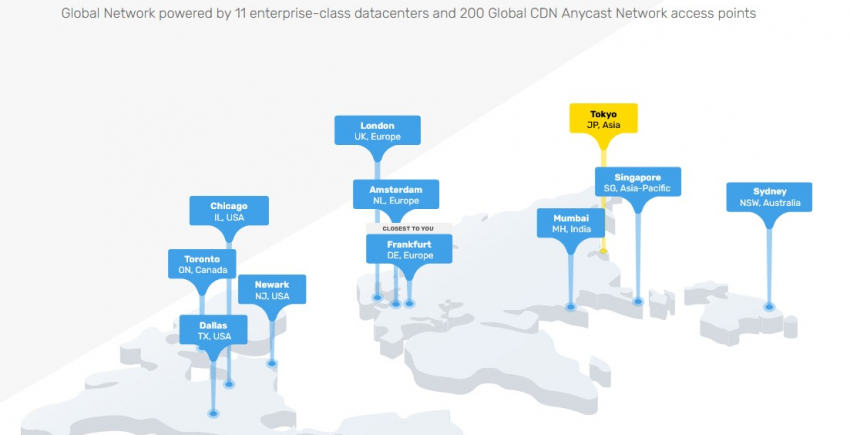
Data center locations
The geographic locations where the companies’ servers are. Most hosts operate more than one data center, although there’s nothing wrong with focusing on just one. Just remember, you need a data center that’s close to your target or majority audience. Running a French politics blog, written in French, aimed at French citizens? Don’t host it in Los Angeles. Go for Paris, or at least Amsterdam. Using Google Cloud’s servers, Kinsta is easily the winner when trying to reach those hard-to-serve audiences in such locations as Japan or Australia. FastComet comes in a close second, and most other hosts operate from Amsterdam and the US east coast, sometimes also running a data center in Singapore. InMotion Hosting and InterServer also run data centers in Los Angeles, making them a great choice for US west coast audiences.Web server
The technology that powers your website. Think of it as the code (not to be confused with the actual server, which is the physical machine that runs the code) that was written by some very talented people to make sure your visitors can view your pages and interact with your site. Apache and its successor, Apache 2.x, are the oldest web server technologies commonly used today. They’re great and reliable, but newer web servers, like NGINX and LiteSpeed, are known to outperform Apache. IONOS, InMotion Hosting, and FastComet are all lagging behind in this aspect, as they only offer Apache.Loading speed
Page loading speed, measured in seconds, is based on a large number of factors, some under your control and some beyond it. Visitors from different locations, and sometimes even the same visitor at a different time of the day, will get slightly different loading speeds. Still, average loading times of over 3 seconds aren’t desirable Many users will simply click away if they have to wait too long for a site to load.To help gauge each hosting provider’s performance. I’ve used GTmetrix to measure loading speeds over a long period of time. GTmetrix speeds: How long the GTmetrix testing server took to load our website, in seconds. I ran these speed tests on an almost daily basis, and now I present you with the average speed to fully load our test site. Unsurprisingly, our top two hosts, Hostinger and IONOS, returned the fastest scores.Uptime
Uptime is measured in percentage, and I used UptimeRobot to test it over several months. 100% means the website was never down. 99% means that it was down for 1% of the testing period. That’s 1% of the time when no visitor was able to view your website. Translate that to lost customers, lost readers, whatever – they may never try to visit your website again. Most hosts guarantee (or at least aim for) around 99% uptime. I like my websites shaken, not stirred, and with at least 99.99% uptime. I’m happy to report that uptime results were fantastic for all hosts. Give it time – when they falter, I’ll be here with the update.Uptime guarantee
Reliable hosts guarantee uptime in their SLA (Service-Level Agreement). They stand by their guarantee, and offer you reimbursement if they can’t live up to their promise. Thing is, some companies are sneaky. They use misleading language to avoid responsibility, or define an “uptime guarantee” in ways that work for them – but not for you. For example, InMotion Hosting advertises a “99.9%” guarantee, but this isn’t backed up within its Hosting Agreement. So, they’re actually under no formal obligation to provide you with 99.9% uptime. Hostinger guarantees uptime under very vague conditions, and will only reimburse you for 5% of your fee as “solely determined by them.” I can’t count these as actual guarantees. Even premium host Nexcess isn’t entirely truthful. It proudly displays a 100% uptime guarantee, but if you dig into the SLA, you’ll find that you’d need to accumulate 15 minutes of downtime across a given month to be due compensation. This is hardly a 100% guarantee, but at least it’s still better than the standard 99.9% guarantee.Performance – Bottom Line
The winners are clear: Kinsta, Nexcess, and Hostinger. How the budget-friendly Hostinger manages to be as speedy and reliable as the two most expensive services on this list is beyond me. Hostinger agents did provide me with a long and useful optimization guide, but I never expected performance to be this great.Support
When you have a question, or simply need help, you’ll have to rely on the host’s support agents, tutorials, and knowledge base. If you’re a beginner or a little less tech-savvy, you have to be sure that these guys will be there for you.| Hostinger | IONOS | InterServer | Nexcess | Kinsta | FastComet | InMotion | SiteGround | HostArmada | GreenGeeks | |
| Support Channels | Chat, Email | Chat, Email, Phone | Chat, Ticket, Phone | Ticke, Phone | Chat, Email | Chat, Ticket, Phone | Chat, Phone, Ticket | Chat, Phone, Ticket, AI search tool | Chat, Ticket, Phone | Chat, Ticket, Phone |
| Support Hours | 24/7 | 24/7 | 24/7 | 24/7 | 5am to 10pm UTC | 24/7 | 24/7 | 24/7 | 24/7 | 24/7 |
| Professionalism | 4.2 | 4.0 | 3.0 | 4.6 | 4.5 | 4.7 | 4.0 | 4.5 | 4.7 | 5.0 |
| Final Support Score | 4.4 | 4.0 | 4.9 | 4.8 | 4.3 | 4.6 | 4.5 | 4.4 | 4.7 | 4.9 |
Pre-sales support
Ranked from 1 to 5. If you’re looking to sign up, you probably have questions. That’s why having a professional sales support agent available is important. One that knows their stuff and won’t try to sell you plans or products you don’t need. I tried to talk with all the hosts before signing up. Surprisingly, it wasn’t always an option. Live chat is obviously my preferred way, but prompt email responses are also appreciated. Just don’t make me call you – I don’t want to. Nexcess’ professional agent was honest, quick to respond, and simply got me psyched about signing up. FastComet was also great, promptly answering my questions with a solid knowledge of the service and no overselling. A2 Hosting and GreenGeeks faltered here and there, but were generally dependable. Best thing about all of these hosts? They were available through live chat. Hostinger made me use email. I got good answers in less than an hour, but I was still not impressed. Kinsta also made me use email, which was surprising considering how much the service costs. I didn’t get an answer to my questions, but the option to make a phone call was available. Ugh. I had a lot of trouble getting in touch with IONOS’ sales team. The live chat service was frequently unavailable, and there didn’t seem to be an email address for sales support. Again, the only option left to me was phone support – which was a bit of a pain as I only had a few brief questions. InterServer’s agent was disappointing. He had a weak grasp of the English language, and didn’t seem to understand how loading speeds are affected by physical distance from the data center. SiteGround doesn’t get a score in this category because the company didn’t offer any pre-sales support when I tested it. It now offers live chat, so we’ll update this page once we have a chance to test it.Support channels
As a customer, I want to be able to contact support when I need it, in the way most convenient to me. I also want live chat and the option to get support through phone, email, and tickets. All of the hosts offer the standard mix of chat, tickets, and phone support. Nexcess was particularly quick to respond on live chat and equally quick to offer a solution.In-house support
To provide the most reliable support, the team needs to be in-house. Hopefully, that means in the very same building as the technicians, sales staff, and all other company personnel. Outsourcing support to second and third-rate manpower companies in India or elsewhere makes things a lot cheaper for the hosts themselves, but it spells disaster for you. When speaking with such agents, expect broken English, a general lack of knowledge, and sometimes a complete inability to assist outside of reciting scripted responses. Eight of the ten did okay, but not A2 Hosting and InterServer. The situation with InterServer became downright depressing as testing progressed. Agents struggled with basic English, and interactions ended up taking way longer than they should. A2 Hosting’s outsourced support is not as bad, although you still have to use “baby-talk” with them, at least for most of the time.Availability
When I contact a support team, I want an agent to be available to me 24/7. And to answer my message in a timely manner, which in my book is around 30 seconds. I gathered data on how long it really took to get support, and what the working hours were. All hosts advertise a 24/7 support service, but with some, this isn’t actually the case. Hostinger, IONOS, and InMotion Hosting took a very long time to answer questions on live chat, sometimes making me wait up to an hour, or even longer.Professionalism
What good is a support agent that answers immediately, but doesn’t know the first thing about connecting a domain to a hosting account, or about setting up an SSL certificate? No good. I’ve ranked them from 1 to 5 based on my experiences. I had multiple interactions with each provider’s support team, and got a good idea of the overall standards. Simply put, you can’t count on InterServer for help via live chat. The agents are not trained for the job, and are only there to give you the illusion of support. InterServer does have actual agents available through tickets, so I eventually gave up on chat support. SiteGround, Nexcess, Kinsta, and GreenGeeks are the complete opposite. These guys know hosting. They have experience with it. They were able to handle every problem I had, quickly and with ease. What about the rest? They’re hit or miss. With FastComet, for example, one agent tried to reinstall my website in an attempt to solve an unrelated issue. Another agent turned out to be an optimization machine, spending a long half hour improving my site’s loading speeds and earning an A in my book.Going the extra mile
Sometimes you’re going to be in need of a helping hand, but the specific issue you’re dealing with isn’t covered by the service level agreement. Many times, the agents know exactly what needs to be done. It’s up to them to either make you a happy customer, or to cling to rules and regulations and say “Sorry! That’s not part of the service!” It’s okay to do the latter. Really. But if you want a place in my heart, you’ve gotta go the extra mile. InterServer fails miserably because it can barely go the first mile, never mind the extra ones. Nexcess was open to making my life easier – a Nexcess agent installed a WordPress theme for me. While this is a one-click no-brainer, many other hosts tell you to either Google it or look for the button. FastComet also scored highly here, although it really seems to depend on the given agent, and on how Jupiter aligns with Mars. But the absolute winner here? GreenGeeks. I’m not exaggerating – these guys want to help. Badly. They will sit with you for an hour and guide you through how to use WordPress for the first time. They will optimize your website for you, thoughtfully taking care of every issue and providing full information each step of the way. They’re the best.Support – Bottom Line
GreenGeeks, knocking it out of the park. As I said, this is how support should be. Nexcess, FastComet, and Kinsta are good, but they all suffer from some issue – annoying ticket system, minor mistakes, or a strict adherence to not doing anything they’re not obligated to do.Pricing
How much do these services actually cost, and how much value are you getting for your money? Additionally – what payment options exist, what aren’t the hosts telling you, and can you leave if you’re not happy?| Hostinger | IONOS | InterServer | Nexcess | Kinsta | FastComet | InMotion | Siteground | HostArmada | GreenGeeks | |
| Lowest Current Price | $2.99 | $1.00 | $2.50 | $21.00 | $30.00 | $1.79 | $2.99 | $2.99 | $2.99 | $2.95 |
| Payment period (in months) | 1, 12, 24, 48 | 1,12 | 1, 3, 6, 12, 24, 36 | 1, 12 | 1,12 | 1,3 | 12, 24 | 12, 24, 36 | 1, 12, 24, 36 | 1, 12, 24, 36 |
| Payment Options | Credit card, PayPal, Bitcoin | Credit card, PayPal | Credit card, PayPal | Credit card | Credit card | Credit card, PayPal | Credit card, PayPal, Skrill, transfer | Credit card, PayPal upon request | Credit card, PayPal | Credit card, PayPal |
| Money-back guarantee | 30 days | 30 days | 30 days | 14 day free trial | 30 days | 45 days | 90 days | 30 days | 45 days | 30 days |
| Free Domain Name | ✔ | ✔ | ✘ | ✘ | ✘ | ✘ | ✔ | ✘ | ✔ | ✔ |
| Final Pricing score | 4.9 | 4.9 | 4.9 | 4.7 | 3.0 | 4.5 | 4.8 | 4.2 | 4.5 | 4.7 |
Entry-level monthly plan price
Simply put, the monthly price of the most basic shared hosting plan. Sometimes monthly plans aren’t available, and in those cases I’ve calculated the monthly price as the plan price divided by the number of months. Wondered where Kinsta and Nexcess were going to get you? It’s right here. The basic monthly price is much, much higher than any other host on this list. Kinsta is actually six times more expensive than InterServer, who’s the obvious winner. Even when paying monthly, the price is still an amazingly fair $5.Annual term plan price
The trick with most hosting companies is, to get the best possible prices, you need to sign up for the longest possible term. In the table above, I’ve included the monthly price if you sign up for a year with any host. Hostinger becomes one of the absolute cheapest options in the history of web hosting… when you sign up for four years. It’s truly an amazing price, but it’s up to you to consider how your needs will change in four years – the plan will likely stay the same.Payment periods
Some people want to sign up to a service and start a business that you know is going to be around for a long time. You might be alright with signing up for years in advance. But otherswant flexibility. Monthly payments give you the ability to change your mind and be done with the plan by next month. Sadly, you’re not getting that with InMotion Hosting, where it’s a minimum one-year signup. SiteGround is even worse, letting you choose a monthly “trial” plan, but after a month, announcing that the trial is over and now it’s either a yearly subscription or bust. Interserver offers the most flexible payment periods, with a staggering number of options. You can sign up for 1 month, 3 months, 6 months, or 1-3 years.Payment options
Please God, let me pay with PayPal. But credit cards are also okay. And I appreciate having other options, like bitcoin or chickens. Kinsta gave me no PayPal and no chickens, instead sticking to credit cards like it’s the jolly 1990s. GreenGeeks let me pay with PayPal, but it’s not recurring. I had to manually pay my monthly invoice every time. These were both major disappointments.No automatic upsells
When signing up to the service, some hosts automatically add extra services you never asked for. Because… they want you to pay more. It’s a sneaky, disgusting business practice. The main offenders here are SiteGround and InMotion Hosting. They all seem to think that they know better than you, and add a backup service or some other extra that balloons the monthly cost past the Kinsta stratosphere. I recommend being very careful with them during the signup process.No hidden fees
Hidden fees are almost as annoying as upsells. These are fees that surprisingly pop up, usually when you’re already set on buying the product. Made-up terms like a “setup fee” (it’s all automatic – nobody is “setting up” your new account) that come with a $15 price tag are a big no-no in my book. SiteGround fails this one completely, and on multiple levels. It charges a setup fee only when signing up for the monthly trial (what kind of trial costs extra?), and doesn’t refund it even if you sign up for an annual plan after the month is over. GreenGeeks also has a setup fee in place, but a sales agent was kind enough to remove it upon my request.Money-back guarantees
If hosting with a company doesn’t work out, you’ll want to bid them adieu and get your money back. Thankfully, all the hosts on our list have a money-back guarantee or a free trial, allowing you to try them completely risk-free. It’s worth pointing out how InMotion Hosting gives you a full three months to make up your mind, which is one of the more generous policies I’ve encountered.Free domain name
I don’t recommend hosting your website and purchasing your domain name from the same company, but sometimes the deal is too good not to consider. IONOS, GreenGeeks, and InMotion Hosting will throw in a free domain name if you sign up for a year or longer. InterServer lets you purchase a heavily discounted one, and Hostinger changes its offering often. I got a free domain name when signing up, but it isn’t always there.Domain name registration
Even if you got a free domain, it’ll only be free for one year. The second year, you’ll pay full price. FastComet and Hostinger have the lowest prices among these ten (for a .com domain), and all others are surprisingly expensive. But seriously, guys, don’t buy a domain where you host. Just go with Namecheap or Namesilo. They’re cheaper, more reliable, and include WHOIS protection for free.Pricing – Bottom Line
This is one section where Kinsta didn’t stand a chance. Our speedy and powerful hero is not only more expensive, but also offers less flexibility and no payment methods other than credit cards. Shame. The winners are Hostinger and InterServer. Hostinger easily wins for long-term hosting, boasting what are simply the cheapest plans on the market. You can sign up for anything between one month and four years, and you can even pay with bitcoin if you so desire. InterServer is best for keeping things flexible and affordable. The monthly price is very fair, making InterServer an obvious choice for you savvy customers who want to get more and pay less without committing for years to come.Final Conclusions and Recommendations
Feeling a bit lost after being bombarded with all this data? Well, not to toot my own horn or anything, but the most detailed hosting comparison ever done can seem confusing at first.
Before I go into specific use cases for each host, let me reiterate one thing – there are no bad hosts in our Top 10. There are no mediocre hosts on this list. All ten companies provide a solid, dependable service, and the rankings only have to do with how well they performed relative to each other.
Now let’s see which host is best for you.
Hostinger – Best for Personal Websites, Has the Cheapest Long-Term Plans
I’m going to be completely honest here – if you’re running a business-critical website or an e-commerce store that’s bound to experience huge traffic spikes, don’t choose Hostinger. This is shared hosting, meaning it’s best for projects like blogs, portfolios, businesses looking to get an online presence, and the like. If that’s what you’re looking for, go for the long-term plan and enjoy some of the cheapest hosting in the world. My testing still has Hostinger out-performing almost all other hosts in terms of speed, and there’s plenty to love about the simplified control panel.Save up to 75 % on your Hostinger plan!
Limited-time offer - Don't miss it!
IONOS – Cheapest Access to Premium Features
Despite the low prices, IONOS goes the extra mile with its features. Even some of the most expensive hosts fail to offer a dedicated support agent like IONOS does. The scalable performance lets your site react instantly to traffic surges, whereas other budget hosts would simply let your website stop functioning. The frequent huge discounts for new customers only sweetens the deal – but keep in mind that IONOS’ plans renew at higher prices, so it isn’t your cheapest option for long-term hosting.IONOS is now only $0.50 per month!
Sign up for an annual plan and enjoy the savings.
InterServer – Best for Hosting Unlimited Websites on an Affordable, Flexible Plan
InterServer’s Standard shared hosting plan has two main strong suits: most resources are unlimited, and its monthly rate (with no advance commitment) is only $7.Get your first month of hosting for just $0.01!
Take advantage of this exclusive deal to try out InterServer.
Nexcess – Best for Managed WordPress Cloud Hosting
Nexcess is a premium host with premium prices, but it’s actually relatively cheap when compared with similar managed services. It offers great performance and comprehensive managed hosting for WordPress, Drupal, Magento, and others. You’ll also get sizable coverage in North America, Europe, and Australia. Overall, Nexcess is a great pick if you’re ready to move to a more powerful platform, but you’d like to keep your hosting relatively affordable.Save up to 33 % on your Nexcess plan!
Limited-time offer - Don't miss it!
Kinsta – Best WordPress Hosting Available (if You’re Willing to Pay the Price)
More expensive doesn’t always mean better, but that’s definitely the case with Kinsta. The premium price tag of $30/month might seem way over your budget limit, but my testing found Kinsta’s Google Cloud-driven managed hosting to be simply the best. It’s easy to use, has data center locations all over the world, and delivers consistently spectacular loading times. Keep in mind that only WordPress is supported, and that email hosting is not available – meaning you might be dealing with yet another monthly expense.See Kinsta's Best Plans
Kinsta's hosting is of the highest quality you'll find, and the plans offer incredible value for money.
InMotion Hosting – Best for Trying Out Web Hosting, With Plenty of Time to Decide
After signing up for InMotion Hosting, you’ll immediately have access to what is maybe the most detailed knowledge base on the market. Steps for any web hosting-related task are clearly laid out, and you can go from zero to hero in the span of a few tutorials. What’s more, InMotion gives you an unprecedented 90-day money-back guarantee. That’s three times more than what most others offer. Give it a chance, take your time, and if it somehow doesn’t work out, get that full refund before three months is up.Save up to 75 % on your InMotion Hosting plan!
Limited-time offer - Don't miss it!
FastComet – Widest Global Deployment in Shared Hosting, Coupled With Great Support
If you’re looking for shared hosting, you’ll usually only find it in three areas: the US east coast, the Netherlands, and Singapore. FastComet is the exception. The company has data centers in hard-to-get-to locations such as Japan, India, or Australia. If your audience is located in one of these areas, don’t even think about hosting in Europe – loading times will be practically endless. It’s true that some hosting services have a more impressive selection of global data centers, but they also usually cost several times what FastComet charges. Do the math and see what’s right for you.Save up to 70 % on your FastComet plan!
Limited-time offer - Don't miss it!
SiteGround – Best for Cheap Managed Hosting With Decent Speeds
With its own custom control panel, SiteGround is a reliable hybrid between managed and shared hosting for limited budgets. While it isn’t as streamlined or as easy to use as the more expensive managed hosting providers, it still does quite a bit to make your life easier and let you focus on your actual website. Wondering what the catch is? That would be the loading speed. On average, my SiteGround site couldn’t pass the 2s mark. However, 2s is still respectable, and there was barely any downtime in our tests. This is simply the price you pay for saving on monthly fees.
SiteGround is now only $2.99 per month!
Sign up for an annual plan and enjoy the savings.
HostArmada – Fast, Reliable Hosting With Better-Than-Average Support
HostArmada combines security, speed, and reasonable pricing to provide you with a hosting plan both value-packed and budget-friendly. You get better-than-many features like a 45-day money-back guarantee and a customer-centric company attitude that rivals many of our top hosting providers. HostArmada is the right choice if you need an inclusive, friendly place to host your blog, personal, portfolio, or small business site.Save up to 75 % on your HostArmada plan!
Limited-time offer - Don't miss it!
GreenGeeks – Best for Beginners Who Will Make the Most of Fantastic Support
With full, unrestricted access to a lot of cPanel’s features, GreenGeeks is a fantastic entry point into the hosting world. It’s affordable, relatively fast, and the personal support agents make the whole experience a cinch, even for beginners. There are things to learn, but you’ll never be looking for the answer on your own. If you’re looking to maximize your options and minimize your costs with an eco-friendly approach, this is an easy choice.GreenGeeks is now only $2.49 per month!
Sign up for an annual plan and enjoy the savings.
FAQ
Can I host a website for free?
Kind of. Free hosting exists, but while it won’t cost you money, it will cost you visitors. Free services are slow, unreliable, and insecure, and if you use one, you should expect anything from frequent downtime to your entire project being hacked and/or blacklisted. It’s best to avoid these issues altogether, and go with a great cost-effective solution like Hostinger instead.Can I change my web hosting company?
Yes, you can. If you’re unhappy with your current web host, know that many of the companies on this list provide free website migrations. Contact support after signing up to your new service, and the agents will happily take care of everything for you. Some hosts, like InterServer, will even clean a hacked website as part of the process.Which web host is best for WordPress?
While all hosts on this list fully support WordPress, their use cases differ. If you’re looking to build a WordPress blog or a simple business website, Hostinger should definitely be first on your list. InterServer is your best bet for multiple low-resource WordPress installations, whether you’re creating landing pages or running a link-building project. For mission-critical websites and WooCommerce stores, go with Kinsta or Nexcess.Which web host is best for small businesses?
Hostinger is an excellent and affordable option if you’re looking to showcase your business, but I wouldn’t recommend using it for a full-fledged e-commerce store. If your website is going to be the center of your business strategy, and especially if you plan on selling products, Nexcess or Kinsta are much better choices.Which web hosts offer free SSL?
All hosts on our top 10 list currently offer free Let’s Encrypt SSL certificates. Keep in mind that vendors sometimes change plan features, so during the sign-up process, be sure to double-check that an SSL certificate is indeed included in the package.
- Hostinger
- IONOS
- InterServer
- Nexcess
- Kinsta
- FastComet
- InMotion Hosting
- SiteGround
- HostArmada
- GreenGeeks
- Popular Hosts That Didn’t Make the Cut
- The Global Web Host Comparison Project: How We Did It
- Who Are the Top Web Hosts Available Today?
- If You Want To Test a Web Host, You Have To Build a Real Website
- Results and Analysis: How Did Each Host Fare?
- Features
- Ease of Use
- Performance
- Support
- Pricing
- Final Conclusions and Recommendations
- FAQ
So happy you liked it!

We check all comments within 48 hours to make sure they're from real users like you. In the meantime, you can share your comment with others to let more people know what you think.
Once a month you will receive interesting, insightful tips, tricks, and advice to improve your website performance and reach your digital marketing goals!