Inside this Article
Connect Your Domain to A2 Hosting
If you already own a domain, the good news is that you don’t have to do any complicated setup work to connect it to your A2 Hosting website. Like with any other host, you’ll need to point your DNS record at your registrar to A2 Hosting. When you first sign up, you’ll get an email with clear instructions on how to do this: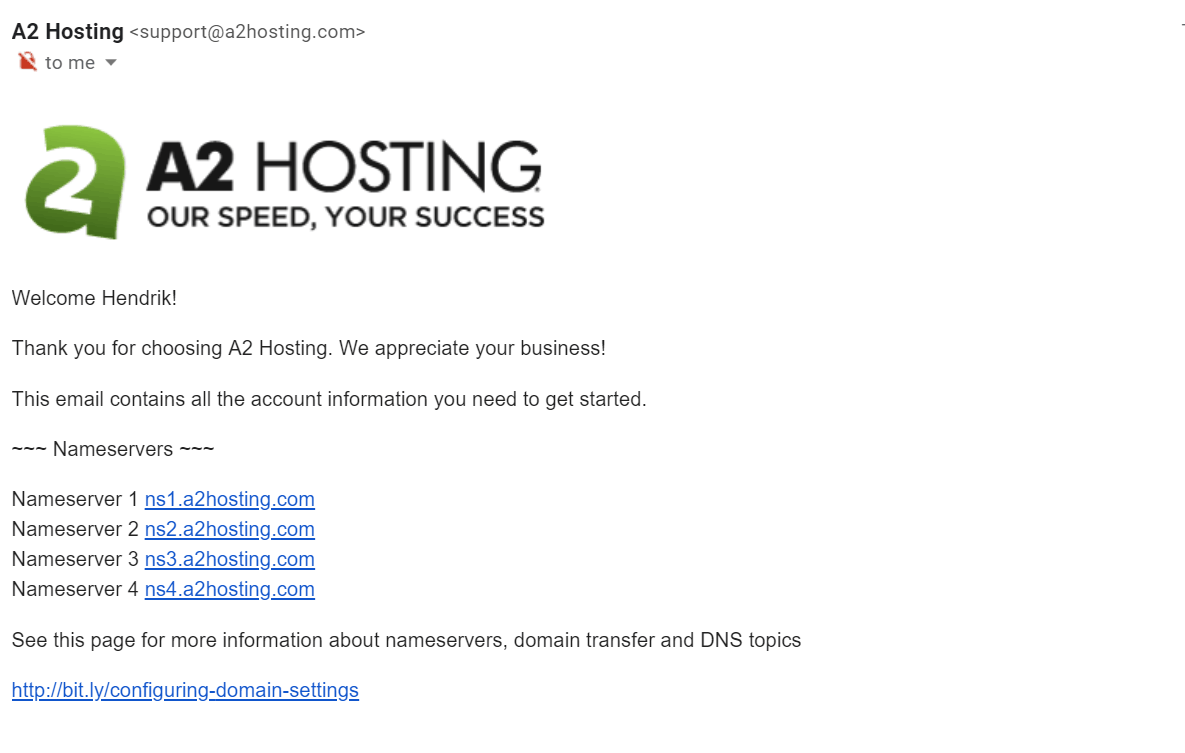 Once you’ve pointed your domain to A2 Hosting, you should be good to go.
If you create a new WordPress website, as I’ll show you below, you’ll also need to provide your domain to the Softaculous installer for it to work.
Install WordPress on A2 Hosting
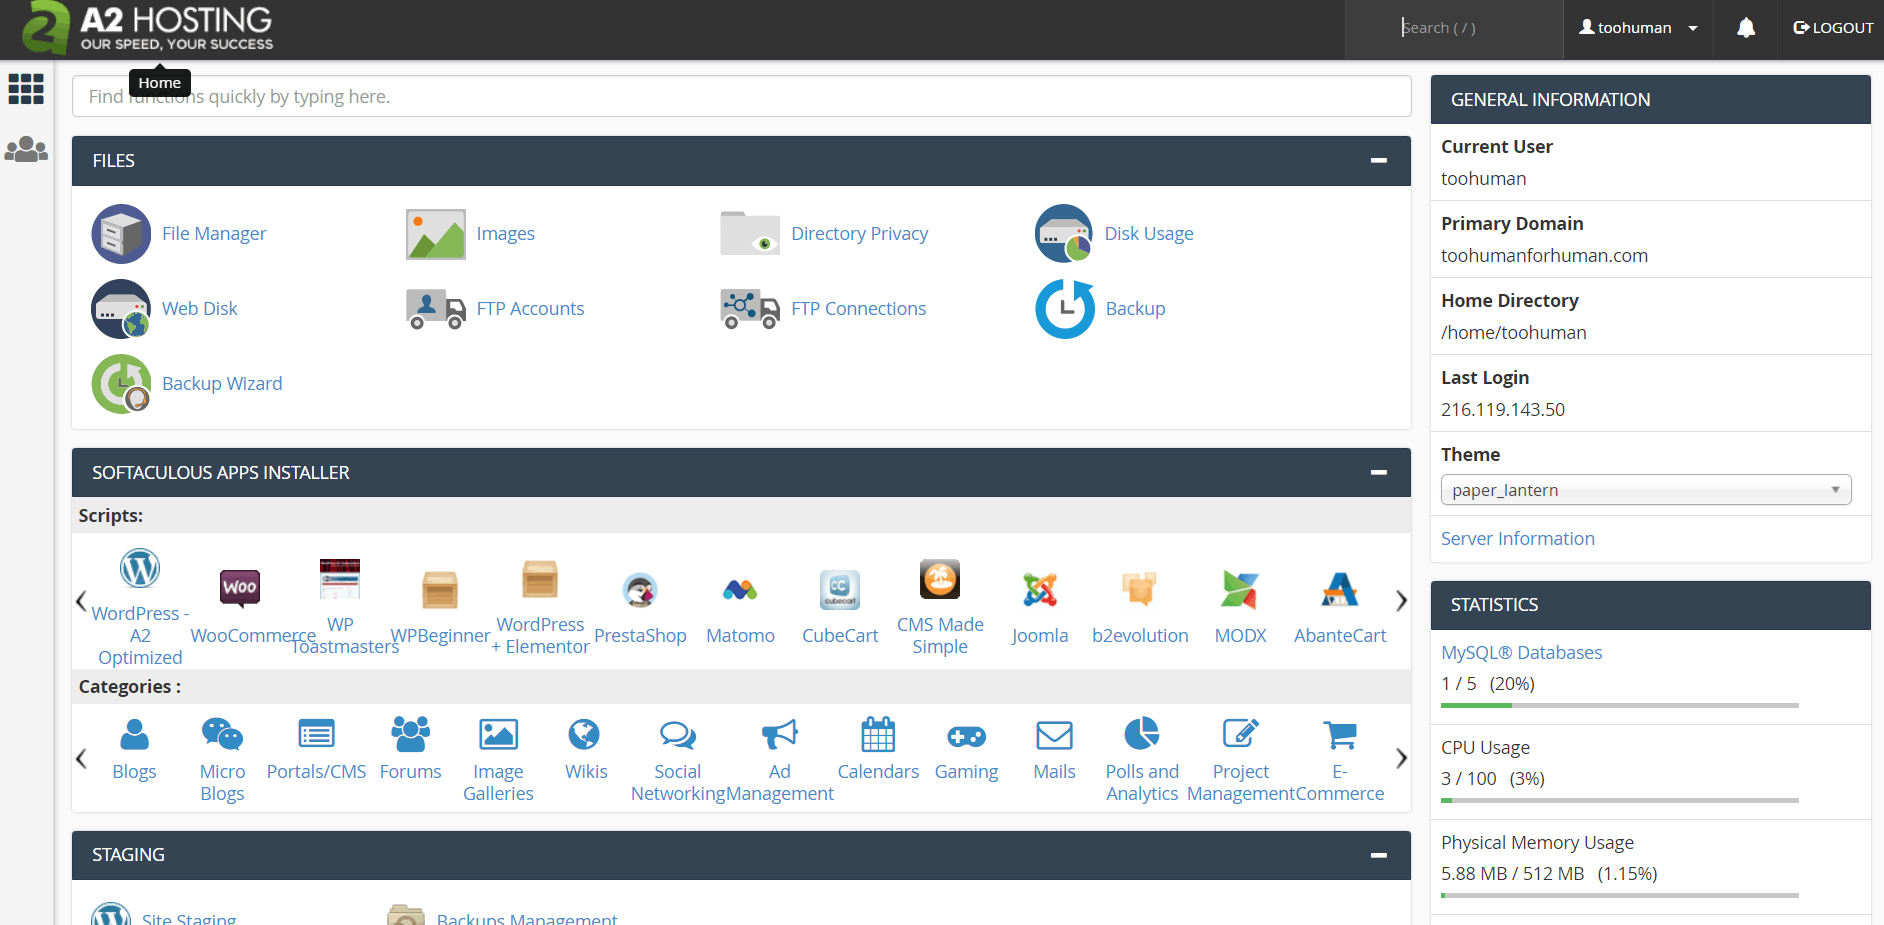
When you sign up for A2 Hosting, you can simply check a box and they will automatically install WordPress (or almost any other website builder) for you. If you missed it, or you want to install additional WordPress sites on your account, here’s how you can do it. Log into your A2 Hosting panel. Then, click on the green ‘cPanel Login’ button: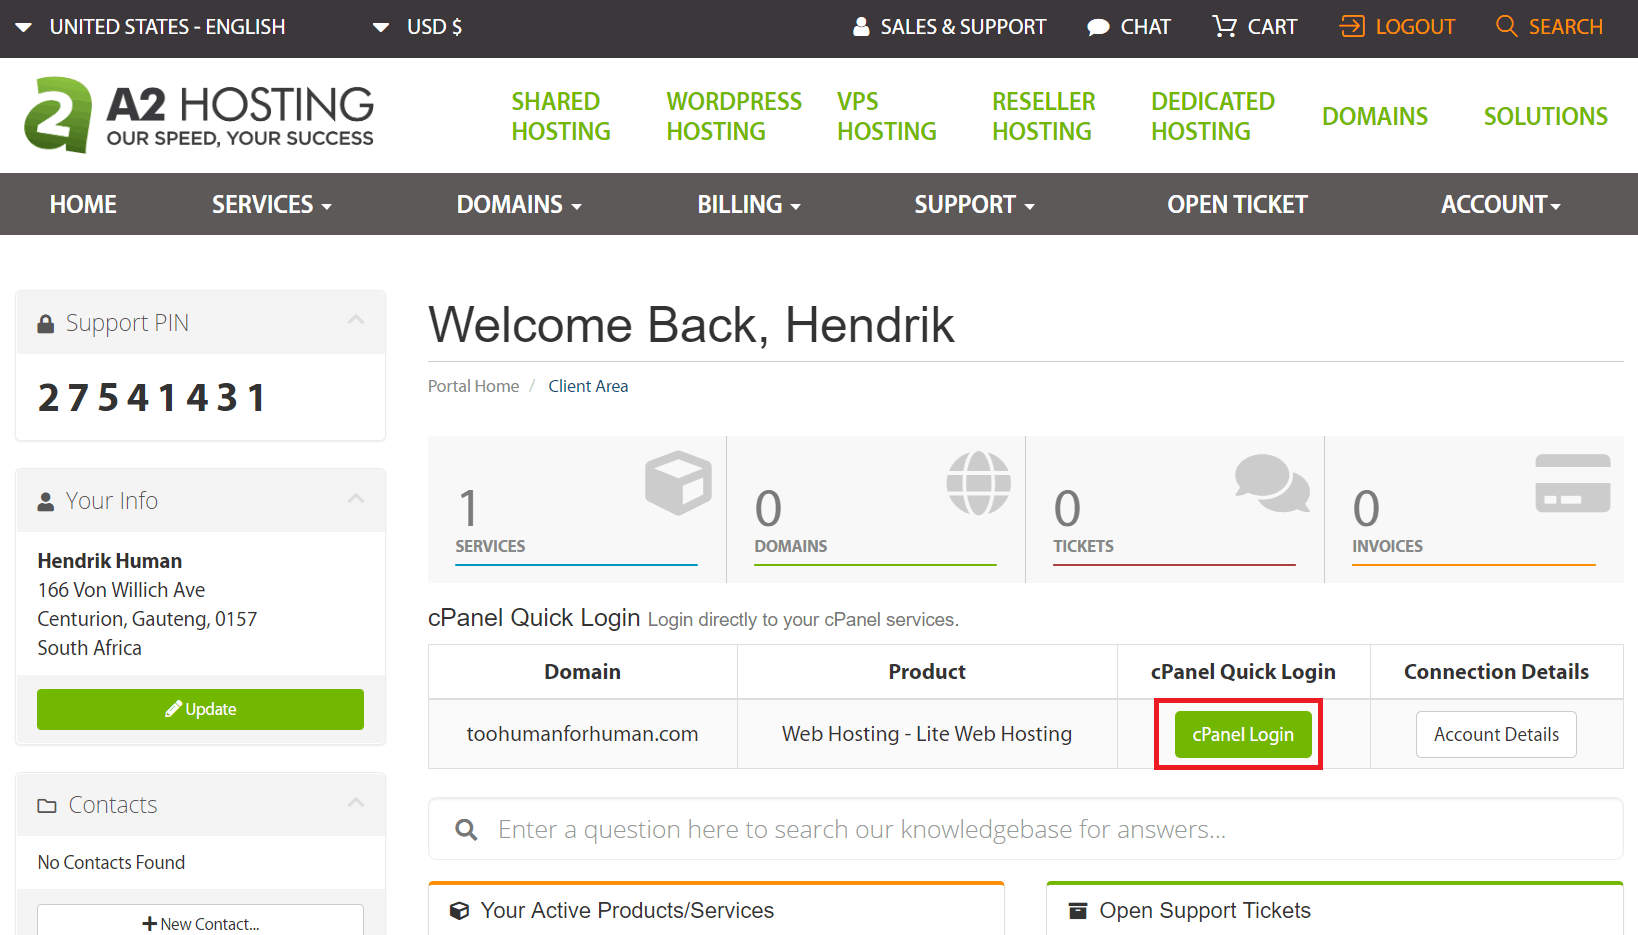 You’ll be taken to your cPanel control panel. cPanel comes with the Softaculous script installer, which you’ll use to install WordPress on your account.
Softaculous is one of the first sections in cPanel, and all the icons are for apps you can install. As you can see WordPress – A2 Optimized is the first option:
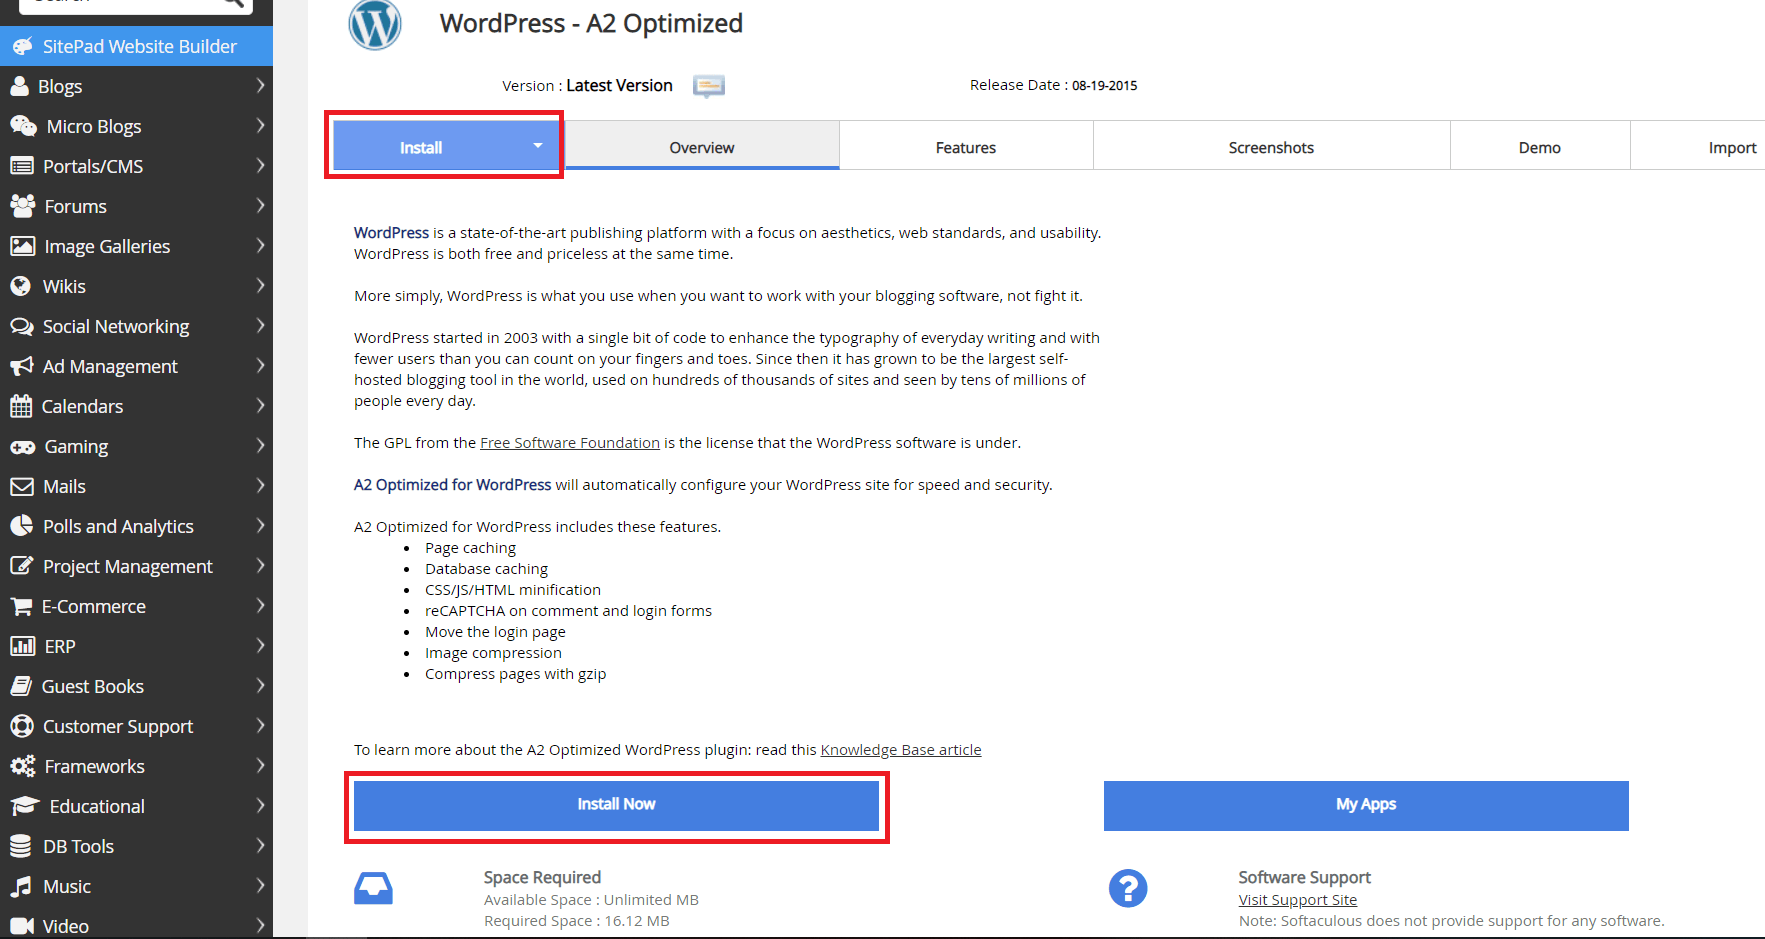
 If you click on it, you’ll go to the installer page below. You should already be in the ‘Install’ tab – to continue with the installation, just click the ‘Install’ button at the bottom of the page:
 On the next page, you’ll need to provide some details for Softaculous to install and set up your site. If you have an SSL certificate (A2 Hosting does provide you with a free Let’s Encrypt SSL certificate), then choose ‘https://’ in the ‘Choose Protocol’ field. Otherwise, just choose ‘http://’.
In the ‘Choose Domain’ field, you should type in which domain you want the site to be hosted on. You can then also add a site name and site description:
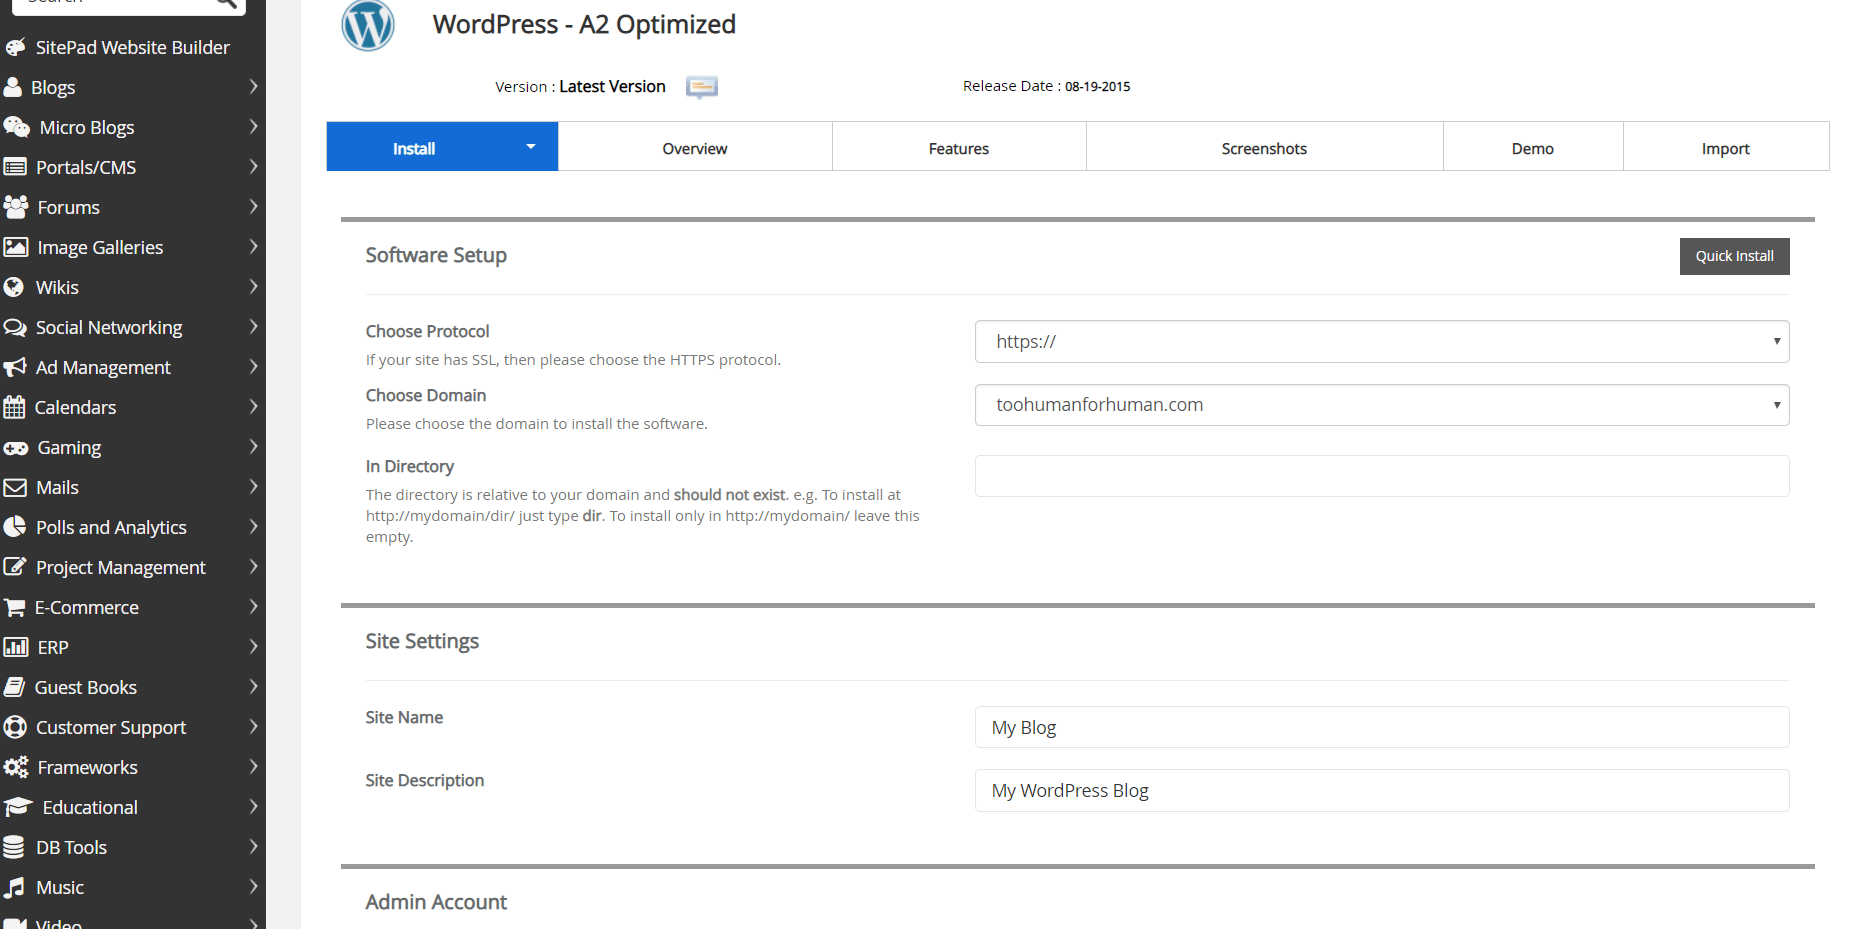 Below that is where you will set up your login credentials for your WordPress admin account. A2 Hosting will suggest a username and secure password for you, but you can also use your own.
They’ll send you these details in an email as well. Below the ‘Install’ button is a field where you can enter your email address:
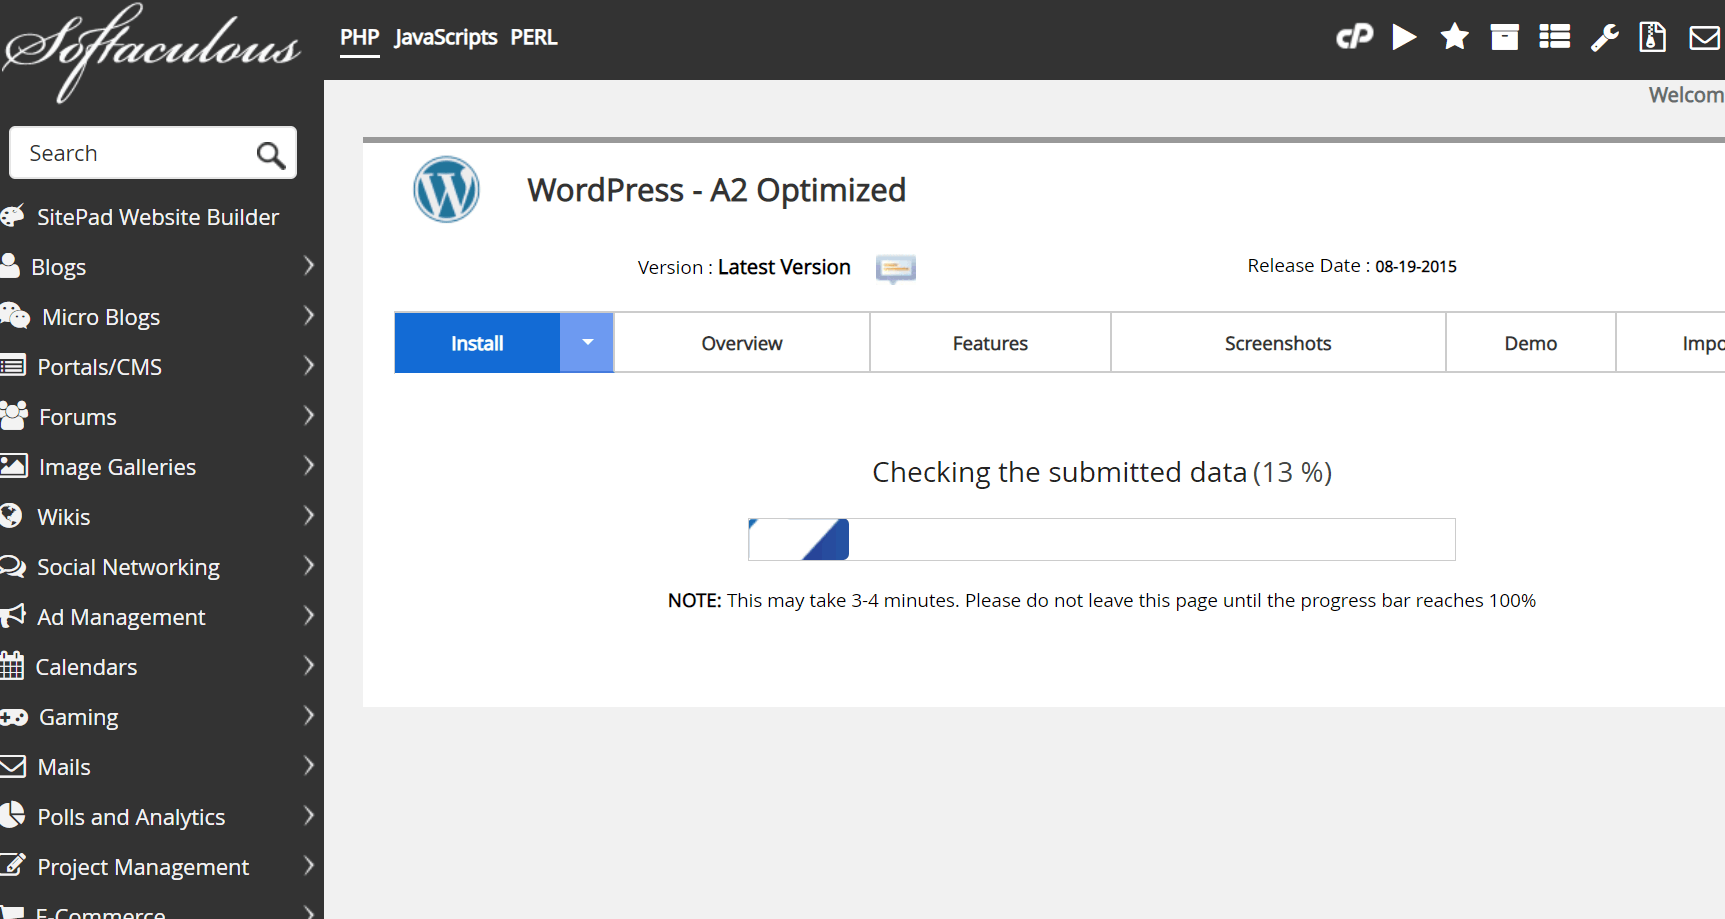
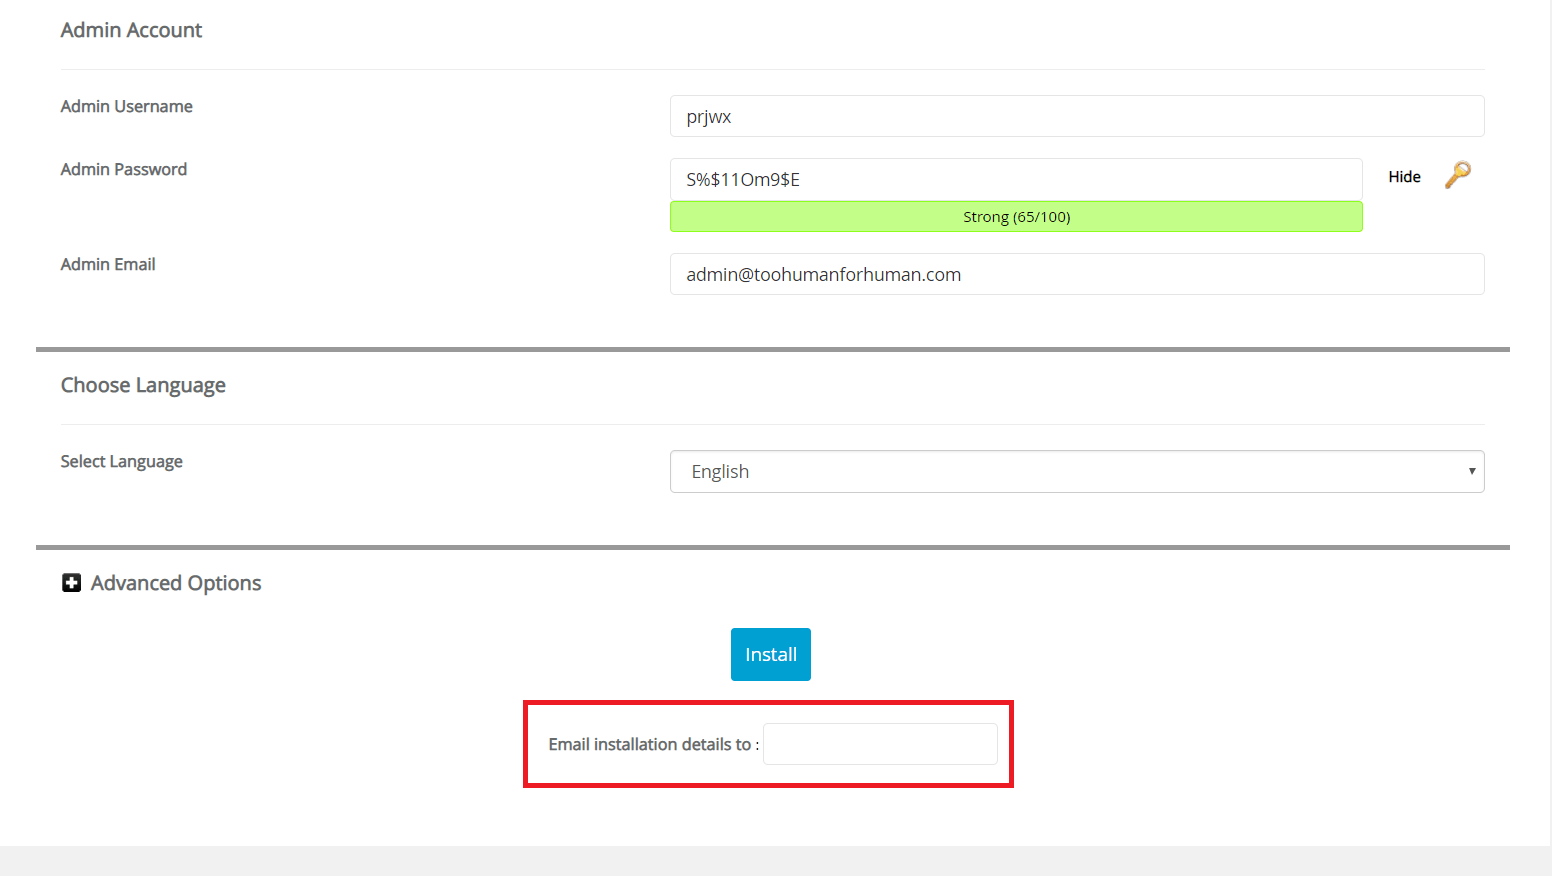 Click ‘Install’ to start the installation process. Mine took about two minutes.
Be sure not to leave this page until it’s completed, because it could disrupt the installation.
 When you get to the page below, it means your WordPress site was successfully installed:
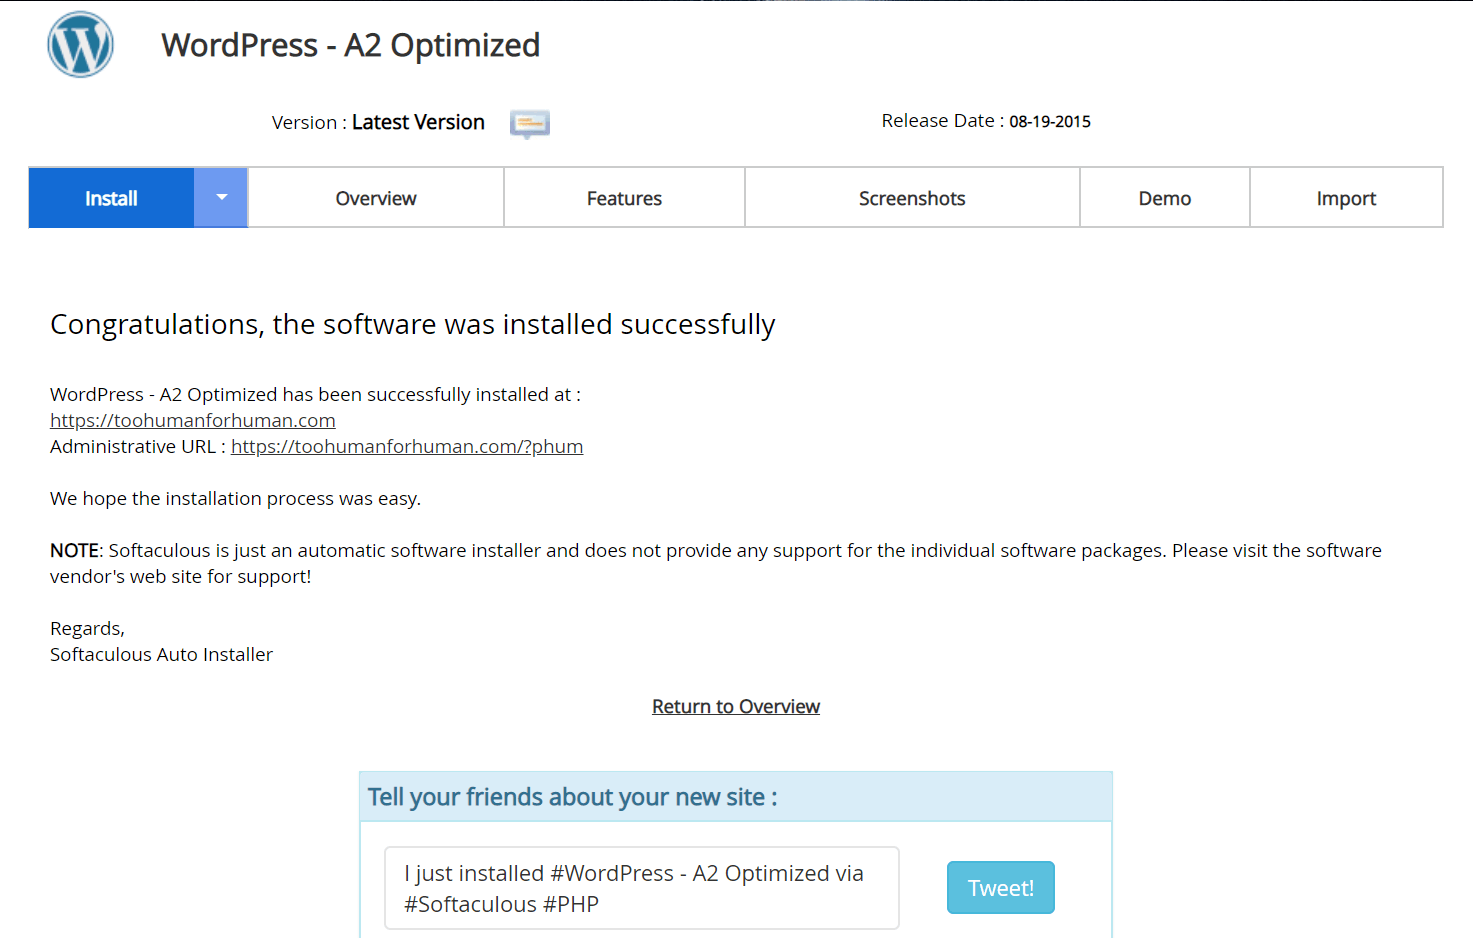 You can then navigate to your WordPress site by clicking the top link to see it as a visitor would, or the bottom link to log in with your administrative account.
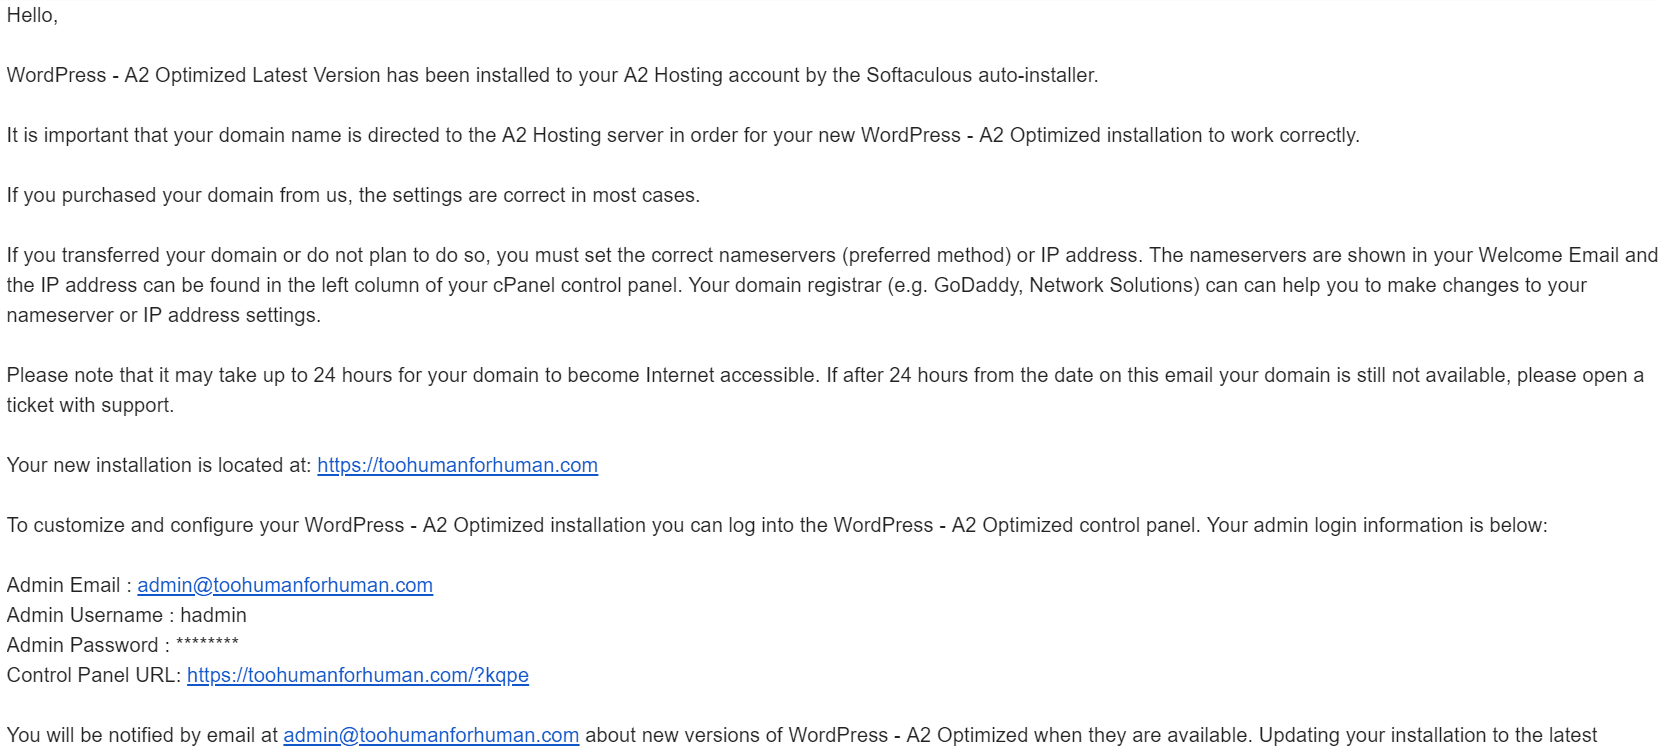
You’ll also be sent information about your site as well as your login credentials via email:
How to Set Up a CDN on your A2 Hosting
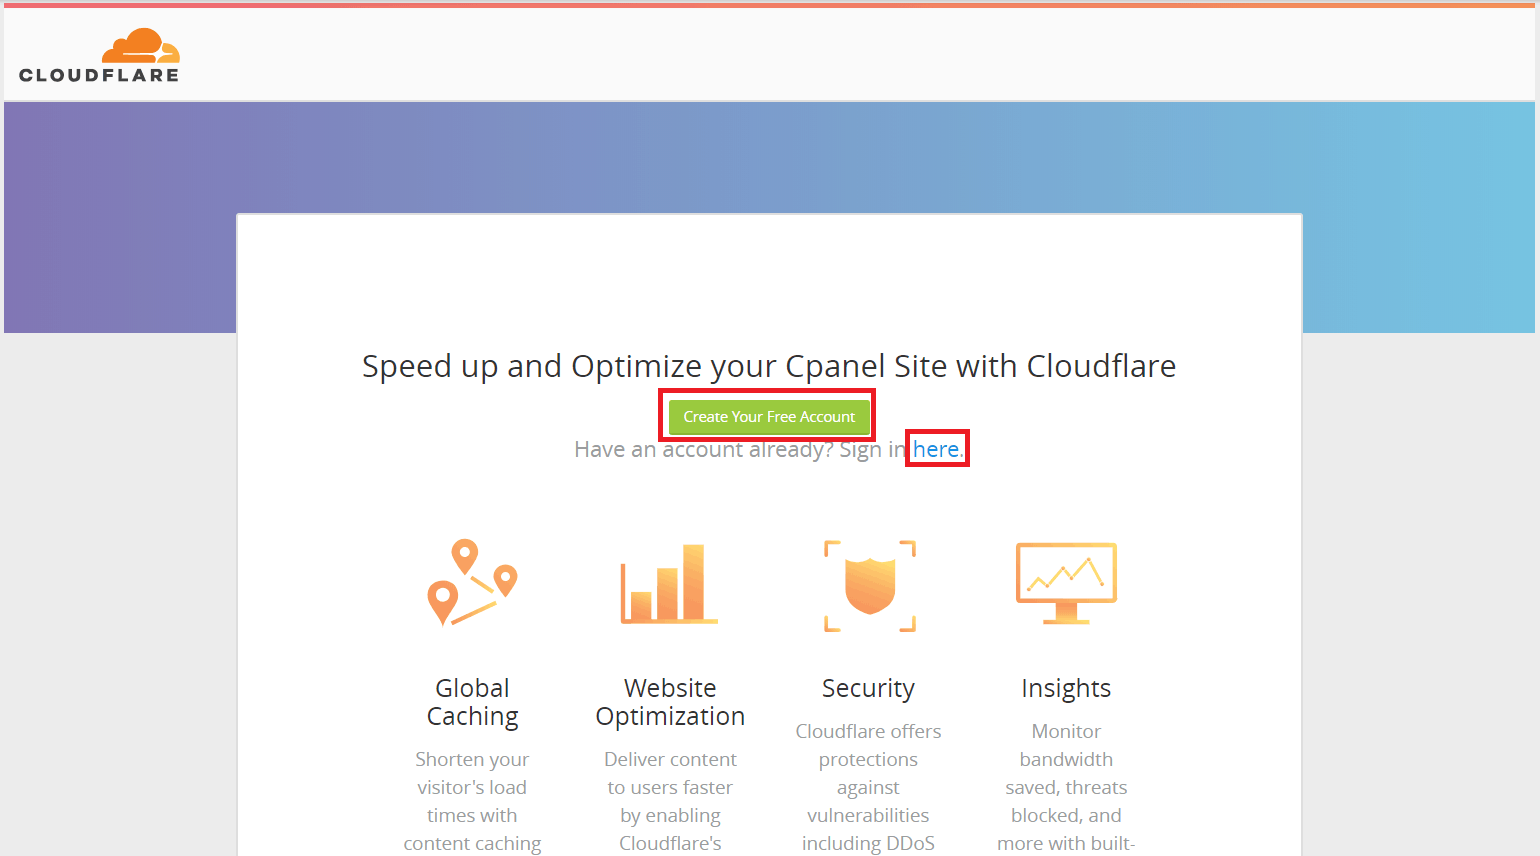
A CDN is a must-have feature for your website, especially if you have a global audience. Fortunately, you get a free CloudFlare account with your cPanel A2 Hosting package. Unfortunately, A2 Hosting doesn’t provide a one-click method to set up your CDN, but it’s still pretty easy to do through cPanel. There are two kinds of setup: Partial (CNAME) setup or full DNS setup. The first way is the easiest, and will enable you to manage your DNS and CloudFlare settings through A2 Hosting and cPanel. If you choose the second method, you will manage these features from your account on the CloudFlare website. To activate CloudFlare on your WordPress website, the first thing you need to do is log back into cPanel from your dashboard. Then scroll down until you get to the ‘Software’ section. CloudFlare should be the first option: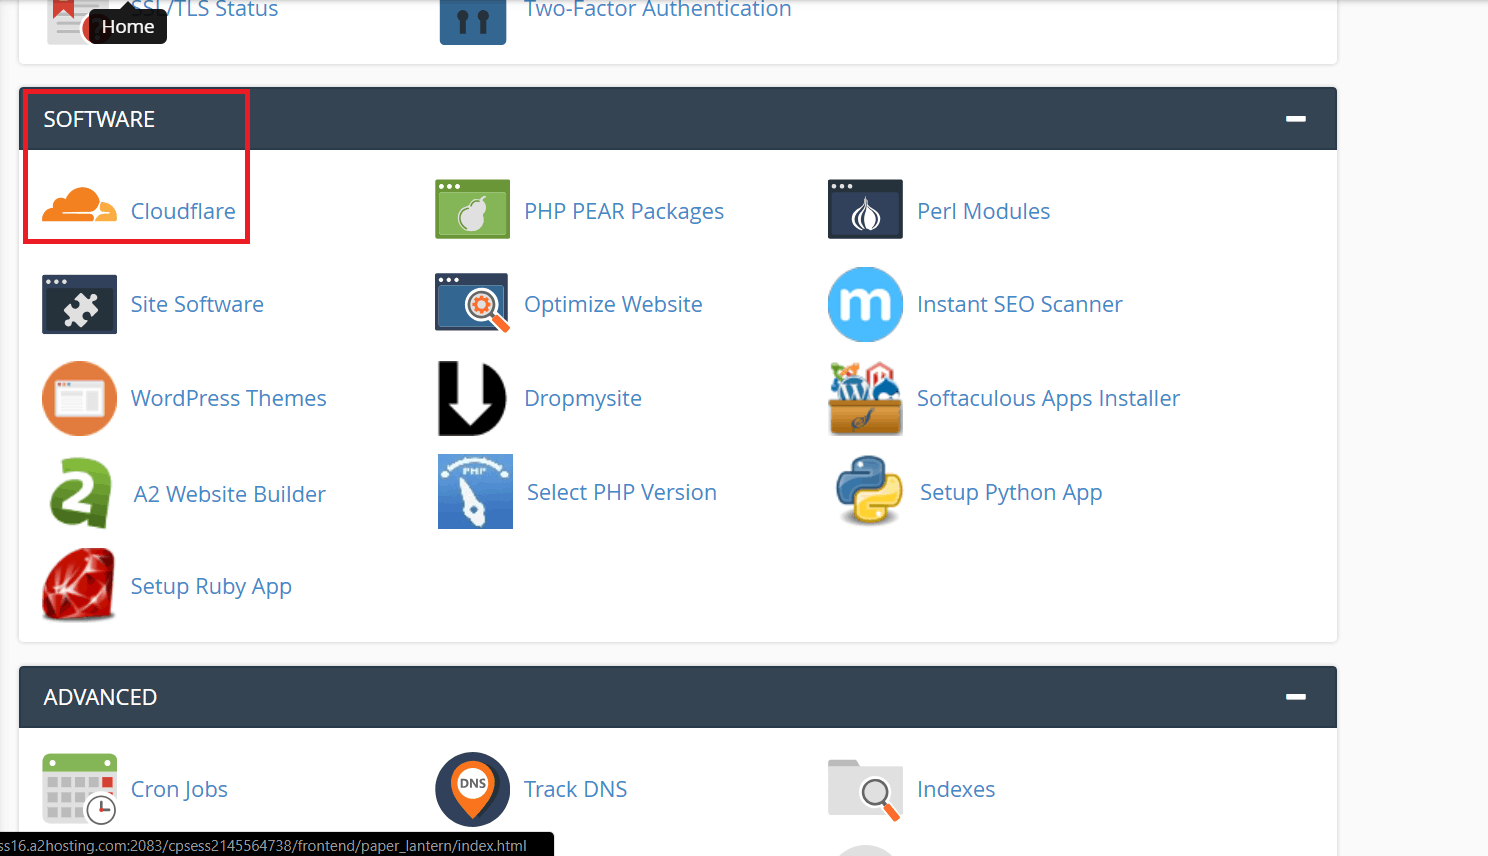 Clicking it will take you to A2 Hosting’s integrated version of the CloudFlare dashboard. If you don’t have a free CloudFlare account, you can create one by clicking the button. If you do, you can follow the link to log into your existing account:
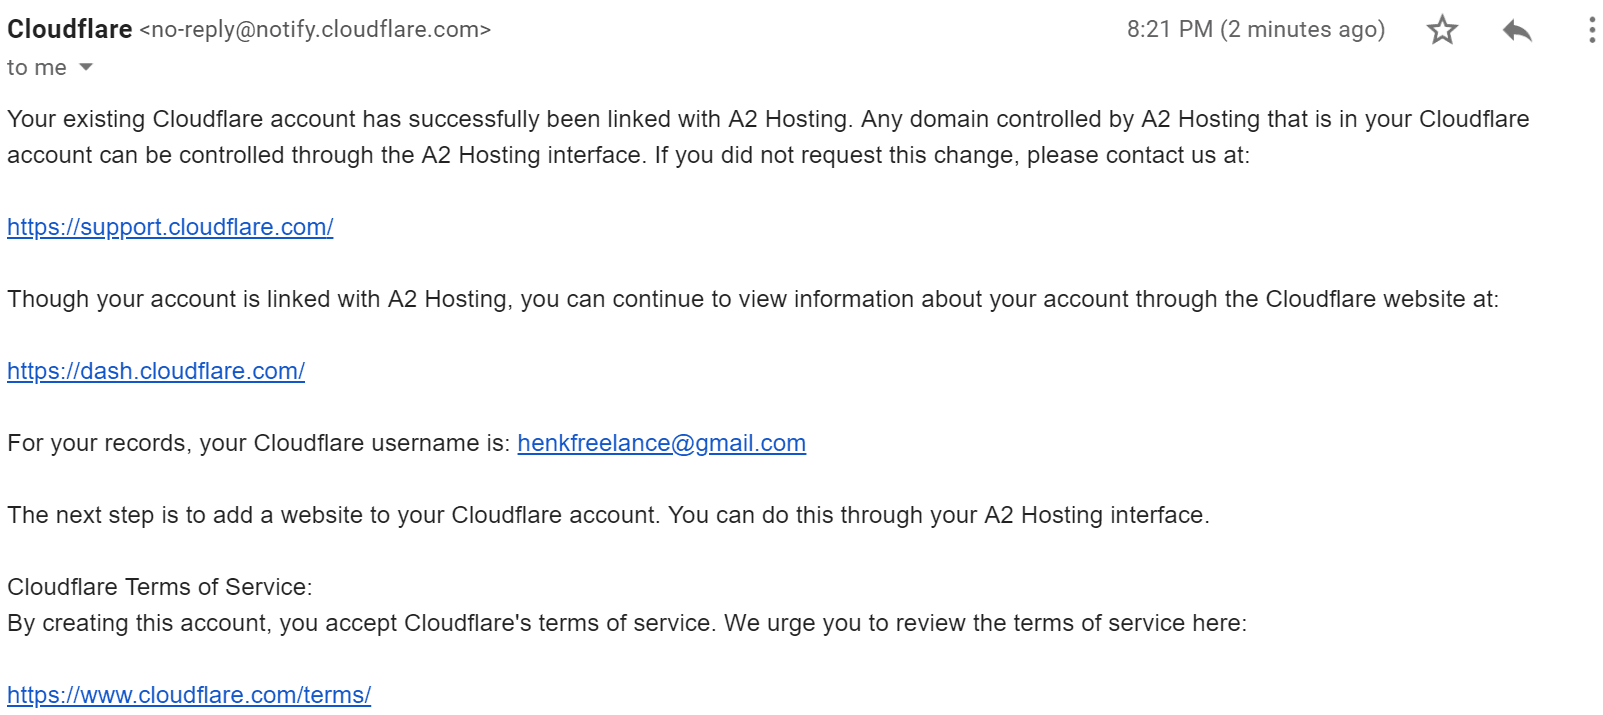
 Whichever route you go will automatically link your CloudFlare account with your A2 Hosting account. Pretty convenient. You’ll also get a confirmation email:
 If you already have a CloudFlare account, it will automatically use the domain you currently have CloudFlare activated on. A free CloudFlare account unfortunately only supports one domain, so you will have to replace the original domain or upgrade if you want to activate CloudFlare on a new domain.
In case you’re a first-time CloudFlare user, I’ll guide you through the next steps anyway. You can also find the complete instructions in the A2 Hosting documentation.
If you already have a CloudFlare account, it will automatically use the domain you currently have CloudFlare activated on. A free CloudFlare account unfortunately only supports one domain, so you will have to replace the original domain or upgrade if you want to activate CloudFlare on a new domain.
In case you’re a first-time CloudFlare user, I’ll guide you through the next steps anyway. You can also find the complete instructions in the A2 Hosting documentation.- As soon as you create an account or log in, you’ll see an ‘Add a Domain’ text box. Type the domain you want to activate CloudFlare on in this box and click ‘Scan DNS Records.’
- You can watch the introductory video by CloudFlare while they analyze the DNS for your domain. When it’s done, just click ‘Continue.’
- Just click ‘Continue’ again on the next page where they show your DNS records.
- On the next page, you can either choose a free plan or purchase a premium CloudFlare plan.
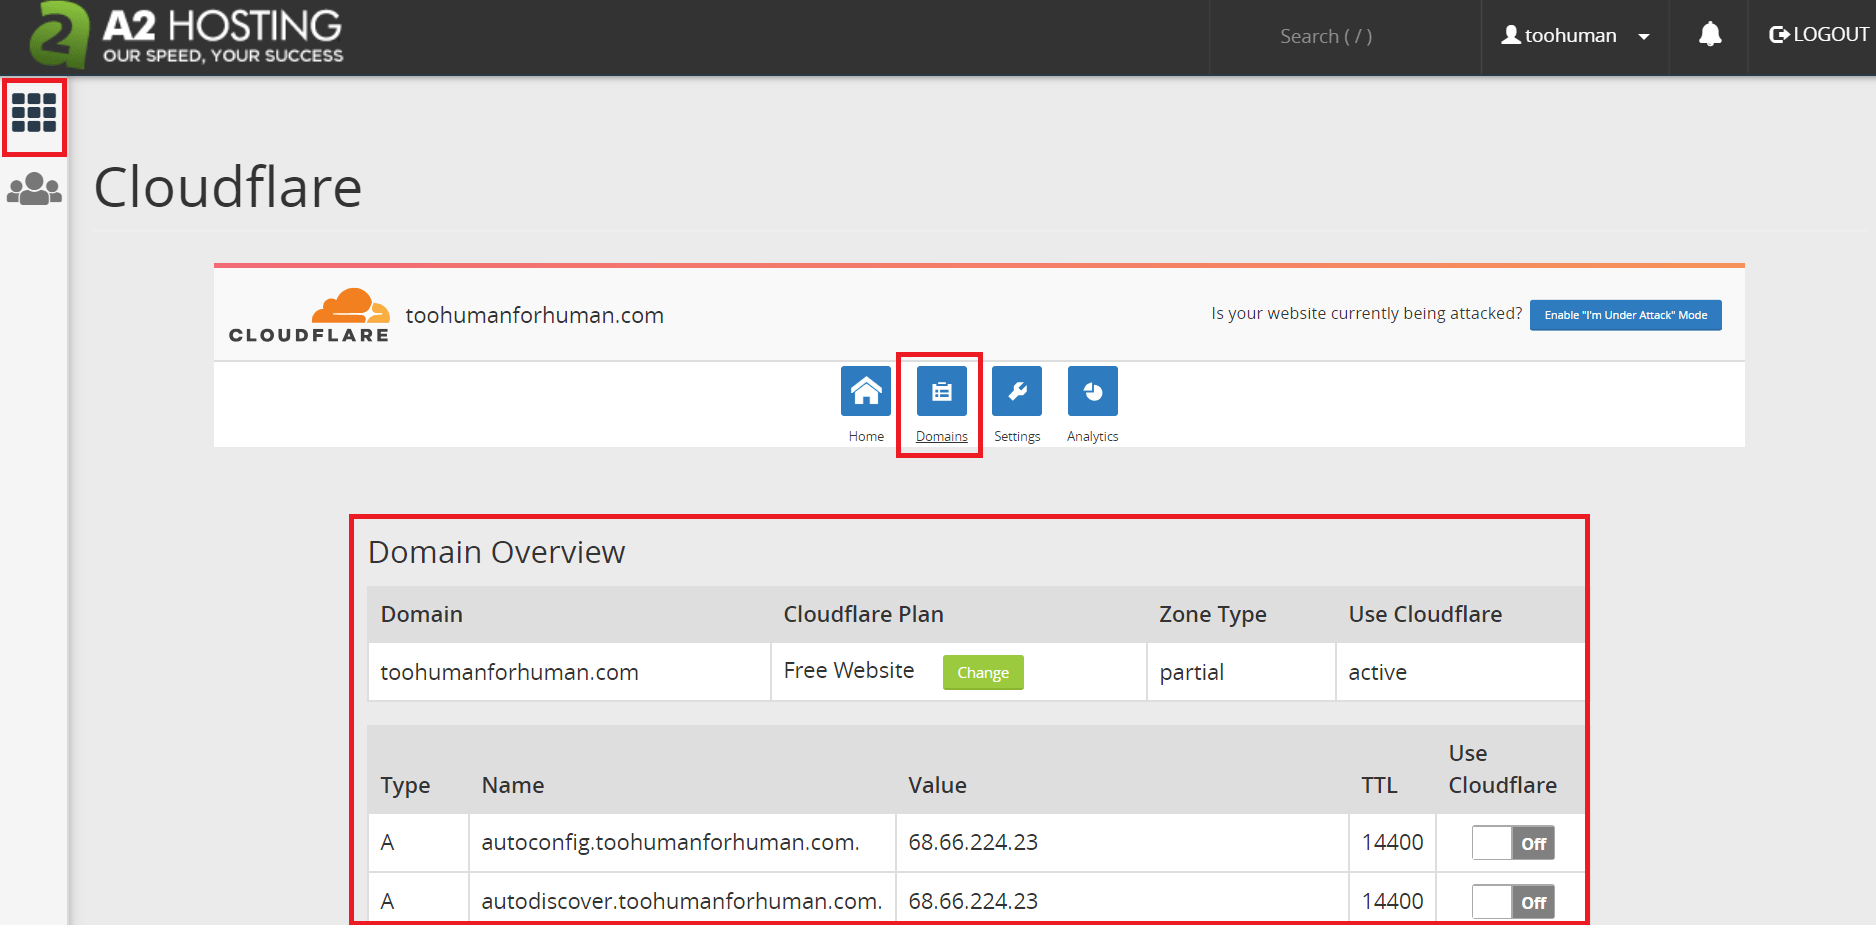 Go back to cPanel by clicking the grid icon in the top left corner. Then, go back to CloudFlare just to make sure everything refreshes.
Go back to the ‘Domain’ tab and then scroll down. Below your DNS records, you’ll find an orange button that says ‘Remove domain from CloudFlare.’ This will remove your DNS and CDN management from CloudFlare and move it to your cPanel account. After you click it, just confirm it on the popup box:
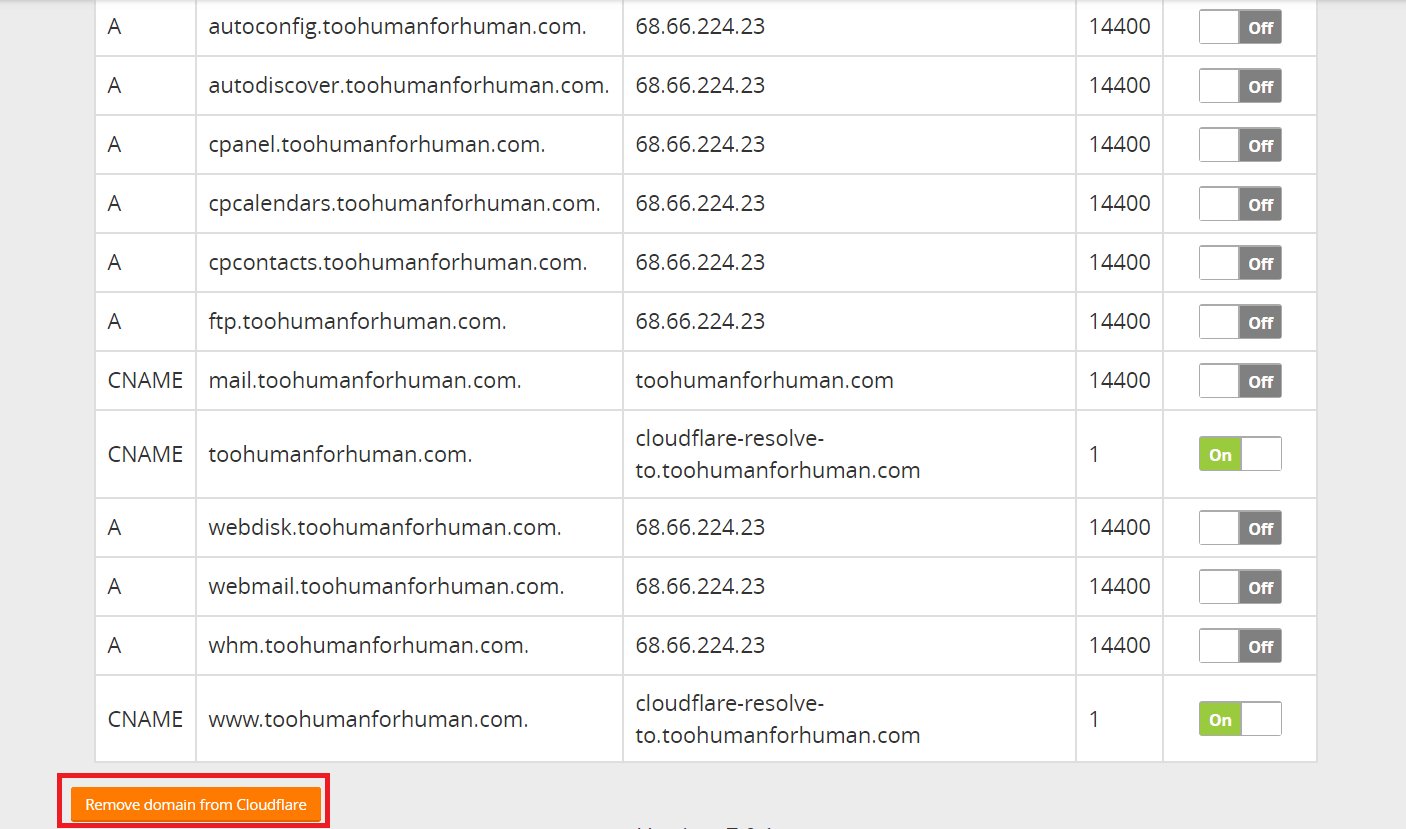
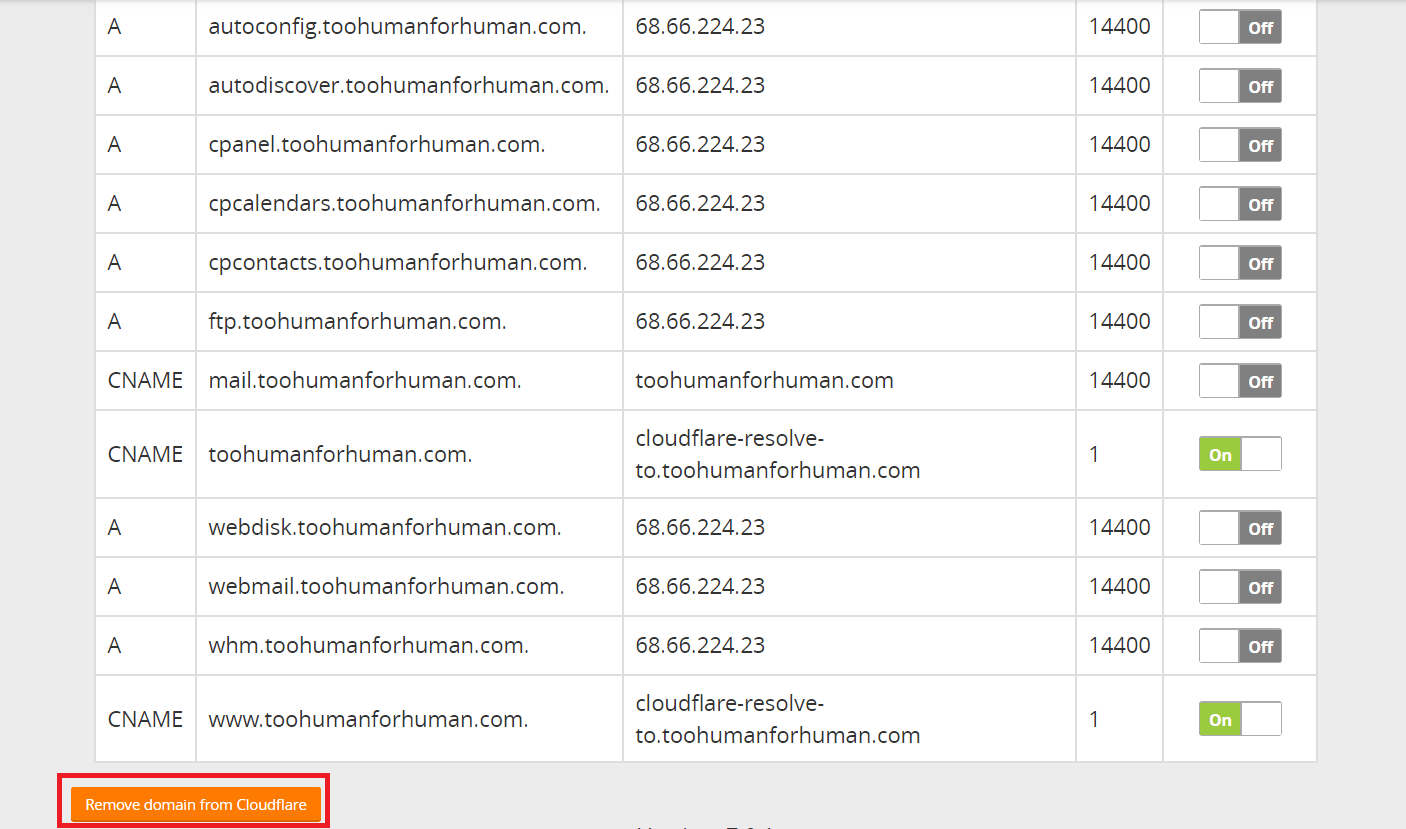 The page will refresh, removing most of your DNS entries. This is where you need to pick whether you want to go with the partial or full DNS setup. I recommend the partial setup, so you can continue managing it straight from your cPanel account. Click the ‘Provision Domain with CNAME Setup’ button:
 The page should refresh with all your DNS records once again. To make sure it’s working, you should check that CloudFlare is switched on for either (or both) of the two entries I’ve marked below:
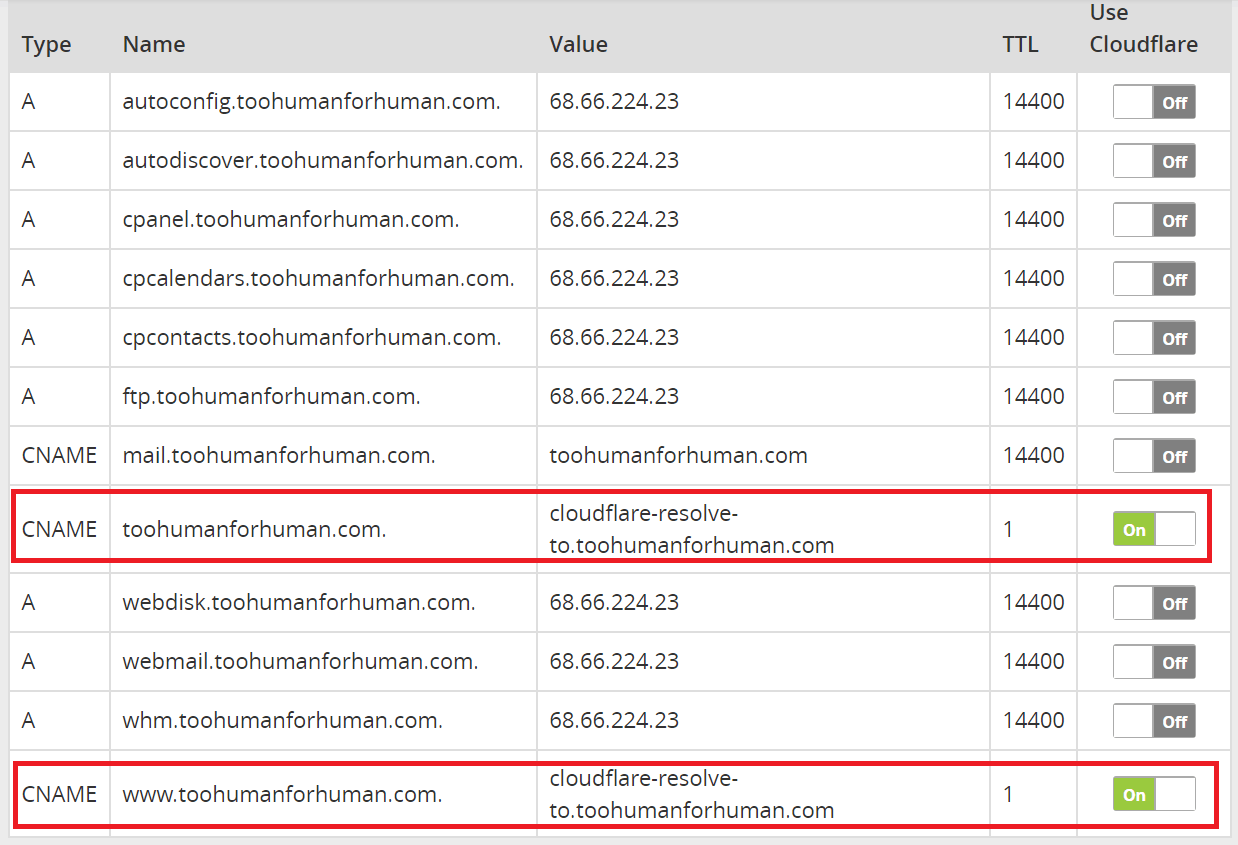 If they aren’t, just toggle the controls to the ‘On’ position.
If you went through all these steps, you should also have received two emails; one about removing your account management from CloudFlare and another about adding it to A2 Hosting:
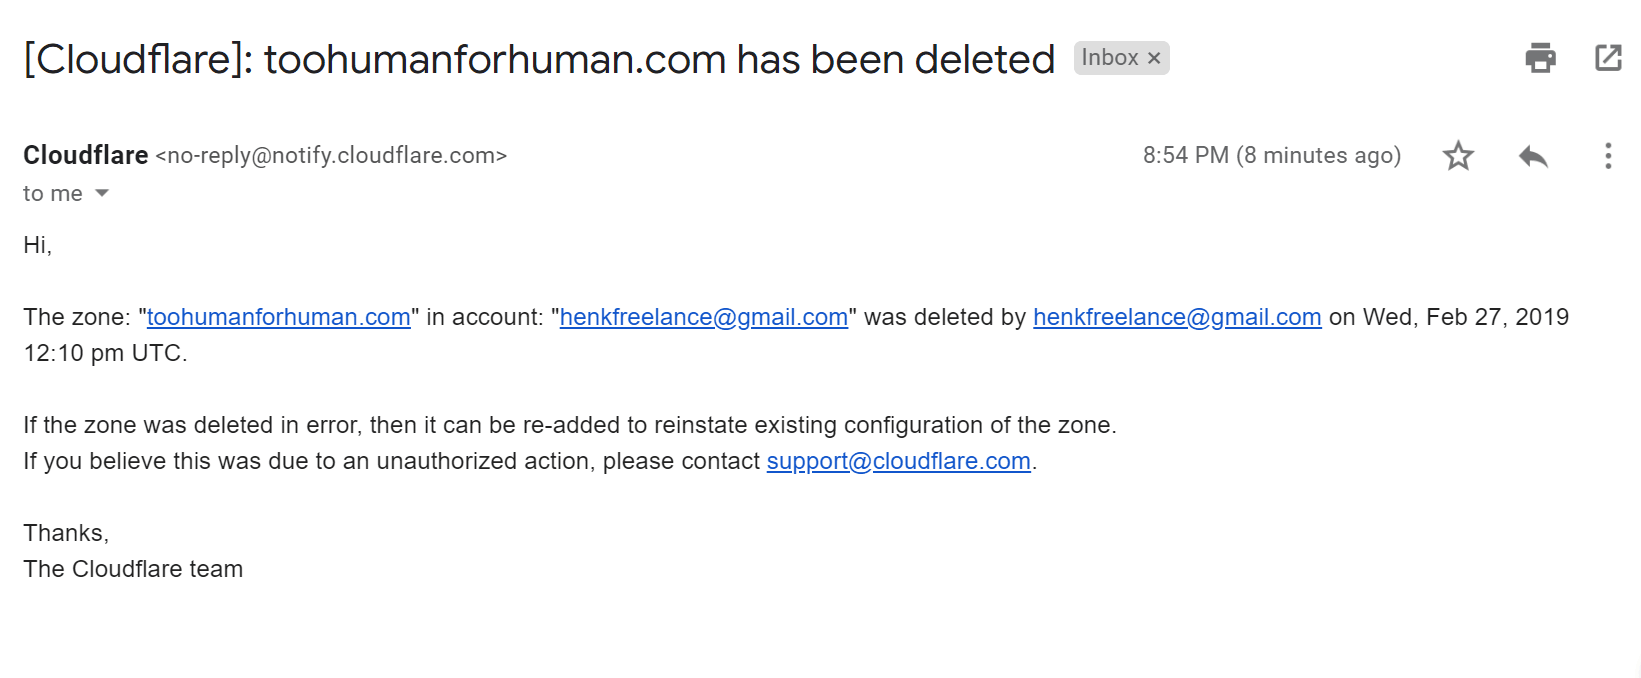
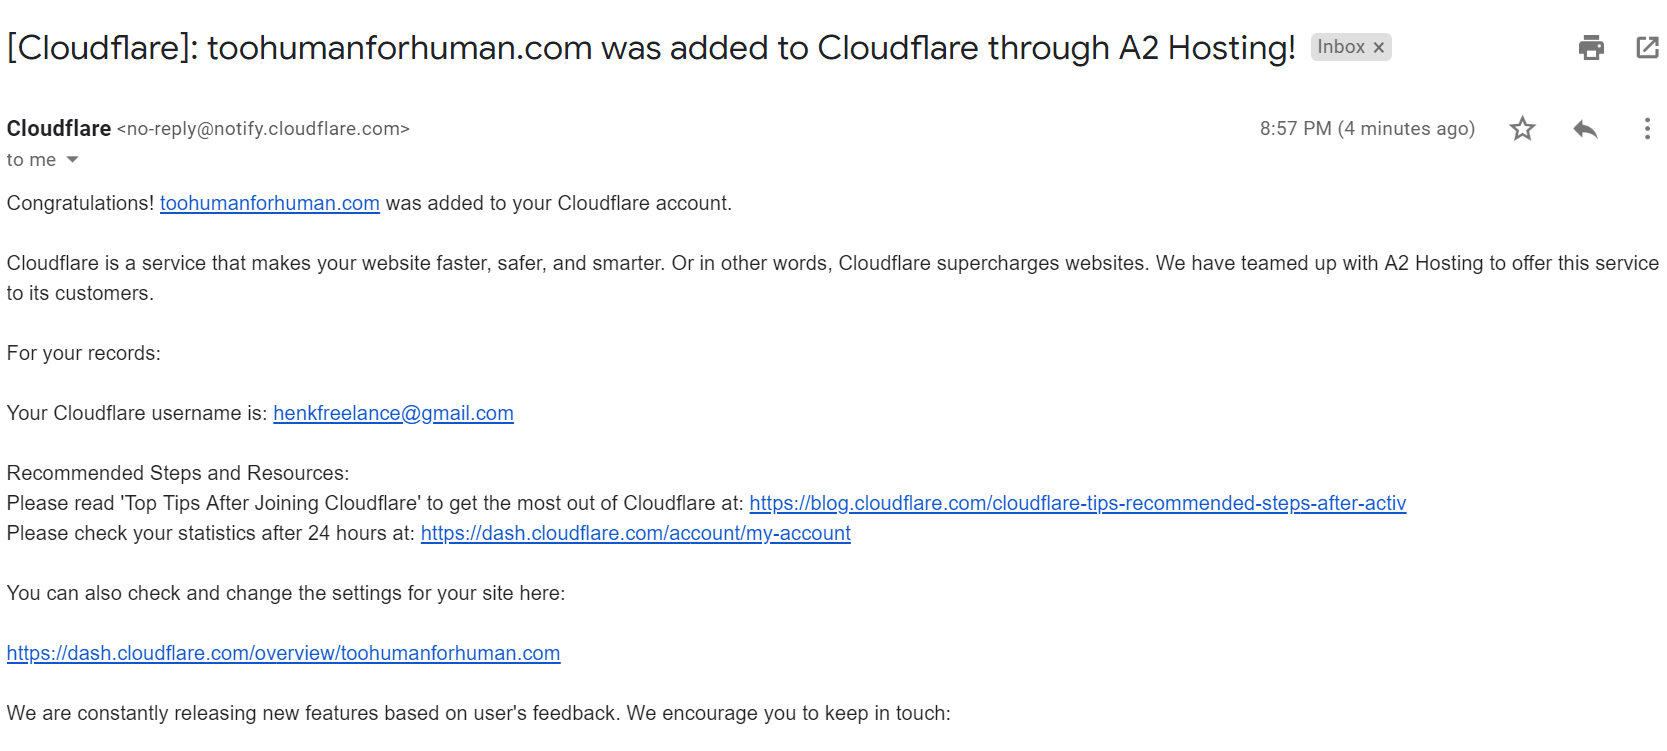 And, finally, you should have CloudFlare activated and enabled on your website. It might take up to a day for the changes to take effect, but this has rarely been the case for me and you should be good to go within the next hour.


![8 Best Enterprise WordPress Hosting (Scalable & Reliable) [2025]](https://dt2sdf0db8zob.cloudfront.net/wp-content/uploads/2024/11/Best-Enterprise-WordPress-Hosting-1.png)


