Inside this Article
Installing WordPress on Cloudways
Step One
Once you’ve created an account with Cloudways, simply log in to access your dashboard.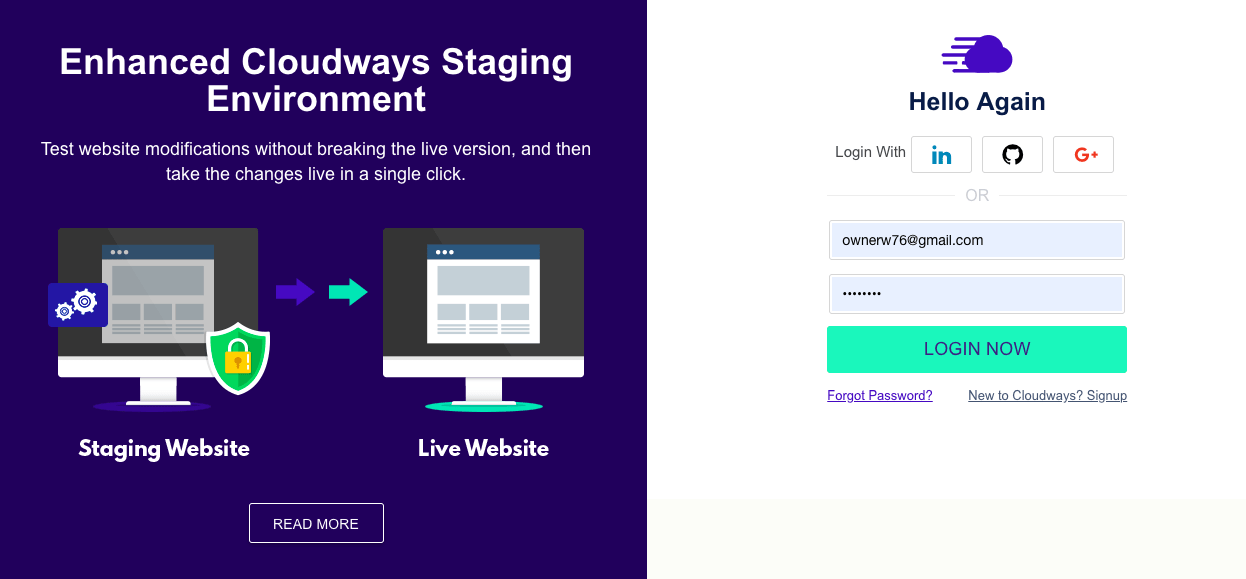
Step Two
You’ll be presented with the following screen, where you’ll need to toggle from Server to Applications in the top left of your screen.
Step Three
In the Applications tab, you’ll be presented with a list of installed applications. This will be empty if you’re brand new to Cloudways. Click on the + Add Application button in the upper-right corner and then again on Add Application in the popup.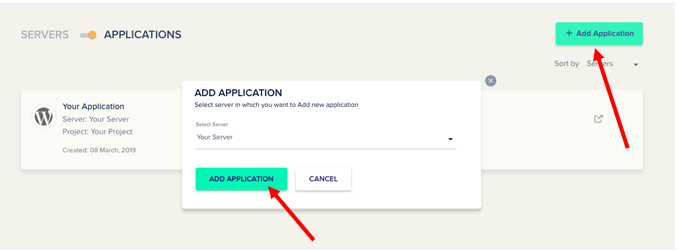
Step Four
Next, you’ll be asked about the version of WordPress you’d like to install. Select the latest version of WordPress and name your blog. Once complete, click Add Application yet again.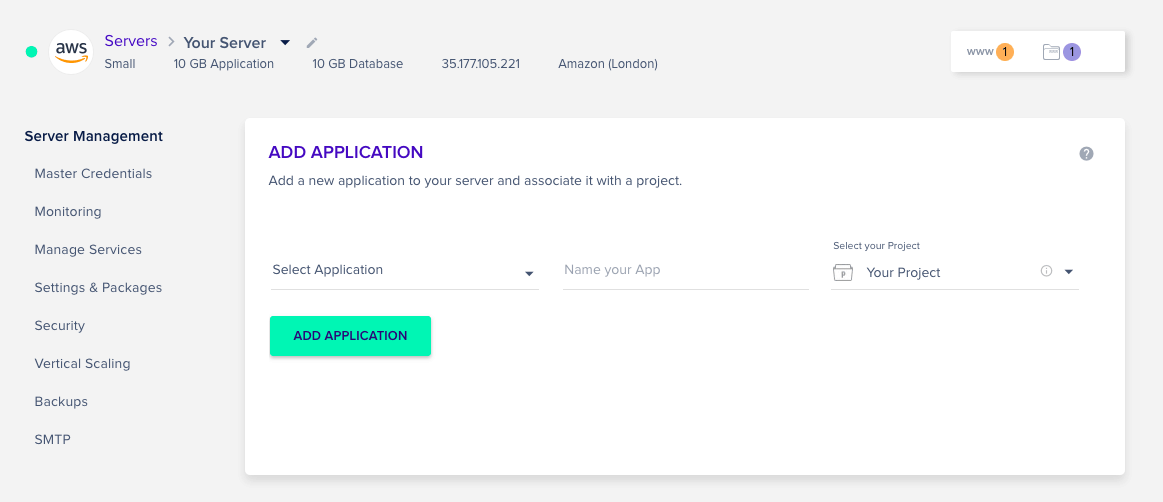 You’ll have to wait for a couple of minutes while WordPress is installed.
 After your application has been created, you’ll see www followed by 1 (or one of the following numbers, if you have more than one application). Click on the orange number to access your WordPress URL and login credentials.
 It’s as easy as that. In just a few clicks and a couple of minutes, you can create a WordPress website via the Cloudways dashboard. The next and slightly more complicated step is to connect your domain.
Connecting a Domain on Cloudways
First of all, you can’t purchase a domain from Cloudways directly, as it doesn’t offer domain registration services. If you don’t already own a domain, you’ll need to purchase one from GoDaddy or another registrar before you can start this process.Step One
Toggle to the Servers section of your website dashboard. Here, take note of your server’s IP address. For the test server I created, for instance, the IP address is 35.177.XXX.221. I recommend copying your IP address to a note file — you’ll need it later on.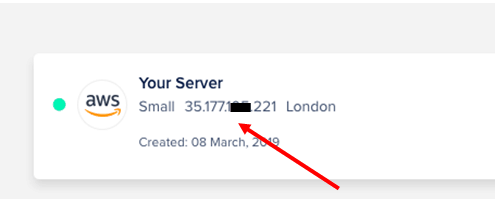
Step Two
Then, head back over to the Applications tab and select the application you just created. Next, select Domain Management from the left-hand menu.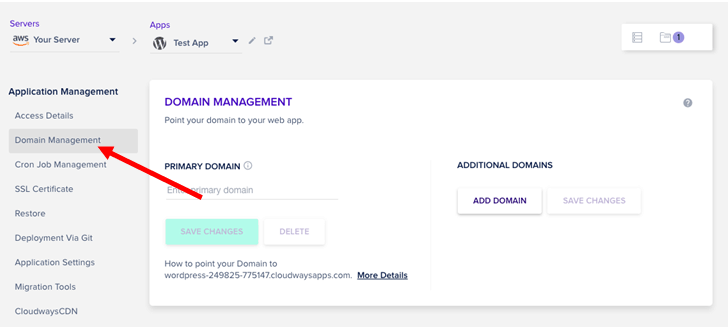 In the Primary Domain field, enter your full domain address including the prefix, as per the screenshot below.
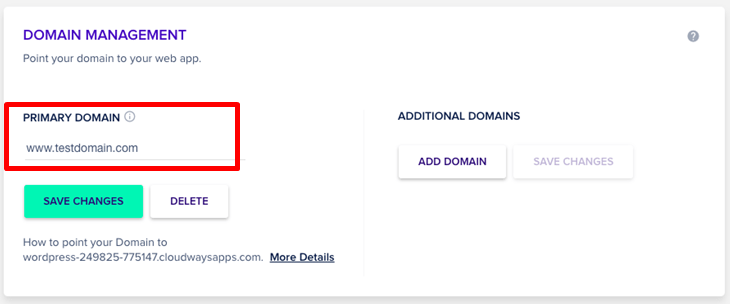
Step Three
Now, it starts getting a little more complicated. You’ll have to head over to your domain registrar (e.g., GoDaddy) and add an A Record for IP address you noted in Step One. The exact steps will depend on your registrar; however, Cloudways provides step-by-step guidance for GoDaddy, Namecheap, and Dreamhost. Once you’ve added your A record, you need to wait for the DNS changes to be propagated. This can take 24-48 hours, although it’s usually a lot quicker. That’s it. Once the changes have been propagated, you’ve successfully added a domain to your fresh WordPress installation. You can check that it’s been done correctly by visiting your website URL.Activating Your Cloudways CDN
Cloudways allows you to set up its proprietary CDN straight from your dashboard. This isn’t available on a free account, so you’ll need to upgrade to install and activate your free CDN.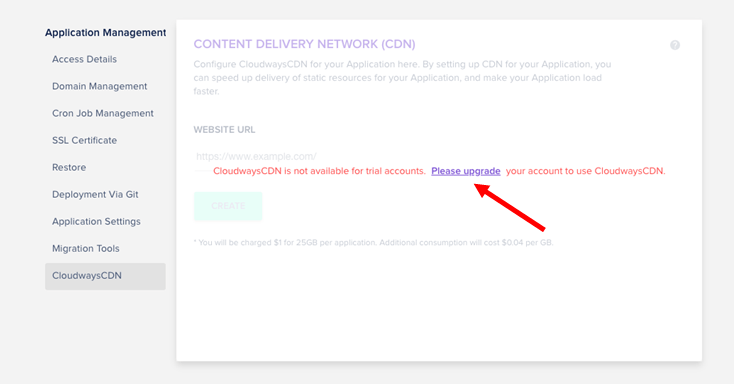
Step One
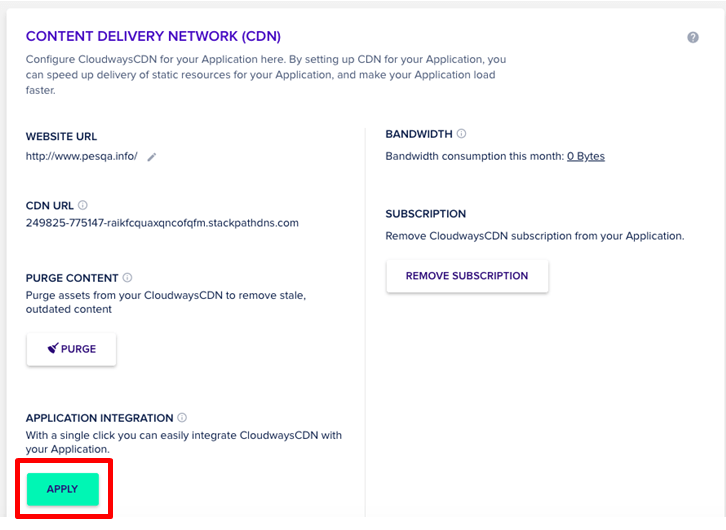
Inside the Applications tab, select CloudwaysCDN from the left-hand menu.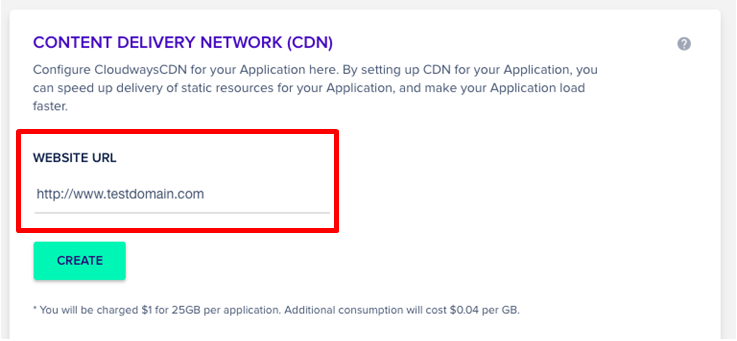 After selecting Create, you should be on a page that looks like the screenshot below. To activate the CDN, you just need to click Apply. Once the CDN has been correctly integrated onto your website, you’ll see a message confirming its success.


![How To Start a Clothing Store Online: A 6-Step Guide [2024]](https://dt2sdf0db8zob.cloudfront.net/wp-content/uploads/2024/06/How-To-Start-a-Clothing-Store-Online-img-02-e1718982195142-850x485.png)


![How To Start a Food Blog in 5 Easy Steps [2024 Guide]](https://dt2sdf0db8zob.cloudfront.net/wp-content/uploads/2024/05/How-to-Start-A-Food-Blog-in-5-Easy-Steps-CurrentYear-Guide-e1715367475336-850x487.png)
