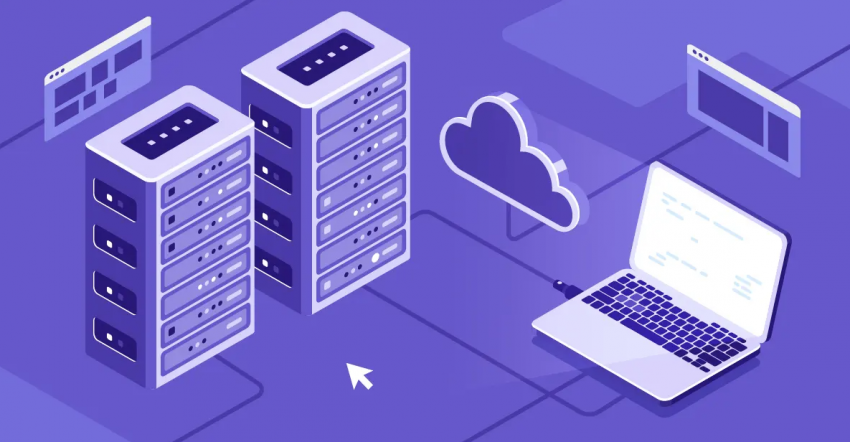
Creating a site for the first time can feel pretty overwhelming. You might have a killer idea for a site, but just the thought of trying to build one is preventing you from even starting. However, hosting a website doesn’t have to be difficult – in fact, it can be fairly easy.
You might think that web design involves a lot of code-tinkering and whatnot. This may have been the case many years ago, but many hosting companies now provide super intuitive ways to build and run websites. No technical knowledge required.
I’ve been testing hosts and site builders with Website Planet for a long time now, so I’ve picked up a tip or two on how to get started. That’s why I decided to write a comprehensive guide on everything you need to know. Follow along and you’ll have a great site up in no time!
Quick Guide to Hosting a Website
First things first – there are a few ways of going about hosting a website. These are:
- Using a web hosting service – This is where you pay a hosting company to host your site on one of its servers. It’s the most common method, suitable for both beginners and seasoned developers.
- Using an all-in-one website builder – The simplest option. These website builders come with hosting included. All you need to do is develop your site with intuitive and easy-to-use tools. Perfect if you don’t want to deal with anything technical.
- Using a local server – You may also purchase your own server and run it from home. This offers the most control, but it’s an option reserved for only the most advanced users.
I’ll be covering each method in detail, from start to finish. Feel free to jump straight to your preferred method with the links above, or keep reading to see which one best fits your needs.
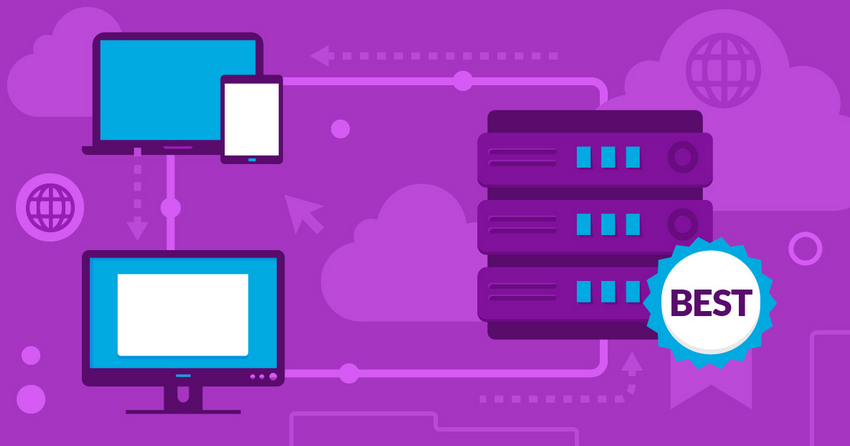
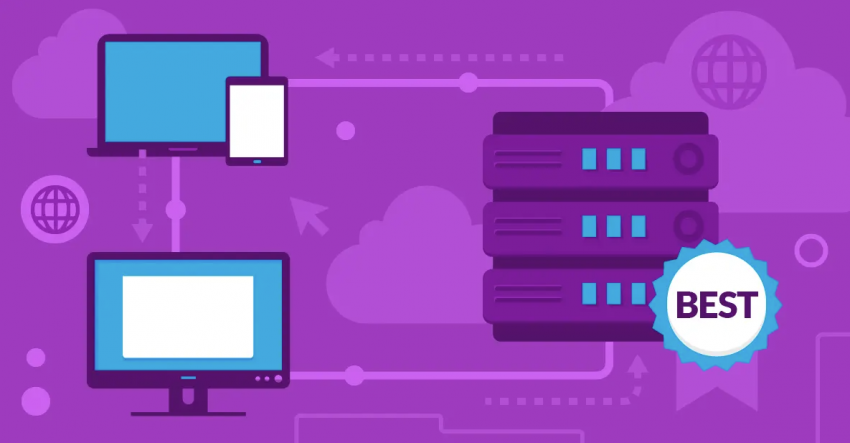
Method #1 – Using a Web Hosting Service
In order to be found on the web, you’ll need to get hosting. If your site is not hosted on a server that’s connected to the internet, no one will be able to reach it. This is where web hosting companies come in. They provide the hosting for your site so that it can be viewed online, in exchange for a recurring fee.
Web hosting services offer a good balance between flexibility and ease of use. Many web hosts offer simple ways for beginners to get started, while providing a great amount of freedom to more advanced users.
To get started with this method, you’ll need to find a good web host that fits your needs. You’ll also need a domain name that serves as an internet address for your website. Here’s how to get both.
Step #1 – Choose the Right Type of Hosting
First, you’ll need to decide what type of web hosting you need. Many web hosts offer multiple types of hosting, which can differ on features, performance, and usability. Here are the most common types:
- Shared hosting – This is the cheapest option. Your website will share a single server with many other sites.
- Managed WordPress – WordPress is a popular way to build websites. With managed WordPress, the web host will offer extra features that make WordPress easier to work with, as well as provide general housekeeping like automatic software updates and site backups.
- VPS – A Virtual Private Server (VPS) allocates a portion of a server just for your site. And unlike shared hosting, you’ll receive a guaranteed amount of dedicated processing power.
- Dedicated server – If you go with a dedicated server, your site will get an entire server to itself. This is the most powerful and expensive option.
For beginners, I’d recommend either shared hosting or managed WordPress. A VPS or a dedicated server is overkill at this early stage, and they both require some technical know-how to operate.
If you’re on a budget, shared hosting is likely your best bet. It can run into a few problems with reliable performance, but it’s certainly the cheapest way to get started. And many hosts offer some great beginner-friendly features to help you along.
On the other hand, WordPress is a powerful content management system (CMS) that can be used to develop, manage, and organize your site efficiently, while also offering a ton of flexibility. The big drawback is that it can be difficult for beginners to use and maintain.
Managed WordPress plans seek to simplify the use of WordPress. The host will install WordPress for you, keep it updated, and provide powerful tools and features that can give you a real head start.
Step #2 – Pick a Good Web Hosting Service
Your choice of web host is incredibly important. After all, not every web hosting service out there is going to be good. If you choose poorly, you could end up paying a lot for slow and unreliable hosting.
Of course, every host sounds great on paper – that’s what their marketing teams are for. To find out whether a host is actually good, you need to go ahead and test it. That’s where Website Planet comes in. We’re constantly testing web hosts to give you the impartial information you need to make an informed decision. Here are some of our top picks.

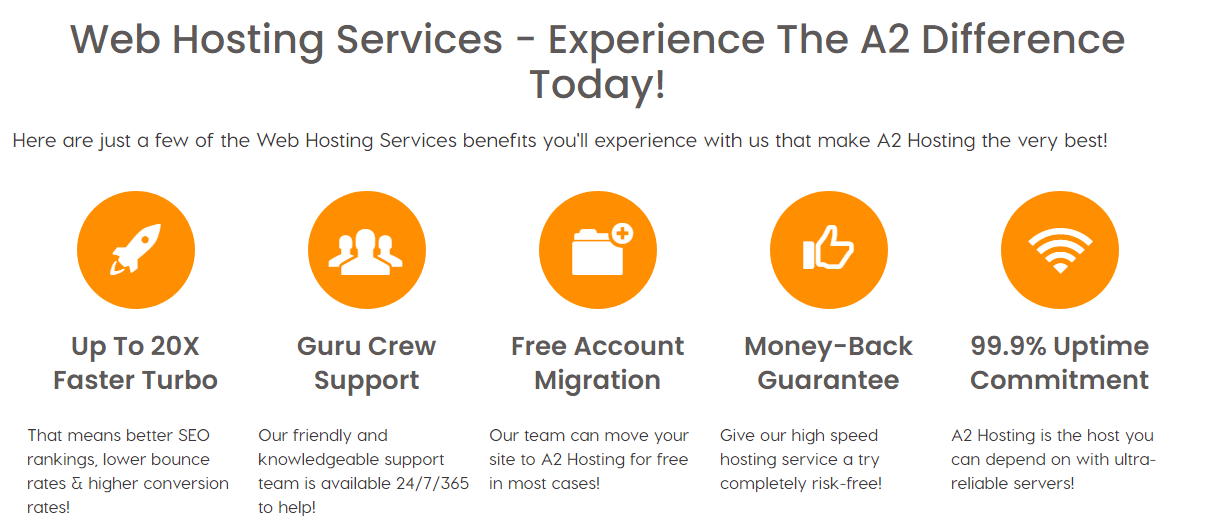
Hostinger is our top-rated host. Why? Because it offers some of the best speeds and reliability I’ve ever seen from a shared hosting provider, all at a low price. This makes it a great choice for beginners – it’s an affordable and simple place to start, but you don’t lose out on performance or features.
Features
- Managed WordPress included. Shared hosting plans include a managed WordPress service at no extra cost. You also get a free plugin that automatically optimizes WordPress for the best speeds.
- Responsive control panel. Hostinger’s control panel features a user-friendly interface that’s simple to navigate. Managing your hosting and website is a breeze.
- Easy-to-follow tutorials and guides. Hostinger offers a ton of tutorials and guides for beginners. They’ll teach you how to use the control panel, develop your site, perfect your SEO, and other basics.
Hosting.com – Perfect Uptime with a Flexible Refund Policy
I tested Hosting.com for over two months, and during this time, my test site didn’t record a single instance of downtime. And while Hosting.com is slightly slower than Hostinger, it’s still speedier than a lot of hosts out there.
Hosting.com also features a unique refund policy. You can cancel at any time to receive a prorated refund for the remaining time on your contract – no other host offers this.
Features
- Lots of storage. Hosting.com provides 100GB storage space for its basic plan, which is more than enough to host an online store with large media files, for instance. Most other budget hosts offer much less space.
- Robust security. You’ll be protected against malware, spam, and all popular forms of web attack. All of this security comes at no extra cost.
- Plenty of room to scale. Hosting.com can easily accommodate a growing site. You can upgrade your hosting plan without any downtime. If you get super popular, you can even move up to a VPS or a dedicated server.
InMotion Hosting – Easy Site Development with Free Advertising Credits
InMotion Hosting makes website building a breeze. It provides a free site builder called BoldGrid, which allows you to create a professional WordPress site with simple drag-and-drop editing.
Even better, InMotion Hosting provides $150 in free advertising credits with every plan, which can be a nice boost in outreach for a new site.
Features
- 90-day money-back guarantee. InMotion’s money-back guarantee is three times the industry average. This gives you plenty of time to test the service without risk.
- Website building service. By paying a one-time fee, InMotion’s experts will build a single-page WordPress site for you, tailored to your exact needs. It will be designed to be responsive on both desktop and mobile.
- Supports two websites. If you’re looking to run multiple websites, InMotion Hosting is the only host on this list that supports more than a single site on its basic plan.
FastComet – Helpful Support with Powerful Features
FastComet provides hands-on support that’s great for beginners. While many other hosts will just direct you to some vaguely relevant documentation, the FastComet support team will do their best to fix any issues for you, no matter how technical.
It’s also the only host in this list that can provide good speeds in Asia and Oceania.
Features
- Automatic daily backups. If you don’t backup your site, you run the risk of losing your data to random hardware failure. FastComet automatically backs up your data every day, so you don’t need to worry.
- Preconfigured firewall. FastComet handles security for you, using a robust ModSecurity firewall that’s already configured and ready to go. All you need to do is enable it.
- Email deliverability. If you send email from a shared server, there’s a large chance your email will be flagged as spam. FastComet’s Email Deliverability tool is available to deter spam filters from marking your email address as bogus.
Here’s a recap of my top web hosting picks and what they offer on their basic plans.
| SSD Storage | Email Addresses | Money-Back Guarantee | Starting Price | ||
|---|---|---|---|---|---|
| Hostinger | 30GB | 1 | 30 days | $2.49 | |
| Hosting.com | 100GB | Unlimited | 30 days | $1.99 | |
| InMotion Hosting | 100GB | 10 | 90 days | $2.29 | |
| FastComet | 15GB | Unlimited | 45 days | $1.79 |
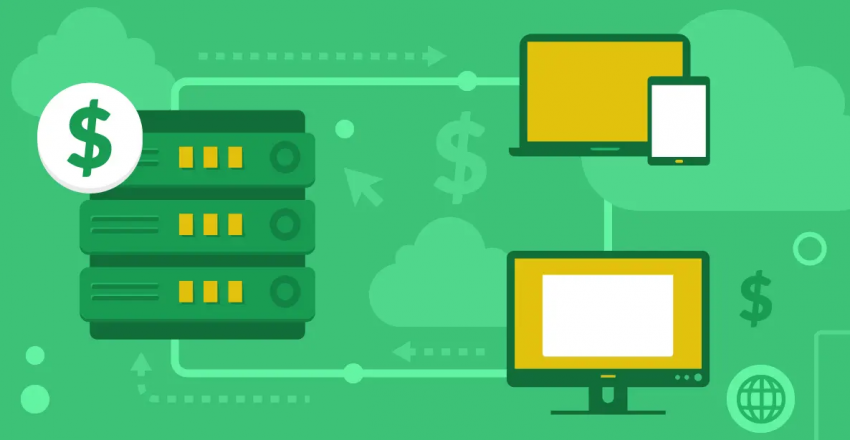
Step #3 – Buy the Right Web Hosting Plan
Got a good idea of what web host you’d like to try? The next step is to pick a hosting plan. Nearly every host offers multiple hosting plans that vary on available resources, features, security, and more. The plan that’s right for you depends on your exact needs.
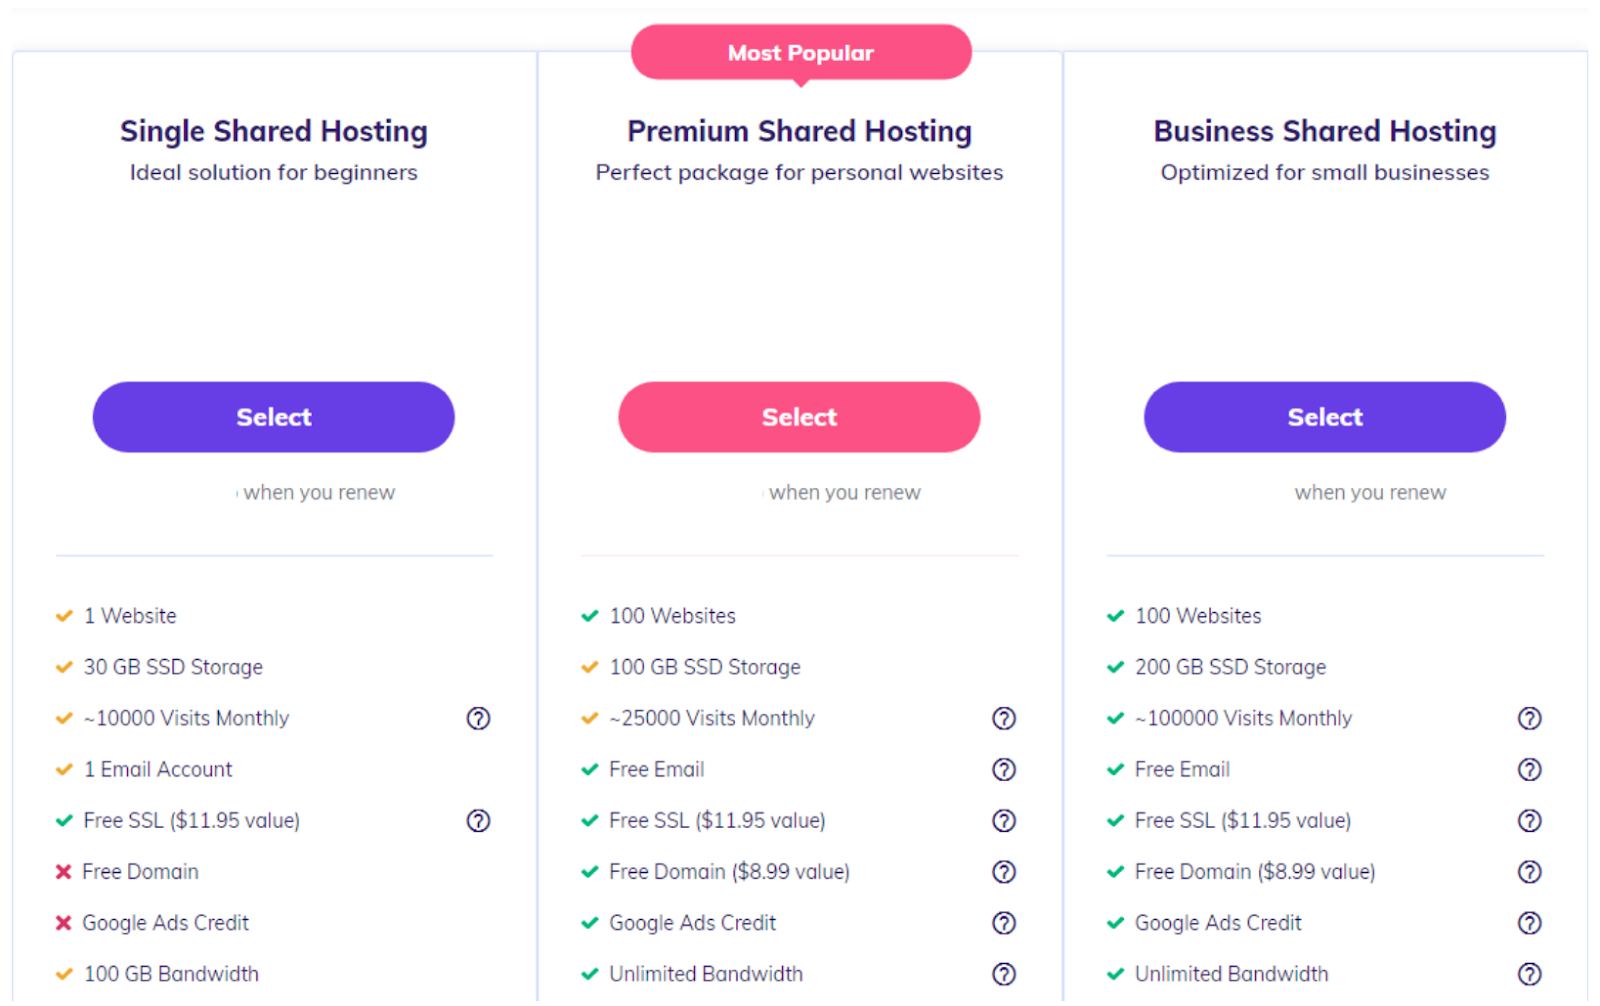
For example, take a look at Hostinger’s plans. The Premium Shared Hosting plan is the most popular, but if you’re just looking to run a simple personal site, do you really need support for 100 websites and 25,000 monthly visits? The Single Hosting plan has more than enough resources and features to support such a basic site.
However, if you were looking to run an online business, such as an online store, the Business Shared Hosting plan may be a much better deal. You have more storage space to play with, along with a Google Ads Credit to boost your site’s discoverability.
Let’s look at another scenario. Say you’re looking to run a lot of small sites – this narrows your potential options because many hosting plans only support a limited number of websites per plan. In this case, something like InterServer’s Standard plan would make a great choice, as it’s one of the few entry-level plans that can support an unlimited number of websites.
If you’re unsure what kind of hosting plan you should go for, it’s best to start with the cheapest plan and upgrade if you need to. Hosts always make it easy to upgrade your hosting plan – after all, that’s what they ultimately want you to do. Staring with the cheapest plan helps you to avoid shelling out for a high-tier plan you may not need.
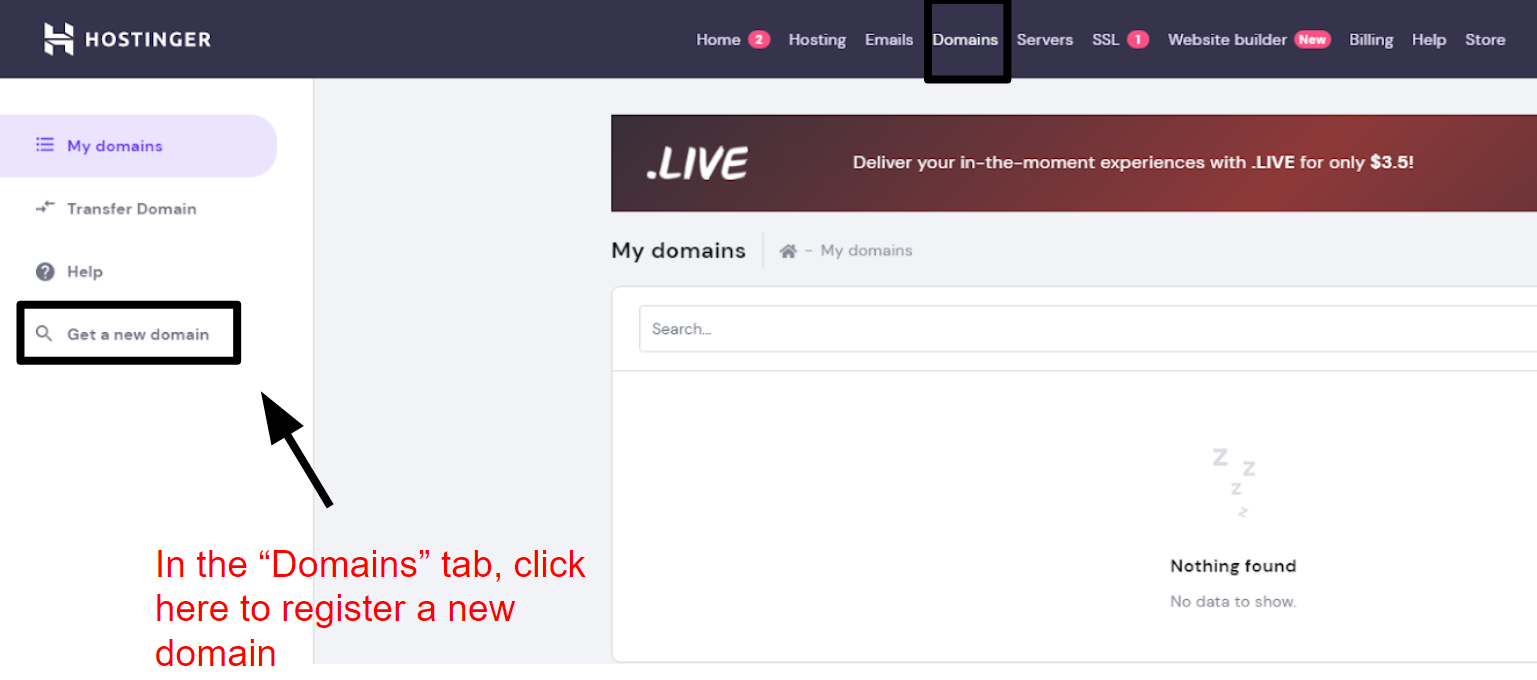
Step #4 – Buy a Domain
Now that you have your hosting sorted out, the next step is to purchase a domain. Luckily, getting a domain is usually a much simpler affair, especially if you go with the right host.
To put it simply, a domain is the internet address of your website, like “websiteplanet.com,” for example. You usually need to pay an annual fee to reserve a domain for your website – however, many hosts will cover the cost for the first year as an extra bonus for new customers.
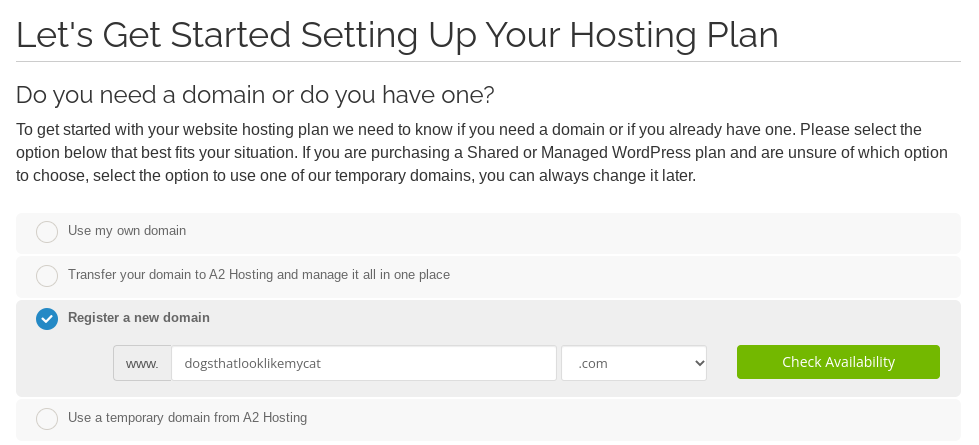
When you purchase a hosting plan, you’ll usually be asked to register a new domain as part of the checkout process. If you haven’t thought up a great name for your site yet, no worries! Many hosts will allow you to add one later.
Step #5 – Log Into Your Control Panel
To begin building your site, you’ll first need to log in to your account to access your control panel. This is an interface that provides plenty of useful tools to manage and design your site. You can create email accounts, view visitor traffic, install apps, and a whole lot more.
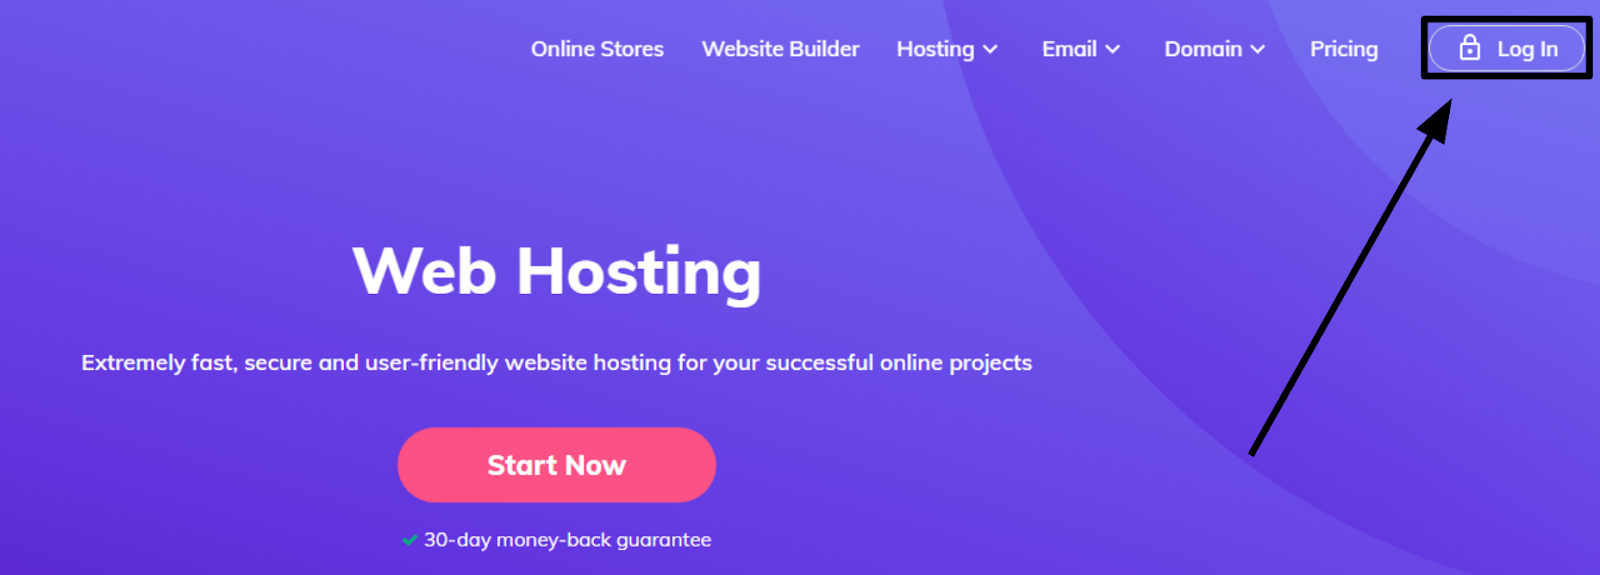
Most hosts have a login button on the home page of their site. Click it and enter your account information.
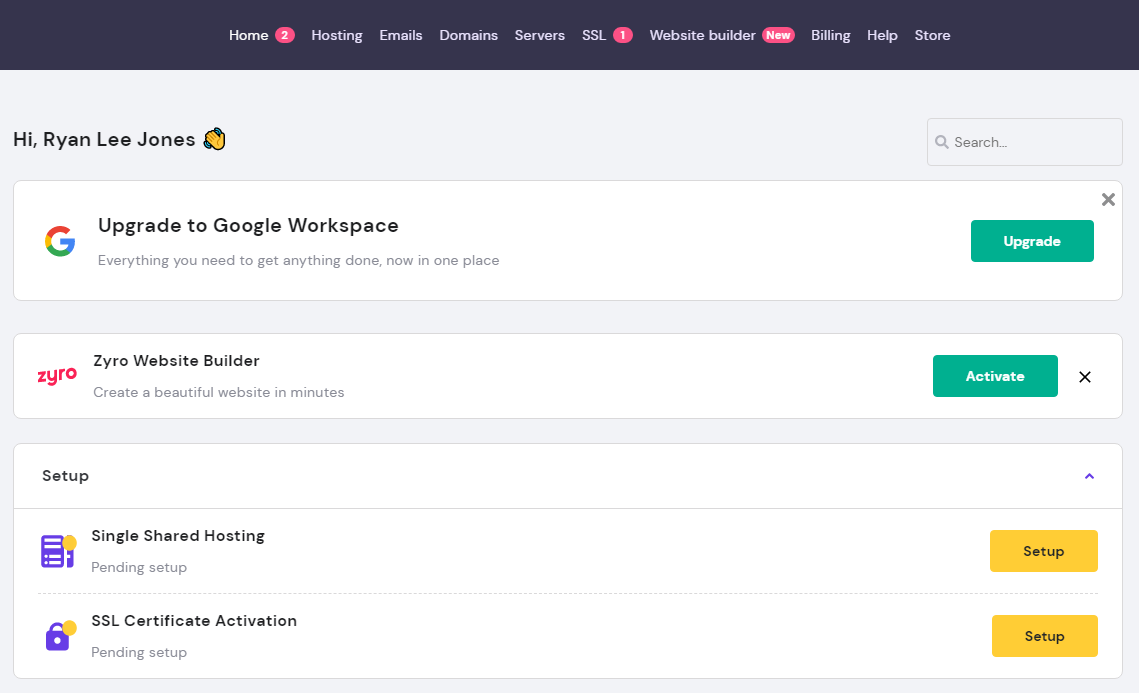
This will bring you to your hosting dashboard. This is primarily used to manage your hosting account – it’s where you’ll see your billing information, contact support, or upgrade your hosting plan. In Hostinger’s case, the hosting dashboard and control panel are one and the same, simplifying things significantly.

With most other hosts, you’ll have to take an extra step to reach your control panel. Within the hosting dashboard, there should be a button that will automatically log you in to the control panel. This should be prominently displayed on the main page, unless they hired a particularly terrible UX designer.
It’s important to note that you may be unable to log in to your control panel if you haven’t registered a domain. Again, you should be able to do this easily through the hosting dashboard.
Step #6 – Install WordPress (Or Another CMS)
Once you’re logged in to the control panel, you’ll need to install a content management system (CMS). A CMS allows you to easily build and manage your site, often with little to no coding required. It’s like a site builder, but it offers more flexibility and functionality.
There are multiple CMSs out there, but I’d recommend choosing WordPress. Because it’s one of the most popular options out there, it receives a great deal of support from website hosts.
The majority of hosts offer one-click installations of WordPress from the control panel. As an example, Hostinger’s control panel features an Auto Installer, which can be used to easily install WordPress for your site. Here’s how!
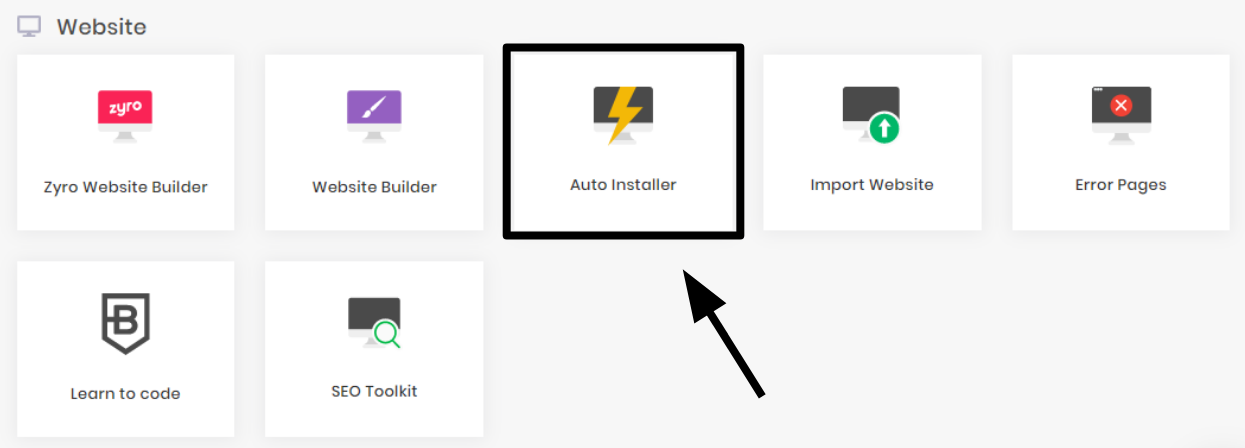
First, locate the Auto Installer in the Website section of the control panel. After selecting the Auto Installer, you’ll see a list of different apps and CMSs that you can install. WordPress should be displayed in the Most Popular category.

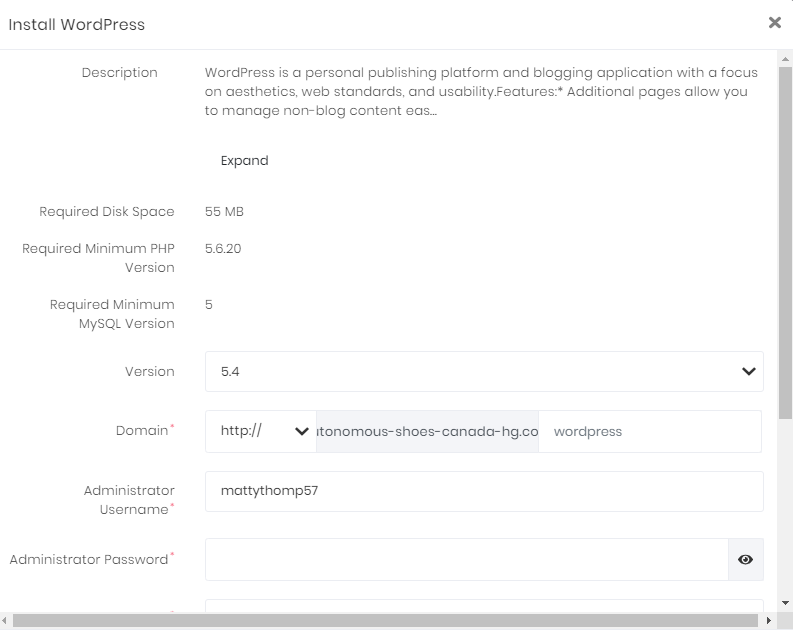
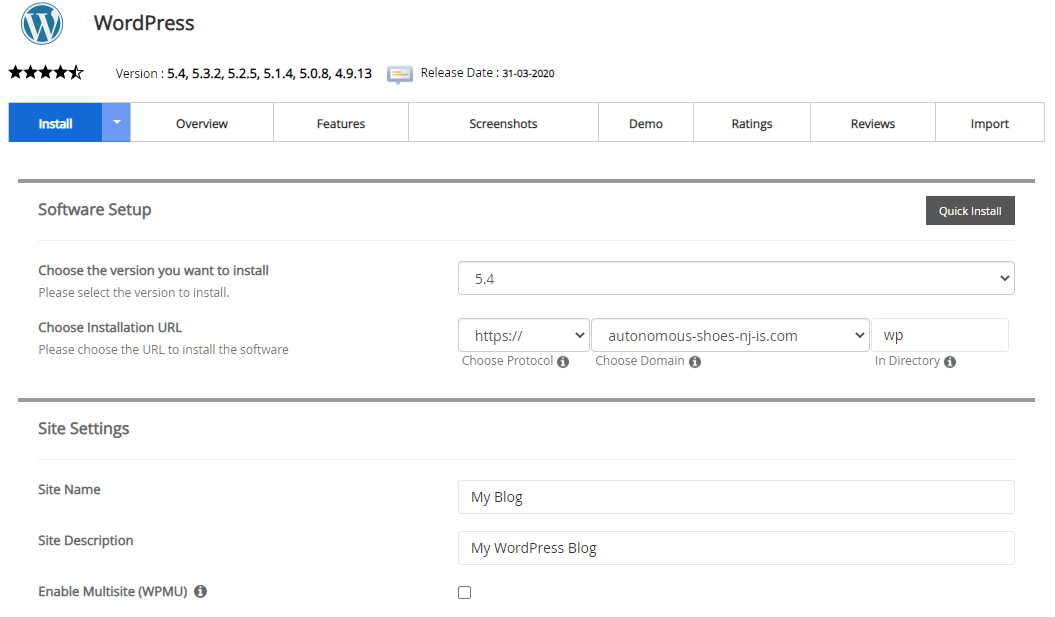
Next, you’ll just need to enter some basic information, including which version of WordPress you want to install. Always choose the latest stable version – it will offer up-to-date security and features. You’ll also have to enter the domain of the site you’d like to use WordPress for.
Finally, you just need to enter your account details and hit “Install.” The entire process should only take a few minutes.
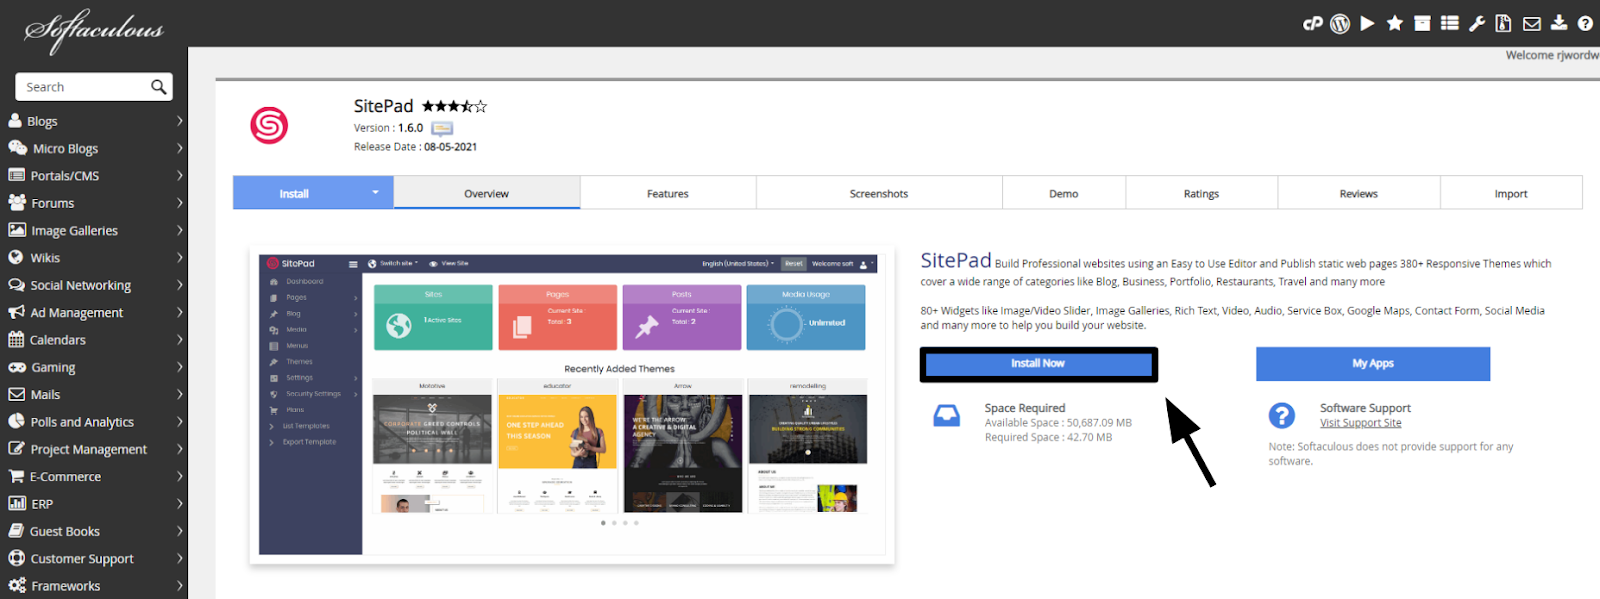
If you’re using a different host, don’t worry – the process is very similar. cPanel is a popular control panel that’s used by many other hosts, which often comes with its own app installer called Softaculous.

Opening Softaculous will bring up a new interface. There are hundreds of apps here, all of which can be installed in just a few clicks. Again, WordPress should be right on the main page as one of the top apps.
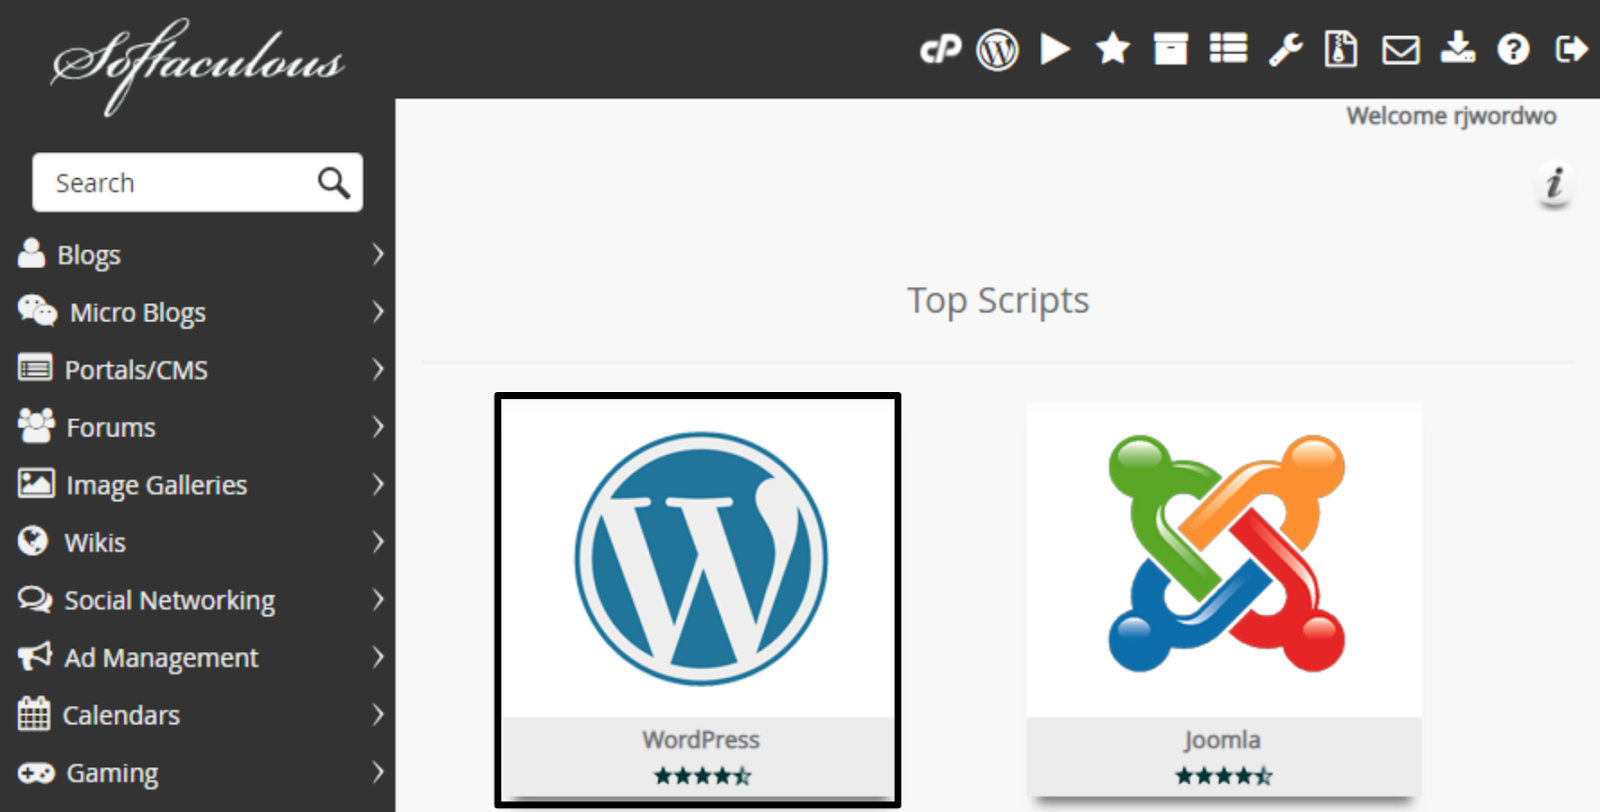
Once you’ve clicked the WordPress icon, followed by the “Install Now” button, you’ll be redirected to a settings screen. Like Hostinger’s app installer, all you need to do is select a version, enter your domain, and provide some other basic information.
And there you go! WordPress should be successfully installed. Keep in mind that some hosts provide a site builder that can be easier to use than WordPress. For example, InterServer offers SitePad, an easy-to-use drag-and-drop builder that can be used to design your site.
If you go with SitePad, you’ll need to install it through your host’s auto installer. InterServer lets you easily install SitePad through Softaculous – it’s the exact same process you’d use to install WordPress.
Step #7 – Build Your Website
Now that you have WordPress installed, you can use it to start building your website. To do this, you’ll need to log in to your WordPress dashboard. It can sometimes be a little confusing to locate the website address of the login page, but your web host will usually include a link in the control panel.
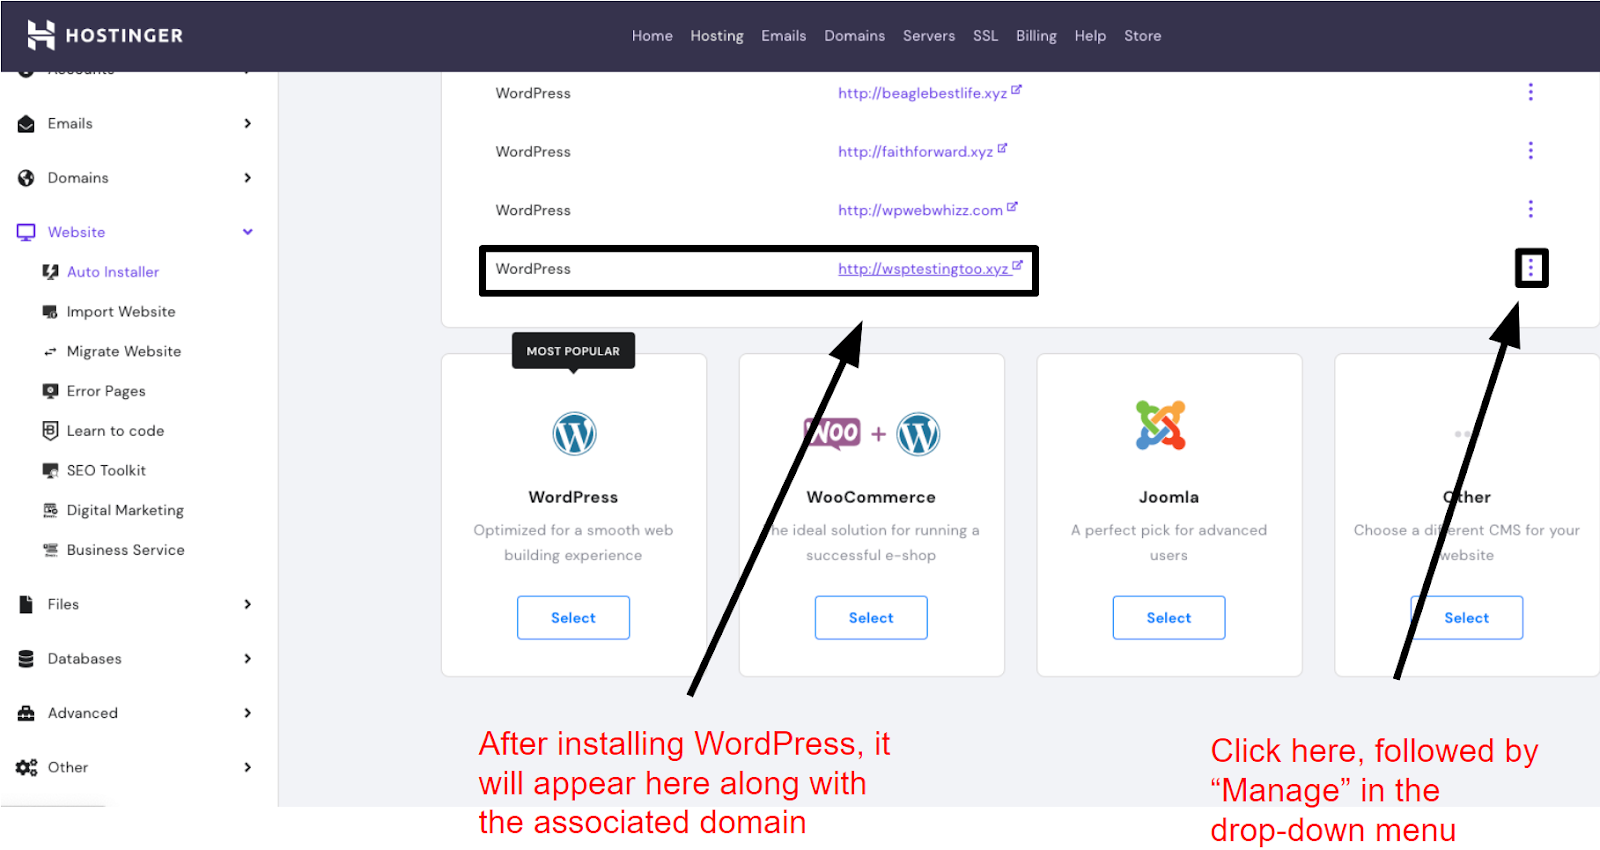
For example, Hostinger displays a list of your installed apps on the Hosting tab, under the Website menu. WordPress can be found here, linked to the domain you installed it to. By clicking the three dots, followed by “Manage,” you’ll find the link to your WordPress dashboard.
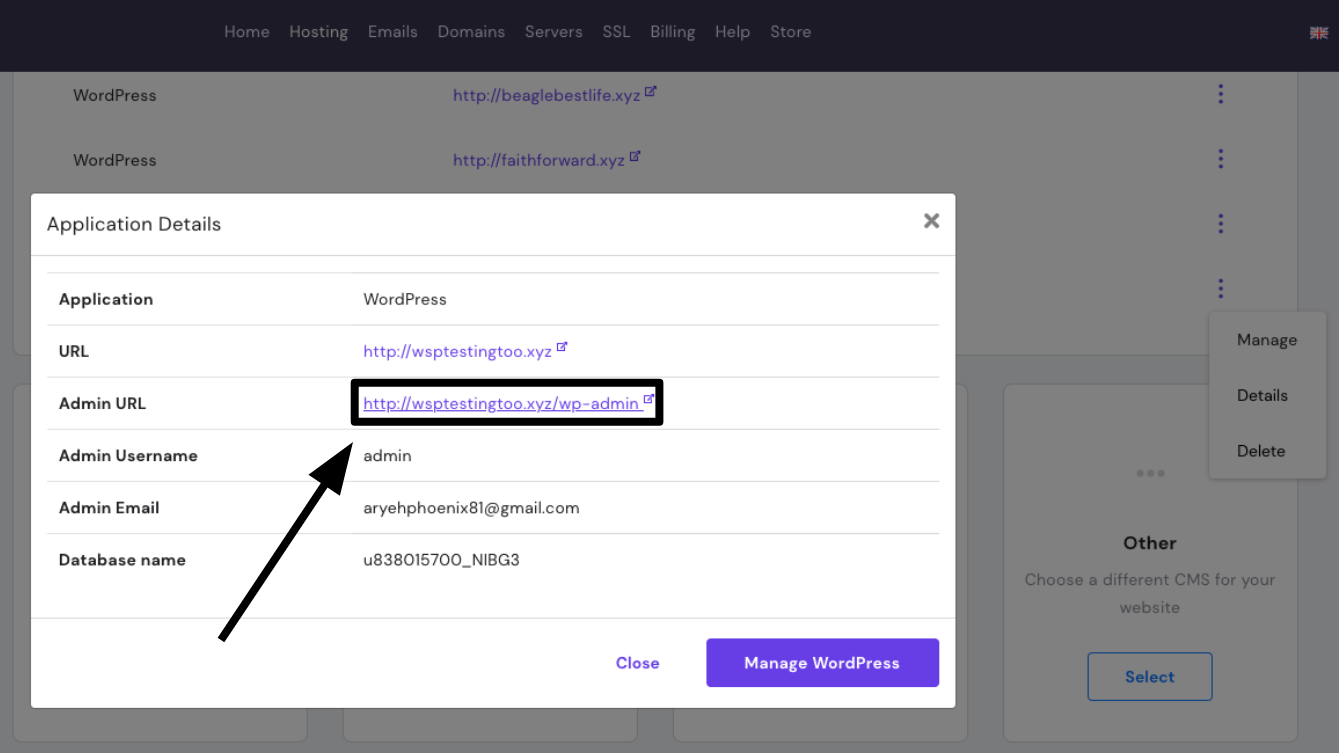
Once you’ve located the login page, it can be helpful to add a bookmark to your web browser for easy access. Enter your account information as usual and you’ll be taken to the WordPress dashboard.
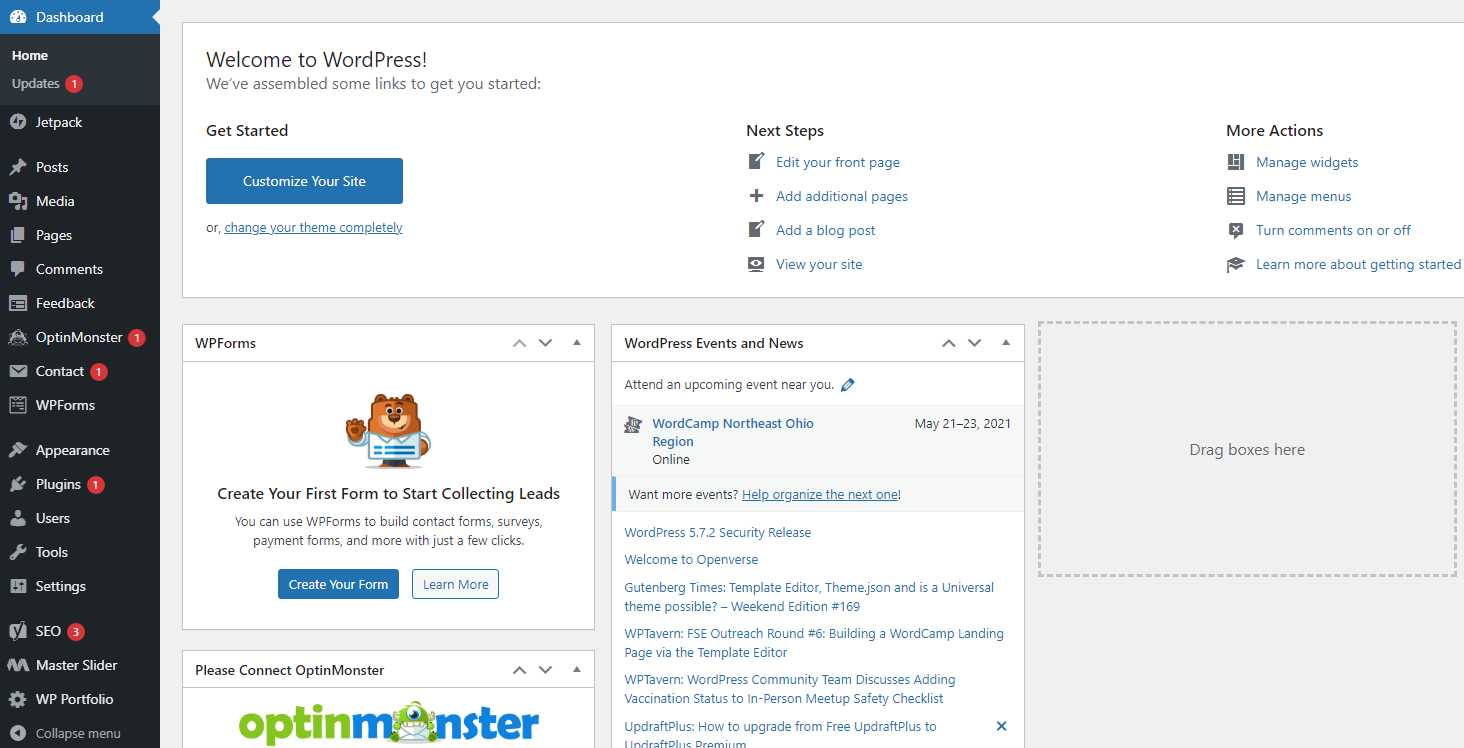
From the dashboard, you’ll be able to select a theme for your WordPress site, begin adding pages, and even write a few blog posts.
But if you find that you’re struggling to create your site with WordPress, it may be worthwhile to install a popular page builder plugin like Elementor or Divi. These add simple drag-and-drop editors straight into WordPress.
Step #8 – Optimize Your Website and Hosting (Optional)
Shared hosting plans feature limited resources. For simple sites, this isn’t a problem – however, as your site grows and gains traffic, you may begin to hit the limits of your resources. This can slow down your site and severely impact your visitors’ experience.
You may be tempted to upgrade your hosting plan, but you may not need to. With a little bit of optimization, you may be able to speed up your site significantly. Here’s how:
- Optimizing images – Optimizing your images can offer a sizable speed boost and free up storage space. The idea is to lower the file sizes of your images while still maintaining acceptable quality. If you’re using WordPress, you can use free image optimization plugins like Imagify to do this automatically. (We also have a pretty nifty image optimizer, too.)
- Caching – Loading a full web page from scratch can take a while, even for a simple site. By saving some or all of your website’s content on the server, it can be instantly delivered to every new visitor without having to constantly load it from scratch. Again, WordPress plugins can be used to achieve this – WP Fastest Cache will get the job done for free.
- Embed your videos – Videos take up a lot of space. If you’re uploading them directly to your site, you’ll quickly hit storage limits. Instead, you should host your videos elsewhere. For example, if you’re using WordPress, you could upload your video to YouTube and link the video, which will be automatically embedded on your site.
- Use a Content Delivery Network (CDN) – You may find that international visitors are experiencing slow speeds. A CDN fixes this issue by delivering your cached content to servers throughout the world. Faraway visitors can then quickly access your site from a much closer server. A free CDN is often included with many hosting plans.
Pro Tip: Managed WordPress Options for Fuss-Free Website Hosting
WordPress can be used to make any kind of site you can imagine – but for beginners, there’s a rather steep learning curve. A good managed WordPress plan will simplify many aspects of the CMS, from performance to security.
Here are our top host recommendations for managed WordPress:
- Kinsta – Phenomenal speed and advanced WordPress management features like theme management and expert support
- Hosting.com – Highly optimized WordPress installation with a generous refund policy
- InMotion Hosting – Powerful marketing tools and an extremely beginner-friendly WordPress page builder
Method #2 – Using an All-in-One Website Builder
Site builders are the easiest and fastest way to build a website because they offer an all-in-one package. Hosting is included and managed for you, and all you need to do is create your site. Just pick a site template, customize it to fit your own needs, and then you’re good to go!
If you want a nice-looking site up in no time, site builders are probably the ideal option. Here’s how you can use a site builder to create a website and get it online.
Step #1 – Choose a Good Website Builder
A lot depends on your choice of site builder. The number and quality of templates on offer can vary significantly from builder to builder. And while some allow you to heavily customize templates, others are much more rigid. Additionally, you still need to make sure the site builder can offer your site good speeds and reliability.
We constantly test hundreds of site builders without bias, so we can definitively tell you which ones are worth your time. Here’s what we recommend.
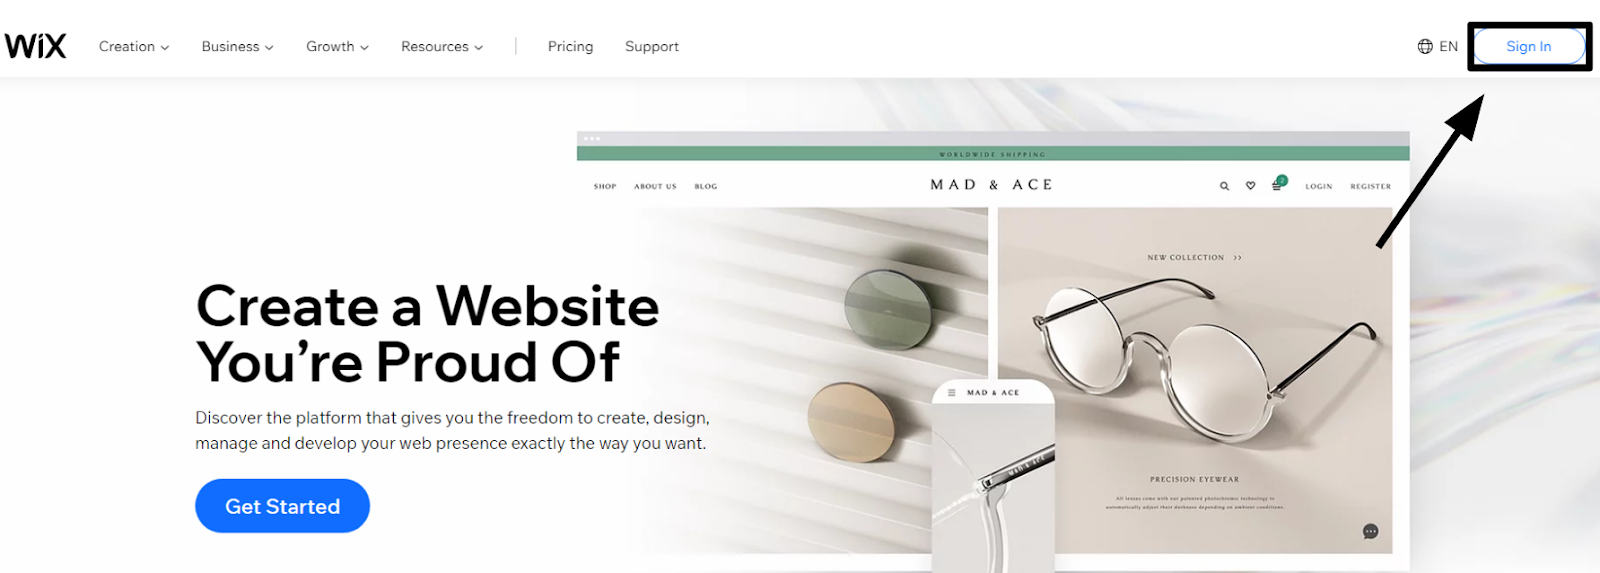
Wix – Huge Number of Professional Templates With a Forever Free Plan

Wix offers over 500 professional templates – hundreds more than the majority of other site builders. The best part is that every template is fully customizable.
Wix also features a forever free plan with no limits to the number of pages you can create. You can’t use your own domain or sell online, but other than that, you’re mostly free to do as you please.
Features
- Free placement of elements. You aren’t forced to adhere to a rigid grid – Wix allows you to freely place site elements wherever you choose. If you have a good eye for design, there’s plenty you can do with it.
- Wix App Market. There are over 250 apps available in the Wix App Market, which can help expand the functionality of your site. Many of these apps also feature useful integrations with third-party tools and social media, such as Google Ads and Twitter.
- Robust SEO tools. Every plan has access to the Wix SEO Wiz, which helps to optimize your site for search engines. It will provide a step-by-step guide with all the information you need to get a leg up on the competition.
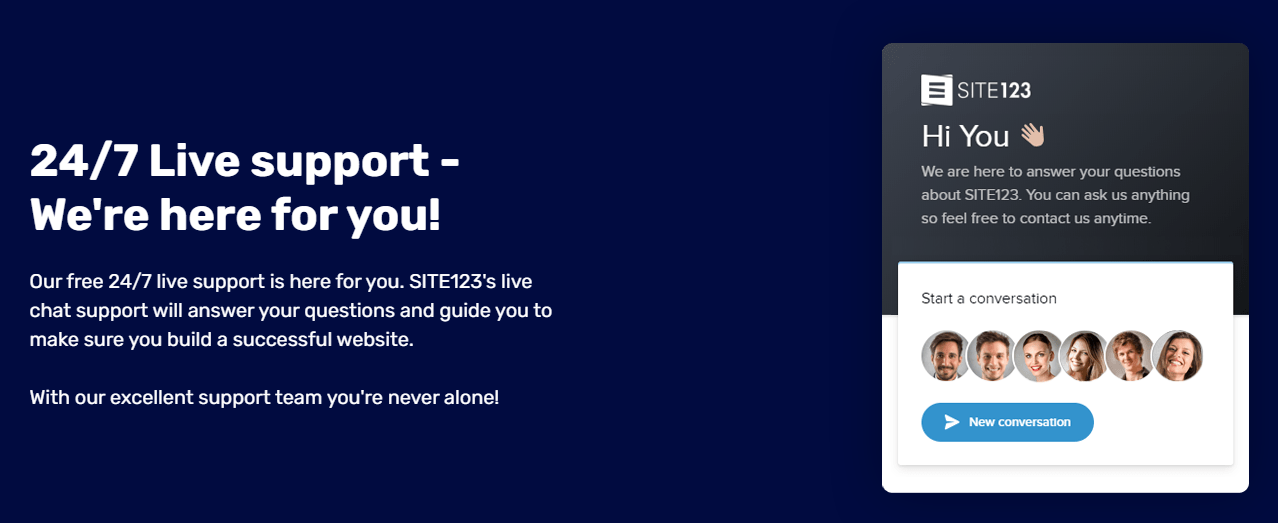
SITE123 – Easy Site Design and Great Live Chat Support
Instead of a drag-and-drop editor, SITE123 uses simple “point-and-click” editing. If there’s an element you’d like to customize, you can just select it and edit the design. There’s no free placement of elements, but this ensures that everything stays aligned.
SITE123 also features responsive live-chat support. I’ve always received quality help from these guys.
Features
- High number of mobile-responsive templates. Every template is designed to be fully responsive on both mobile and desktop.
- Flexible plans for ecommerce sites. While you need a premium plan to sell online, you’ll be able to have unlimited products and customer orders on the Professional and Gold plans. SITE123 also doesn’t take any sales commission.
- Multilingual support. SITE123’s paid plans allow you to display your site in multiple languages. These translations can be performed automatically, or you can do it yourself.
Squarespace – Well-Designed Templates With Impressive Features for Online Stores
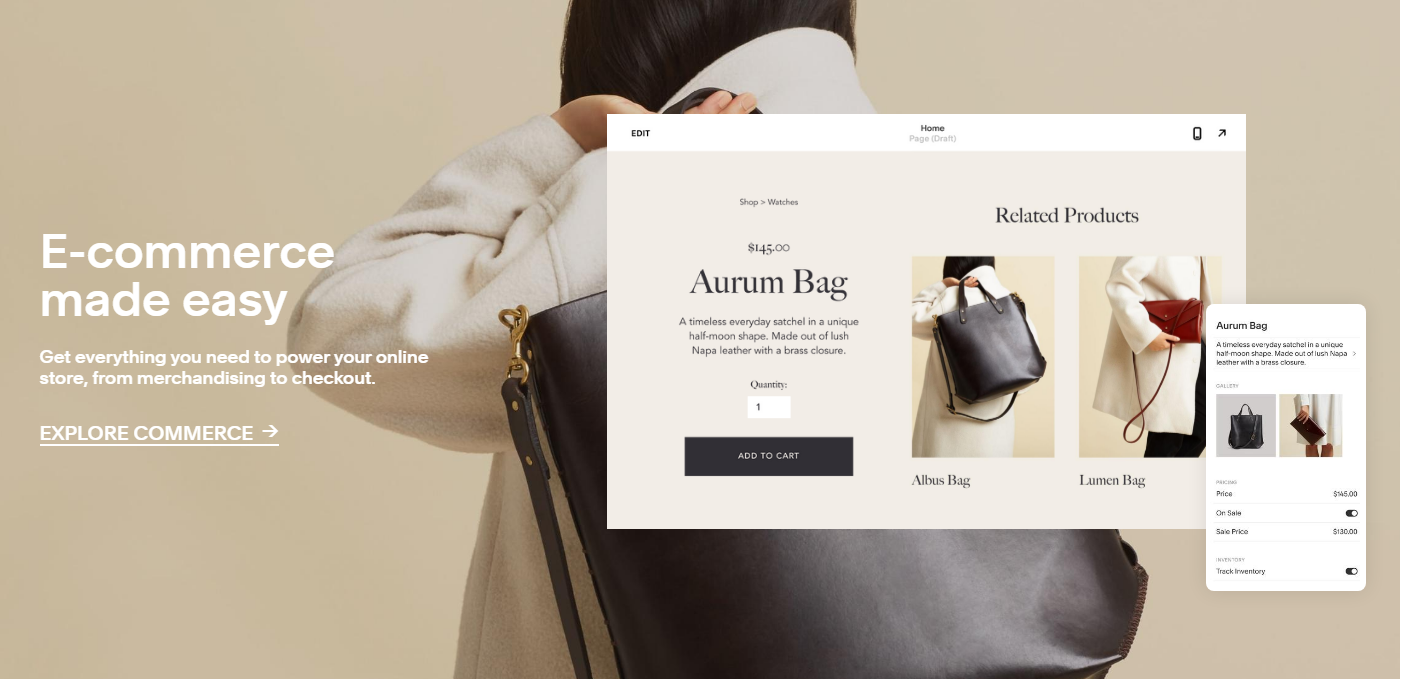
Squarespace features some beautiful templates, and they’re all highly customizable. You can even rebuild a template from the ground up if you wish. However, the real value lies in Squarespace’s ecommerce features. These features include automatic shipping fee and tax calculations, social media integrations, creating discounts codes, and more.
Features
- Free logo maker. Squarespace includes a free logo designer. It features over two million customizable icons that can be used to create a nice-looking logo for your site and/or business.
- User-friendly blog editor. Unlike other site builders, you can write blog posts directly onto the page itself, without the need for a separate editor. This allows you to see how the final post will look in real-time.
- Plenty of app integrations. Squarespace features integrations with tons of third-party apps, including Google Maps, FedEx & UPS, and all popular social media platforms.
WordPress.com – An Intuitive Text Editor With Thousands of Third-Party Plugins

You can also use WordPress without a hosting plan by signing up with WordPress.com (rather than WordPress.org). WordPress.com is essentially a site builder, complete with its own hosting. WordPress.com is well-suited for blogs, featuring a great text editor that’s perfect for crafting aesthetically-pleasing posts.
Features
- Tens of thousands of plugins. With the Business plan and up, you get access to the entire selection of WordPress plugins. They can be used to significantly expand the functionality of your site.
- Scheduling and organization tools. WordPress.com still functions as a content management system, meaning that you can schedule blog posts to be published at any time, and you can easily organize them into categories.
- Forever free plan. WordPress.com offers a forever free plan with 3GB of storage space – much more than you’d get with Wix. As you’d expect, you can’t connect your own domain and you’ll have WordPress.com branding on your site.
| Free Plan? | Number of Templates | Mobile Responsive Templates? | Starting Price | ||
|---|---|---|---|---|---|
| Wix | ✔ | 500+ | ✔ | $17.00 | |
| SITE123 | ✔ | 180+ | ✔ | $12.80 | |
| Squarespace | ✘ | 60+ | ✔ | $16.00 | |
| WordPress.com | ✔ | 250+ | ✔ | $45.00 |
Step #2 – Pick a Suitable Plan
Like web hosts, site builders usually come with a set of plans that differ on features and available resources. Depending on the needs of your site, some plans may work better for you than others.
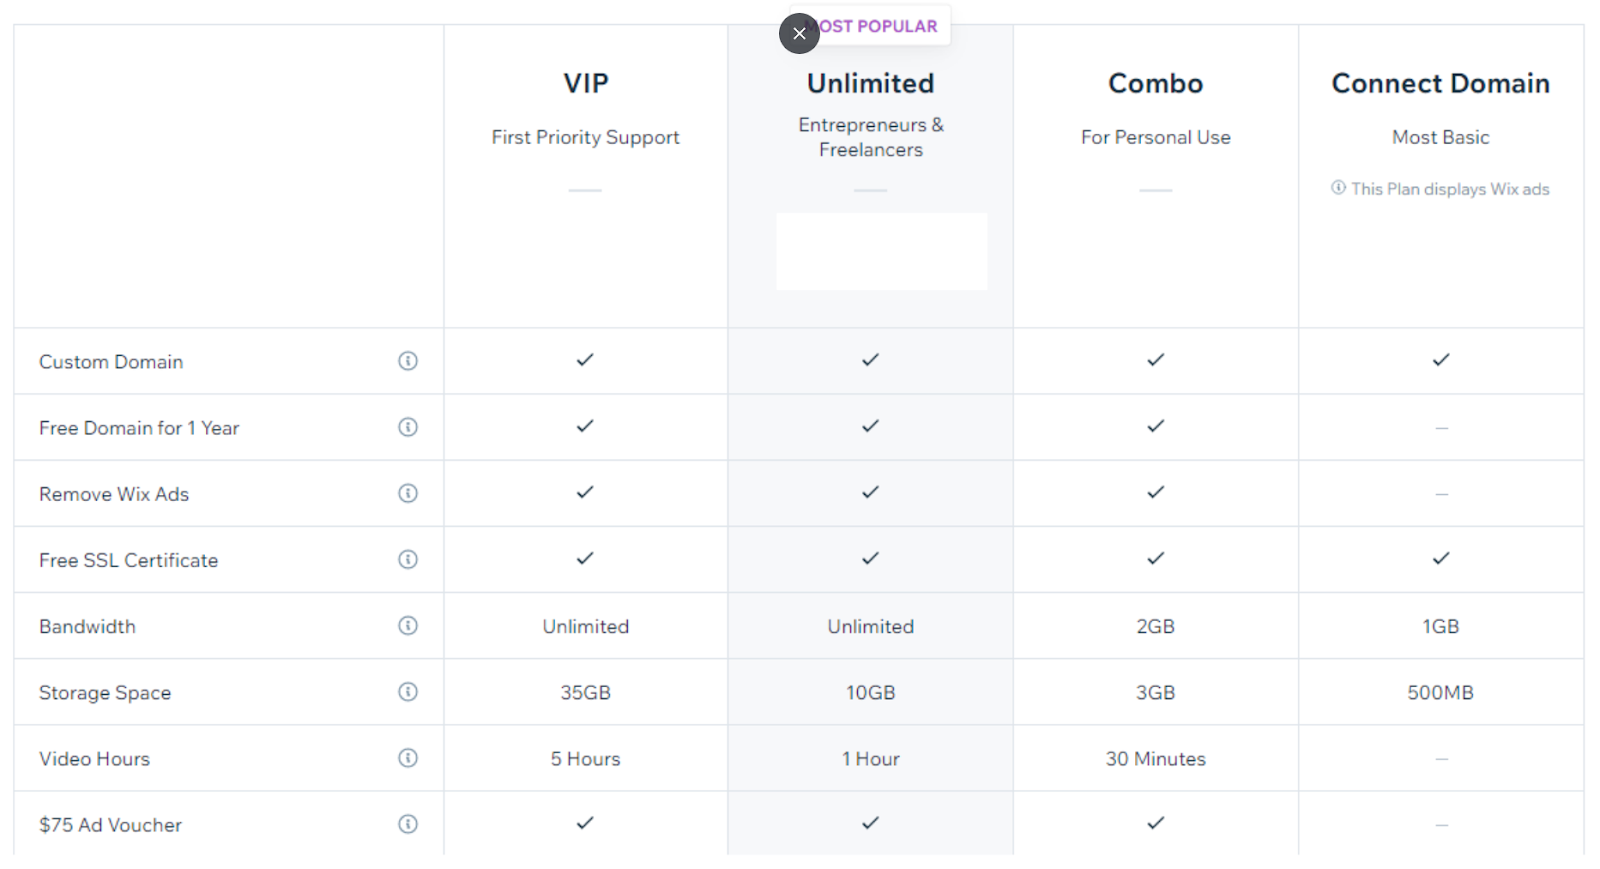
For example, Wix offers four premium plans. If all you want to do is simply connect a custom domain, then the “Connect Domain” plan will let you do just that. However, you’ll have Wix ads placed on your site, and a low number of resources to work with. If you’re looking to run your own brand or business, a higher-tier plan may be more appropriate.
Keep in mind, lots of site builders feature forever free plans, or at least free trials. As every site builder is different, it can be a good idea to make full use of these free plans to see if the builder works for you. You can always upgrade later.
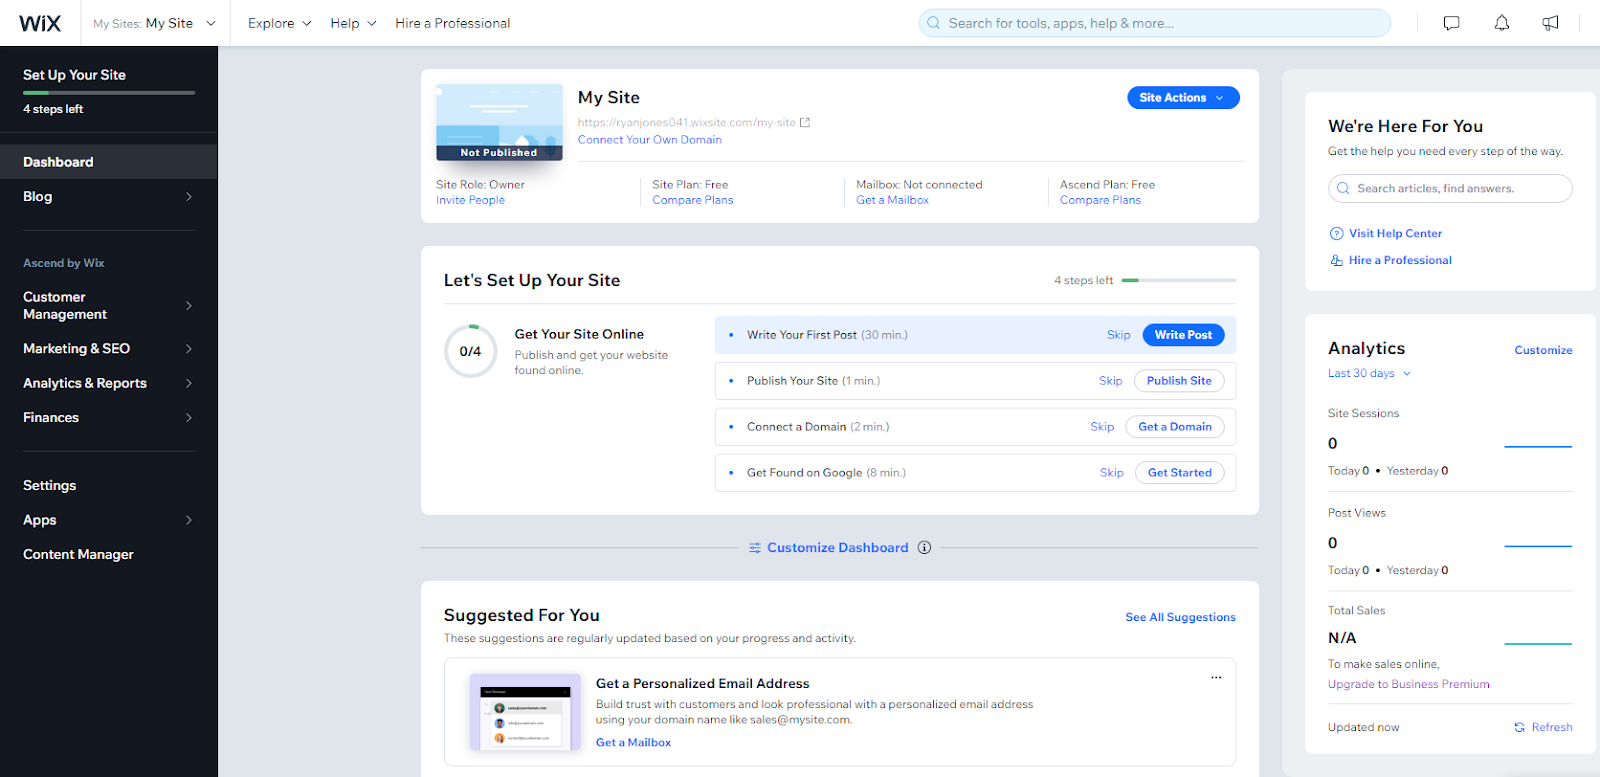
Step #3 – Log In to the Dashboard
After you’ve selected a plan, you should be automatically directed to the site builder’s dashboard to start creating your site. For subsequent logins, you’ll have to manually log yourself in.
Most site builders include a login button right on the home page. Click that and enter your username and password to access your dashboard. It’s really quick and easy – unlike web hosting, you’ll never need to log in to multiple apps.
Step #4 – Pick a Template and Build Your Site
From the dashboard, you’ll be able to begin building your site. First, you should find an appropriate template to serve as a starting point. While some site builders allow you to start from a completely blank slate, customizing a premade template that is tailored to your website’s subject is much easier and will save you a lot of time.
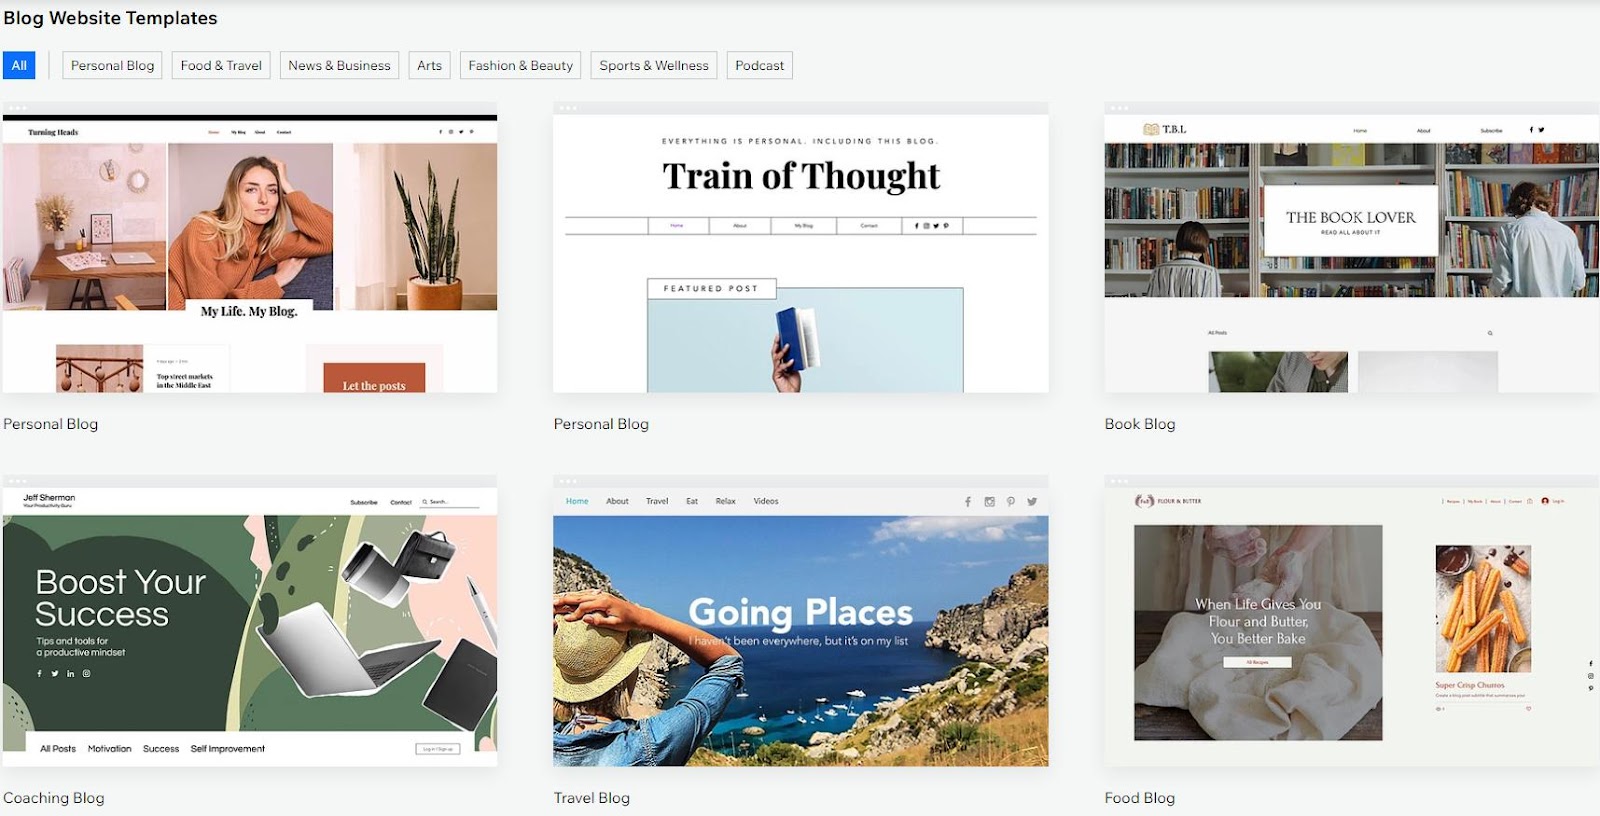
If this is your first time logging in, you should be asked to select your first template. There may be quite a lot from the template library to choose from. Some are focused on personal blogs, while others are targeted to businesses. You can usually make use of filters and categories to narrow down your search.
If you can’t find the perfect fit, don’t worry. You can always change the template to meet your exact needs. At the same time, don’t just pick one at random – changing a template down the road might result in the loss of most or all of your customizations.
Once you’ve picked a template, you’ll be able to begin customizing it to fit your exact needs. If you find yourself running into trouble, take a look at our 10-minute guide on building a website with Wix. Many site builders also offer step-by-step tutorials, and you can always reach out to support if you get stuck.
Step #5 – Connect a Domain (Optional)
Site builders will not offer a custom domain for a free plan. With a free plan, you’ll be forced to have the site builder’s name as part of your domain. This can be fine for personal sites, but for professional sites, you’ll benefit from having your own domain. Your site will appear more trustworthy and it will help with your branding efforts.

Connecting your own domain is usually a simple affair. With Wix, the option lies just under your site information in the dashboard. The option to add a custom domain is usually just as easy to find with other site builders.
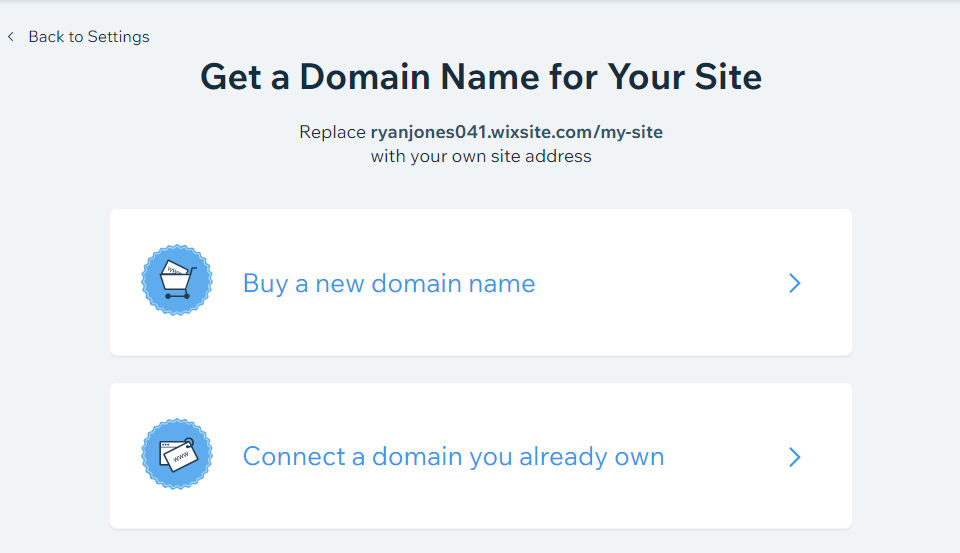
Once you’ve decided to connect your own domain, you’ll be asked to register a new domain or connect an existing one. The easiest option is to just register a domain with your site builder. But you may be able to save money by purchasing a domain using registrars such as NameCheap.
Whatever you decide, connecting a domain is easy. Just enter the domain name you’d like to register or connect and follow the instructions on your screen. Once you’re done, your site should be linked to your custom domain.
Method #3 – Using a Local Server
If you want absolute control over your site’s hosting environment, you may want to run a local server. This is where you set up your own hardware to host your site. This isn’t an option for beginners: running your own server requires a lot of technical knowledge.
It can also get very expensive – very quickly. You’ll have to decide whether the increased layer of control is worth the investment. Read on to find out how to host a site with your very own server.
Step #1 – Choose the Right Hardware
To start, you’ll need some hardware that can work as a server. While it is possible to run a server from your home computer, you aren’t going to get very far without a separate machine with dedicated resources.
If you want to host a simple low-traffic site, you could repurpose a spare computer to work as a server. However, this does come with its own set of problems – the specs of your computer can impact performance heavily, and it can be both loud and unreliable. The easiest option is to purchase a server, but this can carry a high price tag.
Step #2 – Set Up a Web Server
Once you have the appropriate hardware, you’ll need to install a web server. Your options depend on what OS you’ll be running. Most web servers work best with Linux. Apache and NGINX are popular choices.
To install a web server, you’ll need to use the command-line. You can usually find the exact commands you’ll need to execute on the web server’s site.
Step #3 – Buy a Control Panel (Optional)
Using a control panel isn’t an absolute requirement, but it can significantly simplify the day-to-day management of your site. Without it, you would need to utilize the command-line for managing all aspects of your site.
There are many different control panels to choose from, but if you’re using Linux, you can’t go wrong with cPanel. For Windows, Plesk is one of the more popular choices. Keep in mind that control panels aren’t free – you’ll have to pay licensing fees.
Step #4 – Get a Static IP
Next up, you’ll need a static IP. Most ISPs only provide a dynamic IP for regular internet plans, which won’t work for web hosting. Instead, you’ll need to contact your ISP and request a static IP. This will likely require paying extra fees, and you may even need to upgrade your internet plan entirely.
Step #5 – Make Sure You Have Enough Bandwidth
Again, an everyday internet plan will likely prove insufficient for a server. You’ll need much more bandwidth than a residential internet plan normally provides. Contact your ISP to see if you can move up to a special plan that can accommodate your server.
Step #6 – Secure Your Server
A good web host will usually include a security suite for your website. With a local server, that responsibility falls to you. If you have the technical knowledge, you may be able to do this yourself. However, keep in mind that a single vulnerability could result in your server becoming compromised.
If you’re not 100% confident, your best bet will be to purchase and install a third-party security solution. This can add to your server costs significantly, but it can be worth the investment.
Step #7 – Optimize Your Server
To improve your server’s performance, you’ll need to thoroughly optimize it. This includes fine-tuning your databases and web server, along with setting up efficient caching solutions for your content. I’d also recommend trying a CDN – you can set up a free one with Cloudflare. With that, your server should be ready to host your site!
Building Your Site and Beyond
You might still feel a bit overwhelmed about setting up your site, but with this information, you’re now ideally positioned to take the leap and build whatever you’ve envisioned.
Remember, many of the hosts and site builders within this article have plenty of tutorials, guides, and 24/7 support services. If you ever get stuck while building your site, be sure to make use of them.
If you’re still uncertain about where to begin, rest assured! The following site builders and hosts are foolproof choices – it’s simply a matter of selecting the one that aligns with your requirements. Allow me to share my recommendations with you.
For the cheapest option that isn’t too technical, I’d go with Hostinger. You’ll get good performance and flexibility, along with a user-friendly control panel that’s simple for beginners to pick up.
If you’re a complete beginner looking to quickly set up a website, I’d recommend Wix. It features a very flexible and intuitive site editor, along with a forever free plan that you can use to build your site.
Interested in using WordPress? I’d take a look at Kinsta. It’s pretty pricey, but the investment is more than worth it. It’s super easy to use and features some of the best speeds available.