Inside this Article
Step One: Choose Your Hosting Package
MochaHost sells a range of hosting packages, from WordPress plans to dedicated servers and VPS. There’s even a range of shared hosting plans (you can opt for a Linux-based cPanel plan or Windows ASP.net packages), so you have plenty of choices. Be sure to check what’s included. With unlimited disk space and bandwidth, I almost opted for the base Soho plan, but it only comes with one domain and there isn’t a one-click installer, so I decided to go for the slightly pricier Business plan.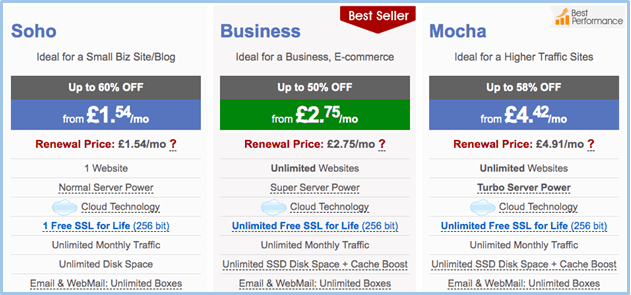
Step Two: Select Your Billing Cycle
There is a range of billing lengths, from one month to three years, with a discount of up to 50% on the lifetime cost for the longest term. In order to test the plan, I opted for the more expensive but lower commitment one-month term.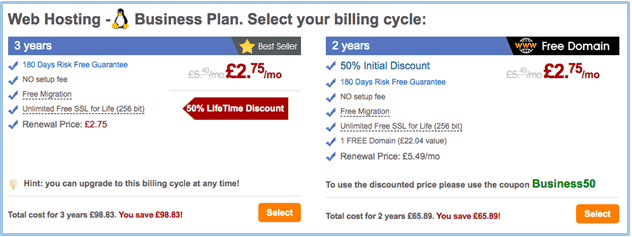
Step Three: Choose Your Domain
The next step offers you the choice to register a new domain (if you opt for one of the two larger packages, you’ll get one free-for-life domain), transfer an existing domain to MochaHost, or use an existing domain without transferring it. I opted for the latter.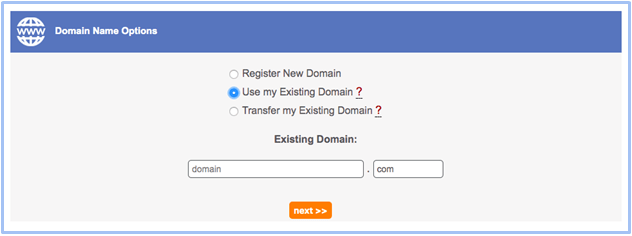
Step Four: Confirm the Details
On the next screen, you’re given the opportunity to check the package details before moving on to purchasing. If everything looks okay, select Calculate Totals.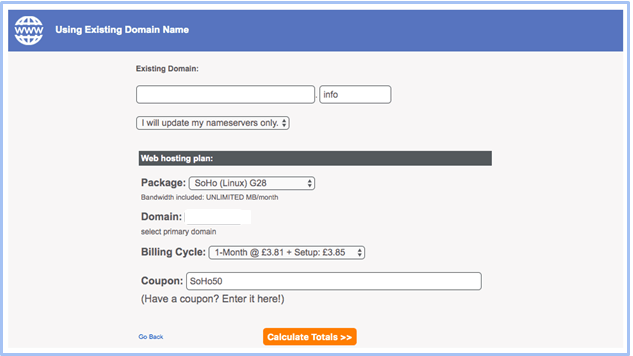
Step Five: Confirm Your Details (Again)
The next page displays the final package prices, and here’s where you find there’s a small setup fee. However, considering the monthly price is so cheap, it’s understandable.
Step Six: Enter Your Personal and Payment Details
The next page is a long form for entering your personal details. It’s nothing overly complex or unusual.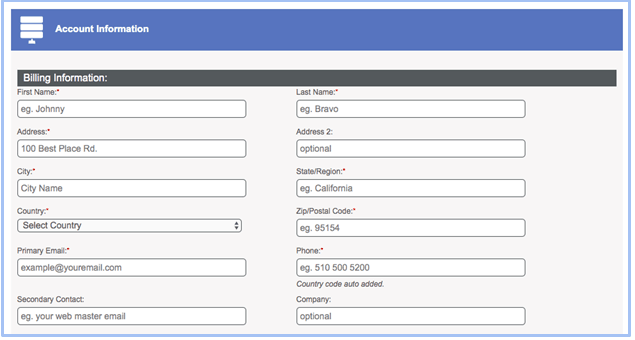
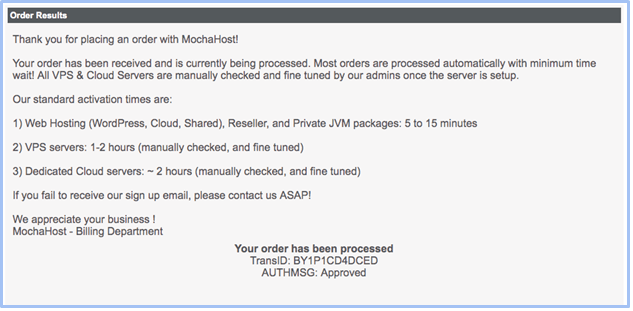
Step Seven: Order Confirmation
After the payment has gone through, you will receive an on-screen notification confirming the success of the order. And that’s it—you’ve successfully and easily created an account with MochaHost.