10 Best Email Marketing Services for Small Businesses in 2026
The most in-depth test of email marketing services ever performed

Email marketing tools often promise more than they can deliver. That’s why we carefully tested every relevant detail of dozens of email marketing services for small businesses. Our methodology involved creating and running several campaigns to evaluate features, ease of use, reliability, and even customer support. From there, we selected the 10 providers that stood out.


A reliable email marketing platform should help you manage campaigns in a way that’s fast, intuitive, and effective at a good value for your investment. The problem is finding the right one for your business – that’s where we come in. After extensive testing of the most popular platforms in the market, we’re happy to present the 10 best email marketing services available today.
For months, we ran real campaigns using dozens of different email marketing services. We took note of everything from deliverability rates and feature offerings to user-friendliness for beginners and the quality of customer support. Of course, we made sure that each service’s overall value justified its price point for small businesses, where every penny counts.
We’ve answered the key questions to help you choose the right service, especially the most important one: Which service is right for you? Let’s find out.
-

- Feature-packed plans for growing businesses
- AI-powered personalized content
- All plans allow unlimited sending
- Extensive automation and CRM options
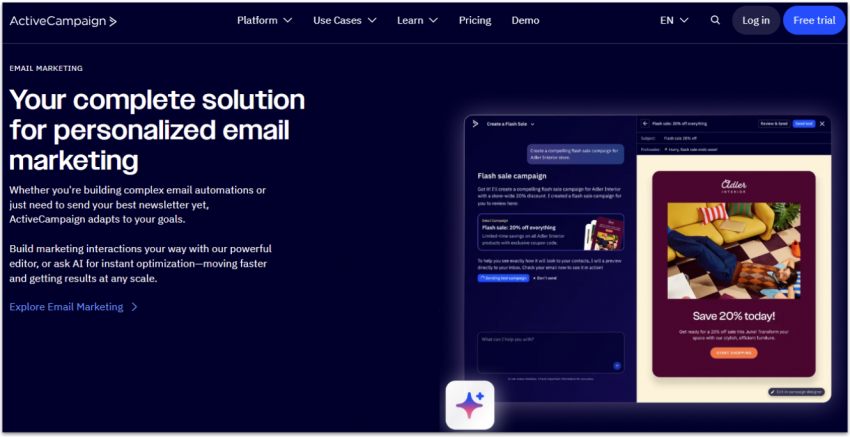
Starting at $15.00, all ActiveCampaign plans give you access to a user-friendly email editor with drag-and-drop functionality. You can easily add and customize elements like buttons, images, and text blocks to create professional-looking emails. These plans also include automation tools, allowing you to set up autoresponders and schedule your email campaigns.
One standout feature is its predictive content tool, which uses AI to deliver personalized versions of an email based on client information like location, behavior, and interests. I recommend upgrading to the Pro plan, which costs $79.00, to access this advanced feature.
It’s also a good service if you’re looking to manage more than just email marketing, as ActiveCampaign offers customer relationship management (CRM) tools, social media marketing tools, and reporting features. ActiveCampaign offers a 14-day free trial – not very long compared to other platforms, but no credit card is required and there’s no extra setup.
More on ActiveCampaign
Visit ActiveCampaign > -
- Affordable plans for growing businesses
- High-quality, easy-to-use tools
- SMS marketing in addition to email campaigns
- Free plan lets you send 300 emails per day
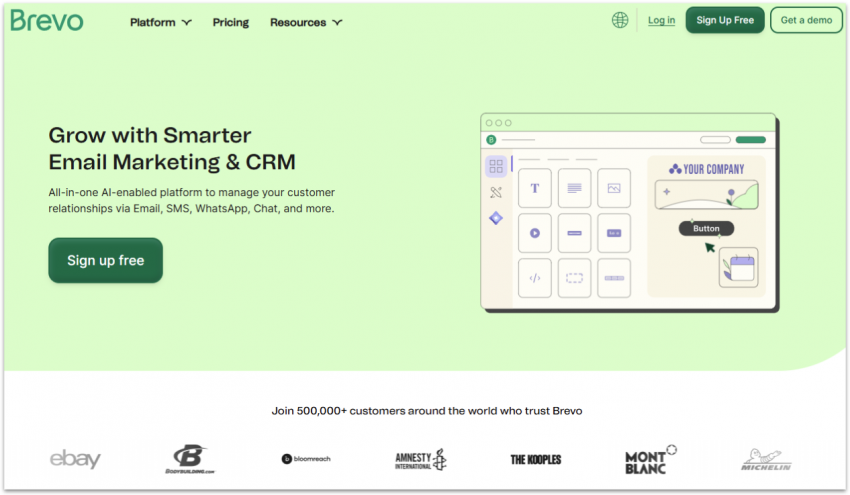
Brevo (formerly Sendinblue) makes some bold promises on its website. While I was skeptical at first, I came out of my most recent round of testing pleasantly surprised.
Brevo has 40+ email templates to choose from – not as many as other services, but they’re all high quality and fully responsive. You also have the option to create your own template if you want to. It offers access to over 20 native integrations, extending its capabilities to areas like CRM and event management.
You don’t need any email marketing experience to use Brevo’s tools, not even for the potentially complicated ones. Take email automation workflows for example. This could be risky, “advanced” email marketing territory, but there are nine common workflow templates already set up for you to add to the editor, which by the way, is super intuitive.
Another thing I really appreciate about Brevo is its free plan, which allows you to send up to 300 emails a day. This is a lot, considering most other services will give you a similar cap of emails per month. Also, unlike other services that will only give you a free trial period, you can use Brevo’s free plan for as long as you like. So, if this is what you’re after, take a look at our list of the best (really) free email marketing tools.
More on Brevo (formerly Sendinblue)
Visit Brevo (formerly Sendinblue) > -
- An excellent solution for small businesses
- Time zone-based email delivery
- Spam checker and other optimization tools
- 1000 free stock photos included
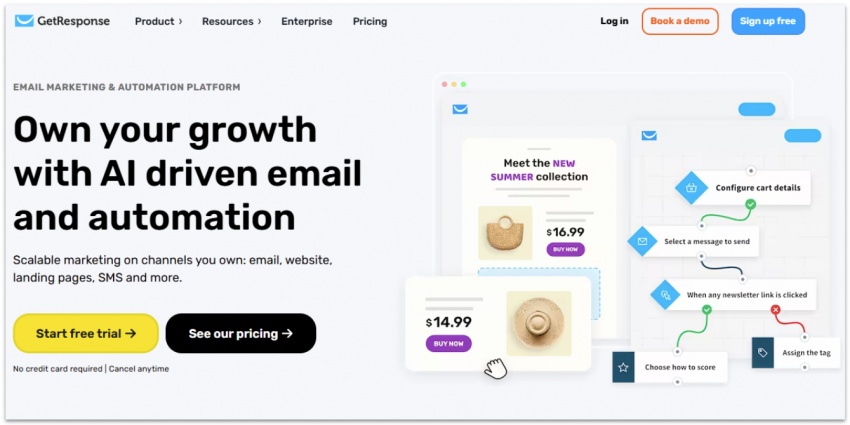
GetResponse is a great service for more experienced marketers. It’s not as immediately user-friendly as others on this list because it’s designed with larger businesses and marketing agencies in mind. This means more in-depth tools that give you more control over your campaigns.
While other services offer basic split testing and list management, I found that GetResponse offers a lot more for a better price. I’m talking subject line and content A/B testing, over 180 integrations, a spam checker tool, and handy features like the Perfect Timing tool to help you send out emails at the optimum time for each contact.
It took me a little longer to learn how to use it. Once I got to grips with the different types of split testing, though, it was a seriously effective tool that helped me improve my campaigns’ performance. You can take advantage of the 14-day free trial to try out (almost) all the tools before you make a long-term commitment.
More on GetResponse
Visit GetResponse >
How We Compared Email Marketing Services
I decided to sign up for every service that came my way and use it to create long-running email marketing campaigns. Only then would I be able to judge for myself which ones lived up to the hype. So, after making a list of every email marketing service available today, I consulted with my peers to create a rigorous testing methodology. Then, it was just a matter of putting in the work.
The entire process took close to a year, but that’s really the only way to test email marketing platforms. When it comes to email marketing, long-term reliability is the entire point, so I couldn’t be satisfied with sending one or two emails, messing around with the UI for a week, and expecting that to be enough.
I imported contacts, set up landing pages and automations, and blasted emails. After that, it was time to analyze the results, segment my audiences accordingly, and repeat. Simply put, we tested how close each service came to a dream email marketing system, one developed to suit the needs of small and medium business owners.
I went and organized it all so that we’ve got five sections for each service:
Features
- Third-party integrations. When creating an email to send to your list, you should be able to simultaneously post its content on social media channels and other third-party services.
- Template selection. Instead of wasting your time on designing your emails from scratch, templates allow you to just fill in the blanks and blast away. You’ll require different templates for different types of emails – a newsletter update is very different from a catalog email, or a promotional call to action.
- Mobile responsiveness. Emails should flexibly fit into any device they’re viewed on, as most readers are going to be using their mobile phones.
- Stock photos. Searching the internet for the right image takes time and effort, and the good ones usually cost money. A service with stock photos saves you that trouble.
- Right-to-left (RTL) support. If you’re planning on writing in RTL languages like Arabic, Hebrew, and Farsi, you absolutely have to choose a service that provides RTL support.
- Personalization. Using your subscriber’s name to greet them in your emails creates a feeling of closeness that immediately makes them feel more inclined to read what you have to say. Email marketing tools should also let you use the data you have to customize content.
- A/B testing. Unsure about a certain phrasing in your subject line, or the image you’re using? Create an A/B test, and create two versions of the same email. The platform will then send version A to a small subsection of your mailing list, and version B to another. The version that gets the best click/open response will “win” and will automatically be sent to the rest of your list.
- Import formats. When importing a contact list, you’ll be stuck with whatever format you were given. Usually, it’s a CSV, which is why supporting CSVs is the bare minimum for most email providers. But the more file types and import formats that are supported, the more freedom you’ll have.
- Segmentation and suppression lists. Instead of simply blasting your emails to an entire mailing list, you can tailor emails to specific segments like gender, origin of signup, birthdate, or location. You can also create rules and specify email addresses that will never receive your emails.
- Landing pages. Email marketing service providers should allow you to create landing pages that you can use to funnel readers into signing up for your list and to promote events, products, and more. This saves you the need to purchase hosting and build a website, especially for small and limited-time projects.
- Signup forms. When building a landing page with your email marketing service, you’ll probably add a newsletter signup form to expand your reader base. But what if you already have a website? Or if a partner wants to promote you? For that, you need a signup form you can “paste” into another website using a simple link.
- Automation. The options are unlimited with good automation. The idea is simple: create rules and scenarios, and decide on an automated reaction sequence. For example, you can send a personalized birthday email with a coupon on each contact’s birth date.
Deliverability
- DKIM authentication. DKIM authentication lets you prove to your recipients that you’re the owner of your email address. The services mostly differ here by the guides they have on the subject, how easy it was to generate the key, and how available the support agents were to guide me on the process.
- Active spam policy. With email marketing services, you share an IP with other users. Your emails will get sent from the same IP, and your IP’s “reputation” will affect everybody’s deliverability. If some users misbehave and get marked as spam or blacklisted, you might get hurt yourself. Because of this, we looked for services that fight spammers and minimize the chance of such tragedies.
- Affiliate marketing policy. Whether you’re an affiliate marketer or not, you still want the service to have a clear and concise policy on the issue. If you aren’t an affiliate marketer, then you definitely want to choose a service that forbids it.
- Private IP. Never available with basic, affordable plans, but usually part of the higher-tier ones, a private IP solves all of your “neighbor problems.” If you’re using a private IP, you don’t have to worry about them misbehaving and your email marketing getting hurt as a result.
Analytics
- Opens. You want to be able to know who opened your email, and who didn’t.
- Clicks. Know who actually clicked an element in your email, after opening it.
- Bounces. Not all your emails are going to reach their audience. Sometimes, a contact’s email inbox malfunctions, which results in a “soft” bounce – try again, and it might work. Other times, people will sign up with fake addresses that don’t exist, so your email to them will forever live in limbo. That’s a “hard” bounce.
- Unsubscribers. It hurts, but some of your subscribers are going to opt out. That doesn’t mean you’re the problem – or maybe it does. It helps to be able to see which emails resulted in people unsubscribing, so you can learn to avoid expensive mistakes.
- Location. Location breakdown can help you identify if your emails are sent to the correct recipients in specific countries or time zones.
- Location world map. Along with the location breakdown, you can quickly view where your recipients are on a world map.
- Graphical breakdown. Having data at your disposal is not the same as easily understanding it. Graphs and charts give you a detailed glance at what is going on in your email campaigns.
Support
- Support channels. Email marketing service providers offer various ways to reach them, including live chat, email, phone, and help center articles.
- Response times. We tested how quickly the support team responds to inquiries.
- Support hours. Support channels can be available 24/7, during business hours, or limited to weekdays. We prioritized services with support available at any time.
- Professionality. You need to have a good agent by your side to help you through. It also doesn’t hurt to have a knowledgeable, experienced person guide you when you’re taking your first steps using a new platform. So we evaluated how well each provider’s support staff handled questions and how smooth the interactions were.
Pricing
- Starting rates. We’ve selected the best email marketing platforms for a range of budgets, mostly focusing on those with affordable starting prices to help get your small business started.
- Subscriber limits vs email limits. If you plan to send frequent email blasts to a relatively limited or stable number of people, you’ll definitely want to choose a service that limits subscribers. But if you’re sending fewer emails but expecting your contact list to grow, go with a service that limits emails.
- Long-term discounts. You can usually get a discount by paying for a service yearly. We identified the providers that offer better long-term savings.
- Free plan and trials. It’s practical to become familiar with an email marketing tool’s interface and features before committing to a subscription. Some of our recommendations include free plans with basic features, while others offer free trials of premium plans to help you decide if they’re worth buying.
- Money-back guarantee. If you want to try an email marketing tool that doesn’t have a free plan or trial, you can rely on its money-back guarantee to try it risk-free.
Which Are the Top Email Marketing Services Available Today?
Out of all the services I tested, most didn’t make the mark. In fact, many didn’t even come close. Some seemed to have halted development about five years ago, while others lacked any understanding of what an email marketing service is supposed to do.
The 10 services I ended up picking as my recommendations did a lot better. None of them are perfect, and each has its weak points, but they offer quality and reliable service that will get results for many different needs. In other words, these are the best email marketing services you will find.
Results and Analysis – How Did the Services Actually Do?
My brain can’t even remember how many phone calls I’ve had with support agents, how many contact lists I’ve imported, and what A/B testing brought me where. But it doesn’t need to, because I’ve gathered everything in beautiful spreadsheets.
Each section comes with a short introduction and its own marvelous table. And each table is followed by an in-depth discussion of the comparison criteria. So, here we go.
Features
Not surprisingly, features made up the bulk of my research. There are a ton to check for and to test. These are going to be your marketing tools, and the better they are, the better you’ll do.
| ActiveCampaign | Brevo | AWeber | Omnisend | Mailchimp | GetResponse | Constant Contact | Benchmark | Drip | Moosend | |
|---|---|---|---|---|---|---|---|---|---|---|
| Third-party integrations | ✔ | ✔ | ✔ | ✔ | ✔ | ✔ | ✔ | ✔ | ✔ | ✔ |
| Template selection | 125+ | 40+ | 600+ | 240+ | 130+ | 150+ | 300+ | 125+ | 7+ | 130+ |
| Mobile responsiveness | ✔ | ✔ | ✔ | ✔ | ✔ | ✔ | ✔ | ✔ | ✔ | ✔ |
| Stock photos | ✘ | ✘ | ✔ | ✘ | ✘ | ✘ | ✘ | ✔ | ✘ | ✔ |
| RTL support | ✔ | ✔ | ✔ | ✘ | ✔ | ✔ | ✘ | ✔ | ✔ | ✘ |
| Personalized dynamic content | ✔ | ✔ | ✔ | ✔ | ✔ | ✔ | ✔ | ✔ | ✔ | ✔ |
| A/B testing | Advanced | Basic | Basic | Moderate | Moderate | Basic | Basic | Advanced | Moderate | Advanced |
| Import formats | CSV | CSV, TXT, Excel | CSV, TSV, TXT, Excel | CSV, Excel, ODS | CSV | CSV,TXT, Excel, VCF, ODS | CSV, TXT, Excel, VCF | CSV, TXT, Excel | CSV | CSV, TXT, Excel |
| Segmentation | Advanced | Advanced | Basic | Advanced | Moderate | Advanced | Moderate | Moderate | Moderate | Moderate |
| Landing pages | ✔ | ✔ | ✔ | ✔ | ✔ | ✔ | ✔ | ✔ | ✘ | ✔ |
| Signup forms | ✔ | ✔ | ✔ | ✔ | ✔ | ✔ | ✔ | ✔ | ✔ | ✔ |
| Automation | Advanced | Moderate | Basic | Advanced | Moderate | Moderate | Basic | Moderate | Advanced | Moderate |
Third-party integrations
GetResponse really shines here, with easy simultaneous publishing on Facebook, Instagram, and many other platforms.
Template selection
A lot of variance was observed here, with ActiveCampaign and Constant Contact truly excelling because of their basic to professionally designed templates in various categories.
Email editor
Benchmark really shone with its easy-to-use drag-and-drop editor that uses flexible grids and customizable content blocks.
Mobile responsiveness
Our top ten all did a good job here. They’re all winners, but I’ll commend Mailchimp for letting you simulate exactly how your email will look on dozens of different phones and tablets.
Stock photos
AWeber, Benchmark, and Moosend were the only providers to offer stock photos as part of the service.
Right-to-left (RTL) support
All services except Constant Contact, Moosend, and Omnisend support RTL.
Personalization
All services did a good job of implementing simple personalization and dynamic content. ActiveCampaign’s intuitive interface lets you easily include as much dynamic content as your heart desires.
A/B testing
ActiveCampaign wins because it allows you to compare up to five emails. You can also test variations of images, videos, and calls-to-action – something not often available in other email marketing tools.
Import formats
GetResponse, AWeber, and Constant Contact support more file types than the rest.
Segmentation and suppression lists
Brevo and Benchmark are the big winners here. With complete control over your lists and the ability to create segments using multiple rules and conditions, I felt like they really let me utilize the information I’d gathered.
Landing pages
It’s a crying shame that Drip doesn’t offer landing pages at all. ActiveCampaign won my heart with an excellent editor and ready-made templates that allowed me to get beautiful one-pagers online in about half an hour.
Signup forms
You can build signup forms with any of the listed top email marketing platforms. But GetResponse gives you full freedom in designing forms using HTML, CSS, and predesigned templates.
Automation
ActiveCampaign and Brevo got automation absolutely right. They let me do anything I wanted with almost limitless functionality, easy drag-and-drop interfaces, and the ability to create extremely detailed scenarios.
Best Overall for Email Marketing Features
ActiveCampaign delivers excellent results, even though it doesn’t have a built-in stock photo library. I recommend it for marketers who want to take email personalization and testing seriously to engage a large subscriber list. However, it might be too technical for beginners. If that’s the case for you, AWeber could be a better pick.
Deliverability
I’ll say it again – there are no funny-looking percentages here. That’s a myth. I’m talking about the tools, policies, and security measures that each service has. Use a service that doesn’t have them, and you risk not getting delivered. Simple as that.
| ActiveCampaign | GetResponse | Benchmark | Brevo | AWeber | Constant Contact | Drip | Moosend | Mailchimp | Omnisend | |
|---|---|---|---|---|---|---|---|---|---|---|
| DKIM Authentication Check | ✔ | ✔ | ✔ | ✔ | ✔ | ✔ | ✔ | ✔ | ✔ | ✔ |
| Active Spam Policy | ✘ | ✔ | ✔ | ✘ | ✔ | ✘ | ✘ | ✔ | ✘ | ✘ |
| Affiliate Marketing Policy | Allowed but limited | Allowed | Allowed but limited | Allowed but limited | Allowed but limited | Not allowed | Allowed but limited | Not allowed | Not allowed | Not allowed |
| Private IP | ✔ | ✘✔ | ✔ | ✔ | ✘ | ✔ | ✔ | ✔ | ✘ | ✔ |
| Final deliverability score | 4.5 | 4.6 | 4.8 | 4.5 | 4.5 | 4.5 | 4.0 | 4.8 | 4.6 | 3.5 |
DKIM Authentication
A service that didn’t offer DKIM authentication had no chance whatsoever of getting on this list. None. Without getting too technical, DKIM authentication lets you prove to your recipients that you are indeed the owner of your email address.
The process will require some relatively heavy configuration, which might not be the most fun for those of you who are tech-averse. The services mostly differ here by the guides they have on the subject, how easy it was to generate the key, and how available the support agents were to guide me on the process.
Kudos to ActiveCampaign and AWeber, prompt and professional as always. Authenticating with them was a cinch. And a dishonorable mention to Mailchimp, which hides its DKIM section so well I thought at one point it didn’t have it at all.
Active Spam Policy
Short introduction first. With email marketing services, you share an IP with other users. Your emails will get sent from the same IP, and your IP’s “reputation” will affect everybody’s deliverability. If some users misbehave and get marked as spam, or worse, you might get hurt yourself. Could get as bad as you being blacklisted, despite your emails being completely fine.
Because of this, we looked for services that fight spammers and minimize the chance for such tragedies. It’s important that they specify exactly how spam is forbidden in their terms of use (which they all do, more or less), but that alone isn’t enough.
One of the most ingenious tests that we devised involved uploading a CSV filled with spammy contacts. You see, spammers are a lazy bunch. They buy contact lists, import them, and hope for the best. These lists quickly become known, and trying to upload one is a clear sign of a spammer.
We attempted to import such a list, hoping to see the services “catch” it, which is exactly what happened with GetResponse, Benchmark, AWeber, and Moosend. All the others greatly disappointed us, as the import went undetected.
Affiliate Marketing Policy
Two things. First, whether you’re an affiliate marketer or not, you still want the service to have a clear and concise policy on the issue. Second, if you aren’t an affiliate marketer, then you definitely want to choose a service that forbids it.
Affiliate marketing isn’t illegal, but let’s just say it’s prone to get sketchy. Somewhere between the line of spam and not-spam. If you’re not doing affiliate marketing, don’t risk using a service that allows others to do so. Constant Contact and Moosend are the best in this regard, strictly forbidding it.
If you do happen to be an affiliate marketer, you’ll find that other services allow it, albeit on limited terms. Just know that one wrong move might get your account suspended.
Private IP
Never available with basic, affordable plans, but usually part of the higher-tier ones, a private IP solves all of your “neighbor problems”. If you’re using a private IP, you don’t have to worry about them misbehaving and your email marketing getting hurt as a result.
While it’s not surprising that the generally flimsy Mailchimp doesn’t have any plan with a private IP, the fact that AWeber doesn’t either was quite shocking. A GetResponse agent told me that they don’t have the option, but I found it actually is available on the most expensive plan. Go figure.
All the rest do alright here, letting you purchase a private IP as a separate add-on, or as part of the higher-tier plans. Warning – it’s not cheap.
Deliverability – Bottom Line
For me (and for you too, if we’re being honest – you just might not feel that way yet), the active spam test is the most important metric, and, as such, GetResponse, Benchmark, and Moosend are the winners here.
The big loser here is Mailchimp, failing the spam test hard and not even having the option of a private IP.
With the other six, I’d suggest keeping a very close eye on your deliverability performance. It might be ok, but if things look weird, definitely consider switching services or moving to a private IP.
Analytics
One of the best parts of a good email marketing service is seeing it all come together. Just chilling in front of a detailed analytics board, watching glorious graphs and pie charts. Good analytics let you know exactly how you’re doing, and exactly what you need to do to get even better results.
| ActiveCampaign | GetResponse | Benchmark | Brevo | AWeber | Constant Contact | Drip | Moosend | Mailchimp | Omnisend | |
|---|---|---|---|---|---|---|---|---|---|---|
| Opens | ✔ | ✔ | ✔ | ✔ | ✔ | ✔ | ✔ | ✔ | ✔ | ✔ |
| Clicks | ✔ | ✔ | ✔ | ✔ | ✔ | ✔ | ✔ | ✔ | ✔ | ✔ |
| Bounces | ✔ | ✔ | ✔ | ✔ | ✔ | ✔ | ✔ | ✔ | ✔ | ✘ |
| Unsubscribers | ✔ | ✔ | ✔ | ✔ | ✔ | ✔ | ✔ | ✔ | ✔ | ✔ |
| Location | ✔ | ✔ | ✔ | ✘ | ✔ | ✘ | ✔ | ✔ | ✔ | ✘ |
| Location world map | ✘ | ✔ | ✔ | ✘ | ✘ | ✘ | ✘ | ✔ | ✔ | ✘ |
| Graphical breakdown | 5 | 4.5 | 5 | 3 | 5 | 3.5 | 4 | 4 | 4 | 3 |
| Final analytics score | 4.7 | 4.2 | 5.0 | 4 | 5 | 3.8 | 4.5 | 4.5 | 4.6 | 4.4 |
Opens
Basic stuff. You want to be able to know who opened your email, and who didn’t. All did well.
Clicks
Going a bit deeper – who actually clicked an element in your email, after opening it. You’d be surprised how many “services” today falter here.
I sent hundreds of emails and had my lackeys – sorry, colleagues – specifically interact with elements in the emails to make sure the analytics were correct.
It’s all good. These ten are the best there is, remember?
Bounces
Not all your emails are going to reach their audience. Sometimes, a contact’s email inbox malfunctions, which results in a “soft” bounce – try again, and it might work. Other times, people will sign up with fake addresses that don’t exist, so your email to them will forever live in limbo. That’s a “hard” bounce.
All services enabled me to view bounces, but hard and soft ones were always coupled together.
I would’ve loved to have soft and hard bounces separated, but none of the services provided this. Systems I’ve helped develop did. I guess if it’s really important to you, invest the small fortune it takes to develop one.
Unsubscribers
It hurts, but some of your subscribers are going to opt out. That doesn’t mean you’re the problem, necessarily. Or maybe it does. It helps to be able to see which emails resulted in people unsubscribing, so you can learn to avoid expensive mistakes.
All services did okay here.
Location
Aha! And so the services begin to diverge. Not all of the ten let me get a breakdown of my recipients by location. Which is a shame, because it’s such a nifty tool to have.
Location breakdown once helped me realize I was under the attack of a competitor. How, you might ask? Because after sending a wine newsletter to what were supposed to be San Francisco-area contacts, my reports indicated hundreds of readers in the Philippines. I sent those IPs straight to my suppression list.
Brevo, Constant Contact, and ConvertKit really disappointed me. No location breakdown with those guys. The others all did good, although something seems to be buggy with Mailchimp’s information. Readers that I knew were from the Middle East were marked as being from the US. I wouldn’t trust that one so much.
Location world map
How about letting me quickly view how things look on a world map? This ingenious feature wasn’t available with all services that had location breakdown.
ActiveCampaign, AWeber, and Drip – I’m looking at you. Implement this, pronto! GetResponse, Benchmark, Moosend did this beautifully.
Graphical breakdown
Having data at your disposal is not the same as easily understanding it. I enjoy going over a 200-row table, sure, but I would love to get some visual aids. But visual aids doesn’t sound so good, so we called this “graphical breakdown” instead.
The more, the merrier. Pie charts, bar charts, graphs, distribution plots – give me everything. But, sadly, not all of the services did. Oh no. Mailchimp and ConvertKit’s flimsy offerings are just not enough. The generally dependable Brevo also falters here.
The winners? ActiveCampaign, Benchmark, and AWeber. With detailed graphs and charts for every type of report, from clicks over time to monthly subscriber growth, I knew exactly what was going on at a glance.
Analytics – Bottom Line
Luckily, everybody did well regarding the basics – opens, clicks, bounces, and unsubscribers. That means all ten will give you the foundation to understand how your campaigns are doing.
But who went above and beyond? That would be Benchmark. Hands down, it doesn’t get more detailed than this. A very close second is AWeber. If they only had that world map I love so much…
Biggest loser? ConvertKit. If I was nice, I’d say they went minimalistic. But I’m not. And their analytics reports are simply bad. They just really dropped the ball on this.
Support
All these platforms aim to provide a similar service, but each one does things a bit differently. Which is why you’ll probably end up needing some help every now and then, even if you know your stuff. If you’re a beginner, quality support becomes even more important.
| ActiveCampaign | GetResponse | Benchmark | Brevo | AWeber | Constant Contact | Drip | Moosend | Mailchimp | Omnisend | |
|---|---|---|---|---|---|---|---|---|---|---|
| Support channels | Chat, email, phone | Chat, email | Chat, email, phone | Email, phone | Chat, email, phone | Chat, email, phone | Chat, email | Chat, email, phone | Chat | Chat, email |
| Average response time | Minutes | Minues | Hours | 5 hours | Minutes | Minutes | 1 hour (for email) | Minutes | Never available | Minutes |
| Support hours | Email 24/7,
LC Mon-Thu 8 a.m. to 11 p.m., Fri 8 a.m. to 6 p.m., Phone 8 a.m. – 5 p.m. CST |
24/7 | Email and chat 24/7
Phone Mon to Fri, 6 a.m. to 5 p.m. PST |
24/7 | Email and live chat 24/7,
Phone 8 a.m. to 8 p.m. EST |
24/7 | 9 a.m. to 5 p.m. CT | Not listed | 24/7 | Not listed |
| Professionality | 4 | 4.5 | 4 | 5 | 5 | 4 | 5 | 3.5 | – | 4.5 |
| Final support score | 4.7 | 4.9 | 4 | 4.5 | 3.7 | 4.3 | 4.5 | 3 | 3.5 | 4.7 |
I feel pretty confident that I don’t need to explain to you what support channels and working hours mean, so let’s jump straight to what I thought about these guys.
And for those of you thinking “Why do I need to care about support? Everything simply needs to work”… Well, that’s not really how things are in the world of email marketing. So many things have to click together, and it’s not uncommon for a small bug to rear its head.
And a bug isn’t the end of the world, either. You just need to have a good agent by your side to help you through. It also doesn’t hurt to have a knowledgeable, experienced person guide you when you’re taking your first steps using a new platform.
For me, not having phone support is no biggie. I’m not a phone guy. When my friends call me, I message them back. Got enough voices to deal with the way things are. And good live chat has never failed me before.
And yet, you might enjoy chatting with a real human being on the phone, solving problems and connecting emotionally. If phone support is what you need, you’ll find it with ActiveCampaign, Benchmark, Brevo, AWeber, Constant Contact, and Moosend.
Back to live chat, also known as where it’s at. I was happy to see that, apart from Brevo, all services implemented a live chat feature. Or at least, they all claimed to have implemented it. Mailchimp comes off as a huge offender here, never actually having an agent online. Seriously. Never talked with them. I tried, but couldn’t. Drip, with its flimsy nine-to-five working day, isn’t much better.
I was happiest with ActiveCampaign, GetResponse, AWeber, and Constant Contact. Every time I tried talking with them, I got an answer in mere minutes. Moosend’s hours aren’t listed, but they always seemed to be available when I tried them.
Sadly, I do have to point out that talking on the phone with Moosend might’ve been one of the worst customer support experiences I’ve ever received in my life. The agent answered quickly, sure, but proceeded to groan and yawn at me, being as condescending as he possibly could. Too bad for him that it was part of our comparison project. Be warned of Moosend support!
When talking about the agents’ professionality, I do have to take my hat off. Apart from the Moosend debacle and Mailchimp, which was never available, all other services knew their stuff. Some knew it well, some knew it extremely well.
I never felt like I was dealing with some outsourced support, barely familiar with the subject matter (which is the standard case in the world of web hosting).
When I asked a GetResponse agent to help me with segmentation, he knew exactly where to direct me, equipped me with a relevant guide, and held my hand as I threw condition upon condition on my mailing list.
I asked the ActiveCampaign team about how to implement RTL support and, despite it not being “natively” supported as a part of the platform, they immediately instructed me on the steps needed to achieve it.
It was the same when I asked Benchmark about suppression lists, and the same when I talked with the others.
Support – Bottom Line
So! Make sure the service has the support channel you wish to converse on, and make your choice accordingly. Beware of Mailchimp and Moosend, which are definitely the underachievers of the bunch.
Pricing
How much will all this cost you, what are the options available, and how does it all compare? Put in even simpler terms – which of these services offers the best deal?
| ActiveCampaign | GetResponse | Benchmark | Brevo | AWeber | Constant Contact | Drip | Moosend | Mailchimp | Omnisend | |
|---|---|---|---|---|---|---|---|---|---|---|
| Basic plan price | $15.00 | $0 | $8.08 | $12.50 | $12.00 | $39.00 | $16.00 | $20.00 | $16.00 | |
| Plan limits (subscribers/emails/both) | Subscribers | Emails | Emails | Emails | Subscribers | Subscribers | Both | Subscribers | Both | Subscribers |
| Long term discounts | ✘ | ✔ | ✔ | ✔ | ✔ | ✘ | ✘ | ✔ | ✘ | ✘ |
| Payment period (in months) | 1, 12 | 1, 12, 24 | 1, 12 | 1, 12 | 1, 12 | 1 | 1 | 12 | 1 | 1 |
| Payment options | Credit Card, PayPal, Wire, Check | Credit Card, PayPal | Credit cards, Wire, Check PayPal | Credit cards, PayPal | Credit and debit cards | Credit, PayPal, Amazon Pay, eCheck, Check | Credit card | Credit card, PayPal | Credit Card, PayPal | Credit Card |
| Free plan | ✘ | ✘ | ✔ | ✔ | ✔ | ✘ | ✘ | ✔ | ✔ | ✔ |
| Free trial | ✔ | ✔ | ✘ | ✘ | ✘ | ✔ | ✔ | ✘ | ✘ | ✔ |
| Money-back guarantee | ✘ | ✘ | ✘ | ✘ | ✘ | ✔ | ✘ | ✘ | ✘ | ✘ |
| Final pricing score | 4.7 | 4.8 | 4.5 | 4.5 | 4.5 | 4.3 | 3.7 | 4.3 | 4 | 4.6 |
I make it a habit of doing all the heavy lifting for you, my most valued readers. I don’t think it’s fair to carpet bomb you with the bare data, and ask you to understand what it means. You want to get this over with as quickly as possible, and go back to doing something fun.
But in this final section on pricing, I’m going to ask you to share some of the load. Not because I’m lazy, or tired, or looking to quit this job, give away all my earthly possessions, and walk this earth.
The reason I’m asking you to think about these results with me is that your specific business needs play a huge part in this decision. I’ll show you what I mean.
Basic plan price
The numbers speak for themselves, as numbers usually do. The cheapest way to go is ActiveCampaign, without a doubt. No, the basic plan doesn’t have all the features the higher-tier plans come with, but it’s much more than what Mailchimp offers you for double the price.
GetResponse, Benchmark, ConvertKit, and Moosend also do well here. If you can’t afford about a dozen dollars a month to run your business right, you, my friend, might be in the wrong business.
On the more expensive side, we have Brevo, Drip, and Constant Contact. Are they worth it? Well, Drip could be, especially if you’re knee-deep into e-commerce. Brevo’s powerhouse features obviously carry a high price tag, so make sure you need what they offer.
Subscriber limit vs email limit
Are you planning on sending frequent email blasts to a relatively limited or stable number of people? If that’s the case, you’ll definitely want to choose a service that limits subscribers, but not emails – ActiveCampaign or AWeber, for example.
You’re going to send fewer emails, but you’re expecting your contact list to grow to thousands and thousands of users? Go with a service that limits emails, but not subscribers. GetResponse or Benchmark will do just fine.
This decision is major, so I really suggest you think about it. The difference in cost can grow exponentially.
Long-term discounts
You won’t find much in the way of major discounts in the world of email marketing services. Minor ones are available when signing up a year ahead, and the services sometimes run promotions, so you might get lucky.
Free plan vs free trial
The concept of “free” sounds appealing, but it’s important not to deceive yourself. These individuals are not virtuous, and what seems initially “free” has the potential to transform into something “excessively costly.” This is the essence of free plans – they lure you in, prompting your dedication to hours of setup and configuration. Then, just as you realize your increased requirements, you find yourself ensnared.
Even worse, a free plan is always extremely limited, so you won’t really know what to expect of the service. You’ll have a general idea, sure, but do you always run your business based on vague concepts and gut feelings? Remember what happened to Santino Corleone.
As such, I’d truly recommend avoiding free plans. Free trials, like the one GetResponse offers, are much better. You get a free month to play around with everything the service can offer. By the end of it, you’ll have an excellent idea of what it’s capable of, and how you feel using it.
Money-back guarantee
A bit of respect for my buyer’s remorse, that’s all I’m asking for. Sadly, most services don’t provide any money-back guarantee.
The only two saints here are Constant Contact and ConvertKit. Now, I do think that the free trials that GetResponse and ActiveCampaign provide give you enough time to make an informed decision, but if you know yourself to be extremely flaky, take this into account.
Pricing – Bottom Line
As I said before, this really depends on you.
Understand your business plan, and choose what you want to be limited by – subscribers or emails. That will already narrow your choice in half.
After doing that, don’t be distracted by free plans or beautiful celebrities. Do as you’ve been trained to do and understand that your business is worth investing in. A free trial is okay, too.
If you’re one of those people who can barely make a decision, then know that ConvertKit does give you the greatest freedom – a free plan, a money-back guarantee, cheap prices all over. Not my favorite service, but undeniably budget-friendly.
My personal recommendations would be ActiveCampaign for a subscriber-limited service, and GetResponse for an email-limited one. They’re powerful, well-supported, and very fairly priced, plus you can check them both out with a free trial.
Final Conclusions and Recommendations
When you come right down to it, most of the big-name email marketing services do almost the same thing, with similar feature sets. That’s not a bad thing, as such. It just means that these services have seen what works, and have each tried to put their own spin on the formula. If it ain’t broke, don’t fix it.
However, this relative uniformity makes picking an email marketing platform for the long term just a little bit harder. So, you have to go by what you need, specifically.
What is your business about? How much time do you want to spend on your emails? What other online platforms do you want to integrate with your email marketing?
ActiveCampaign claimed the top spot by providing the best overall experience, but if you want better A/B testing features, GetResponse or Benchmark might be for you. If you specifically want a bunch of e-commerce data in your email reports and campaigns, Drip might actually be the best choice, even though it came in at #6.
I can only provide you with the most precise information I have. The rest depends on you. But hey, you’re clever! I have faith in you. You’re going to achieve great things, make a lot of money, and go far. All the best with your marketing adventure!
FAQ
What is the best free email marketing service?
Is email marketing still effective?
Which email marketing service is best for small businesses?
How do you make money with email marketing?
Can you do email marketing on Wix?
What is the best email marketing software for Shopify?
Which email marketing service is the best?


So happy you liked it!