Inside this Article
Top Website Builder Comparison TableStep 1. Choose the Right BuilderStep 2. Choose a planStep 3. Choose a templateStep 4. Customize your templateStep 5. Add your own contentStep 6. Add appsStep 7. Choose a domain nameStep 8. Preview and publish your websiteBuild Your Dream Site With a Website Builder
Top Website Builder Comparison Table
Here’s a breakdown of our top recommended website builders.| Website Builder | Free Plan | Best Feature | Best For | Templates | Starting Price | |
|---|---|---|---|---|---|---|
| Wix | ✔ | Flexible website builder with a ton of free, attractive templates | Most types of sites, including personal sites, blogs, and business/services | 900+ | $0 | |
| Shopify | ✘ | Advanced e-commerce functions and hundreds of business apps | Small- to mid-sized e-commerce sites that sell physical products, digital products, subscriptions, food, and more | 180+ | $2300.00 | |
| Hostinger Website Builder | ✘ | AI tools for text & image generation | Getting online quickly without complex setup & customization | 150 | $2.99 |
Step 1. Choose the Right Builder
A website builder is an online tool that makes it super easy to build a website. Website builders can be quite powerful but require no coding or technical skills, which makes them accessible to beginners and useful for professionals. Their intuitive interface and flexible features mean that you can use a builder to create a website that looks great in a matter of hours – or even minutes. Most website builders are budget-friendly, and many of them offer free plans or free trials, so you can get started without having to spend a dime. Website builders come with pre-designed templates that set the style, layout, and color scheme of your site. All you have to do is pick one add your own content and images, and personalize it with your own branding.Step 2. Choose a plan
Most website builders have a free plan, or at least a free trial period. If you’re just getting started with your website, or if your budget is tight, a free plan can be the best solution. Free plans give you the chance to try out a website builder without investing upfront. The downside, however, is that free plans often come with a lot of restrictions. You’ll be limited to using your website builder’s URL (e.g., username.wixsite.com/yourcompany). That’s fine if you’re creating a website as a hobby, but if you’re using your website for business, you really need a custom domain name (yourcompany.com) that’s easy for your customers to remember. Also, if you use a free plan your website will be full of the builder’s branding, which can look unprofessional. Free plans also tend to restrict the amount of traffic you can get, and many useful features such as installing apps or accessing tools for e-commerce might be locked behind a paywall. If you’re serious about your website, you’ll likely need to upgrade to a paid plan. It’s important that you know the type of website you want to build before choosing a plan. That way, you can select a plan that’s better suited to both your budget and your needs. For example:- If you want to sell online, you’ll probably want to go for a designated business plan (or, at the very least, a plan with the necessary tools for e-commerce). Wix has general and business/e-commerce plans to choose from, but you can only accept online payments on the business/e-commerce plans.
- If you’re creating a blog or informational site, you’ll want a website builder with SEO and content tools. With a 30-day money-back guarantee, you can try Hostinger’s AI tools to generate SEO-optimized blog posts based on a simple prompt and a few keywords.

Short on time?
Take this one-minute quiz to learn which website builders are best for your project.
Step 3. Choose a template
The first step in the process will always be choosing a template. All website builders use templates (some builders call them themes, but they mean the same thing) as the building blocks of your website. Templates are professionally designed to work on all types of devices, and they allow you to get your website online in a relatively short amount of time. The template sets the style and general layout of your website (although you can customize it later), providing you with a framework that you can customize and use to add your own content.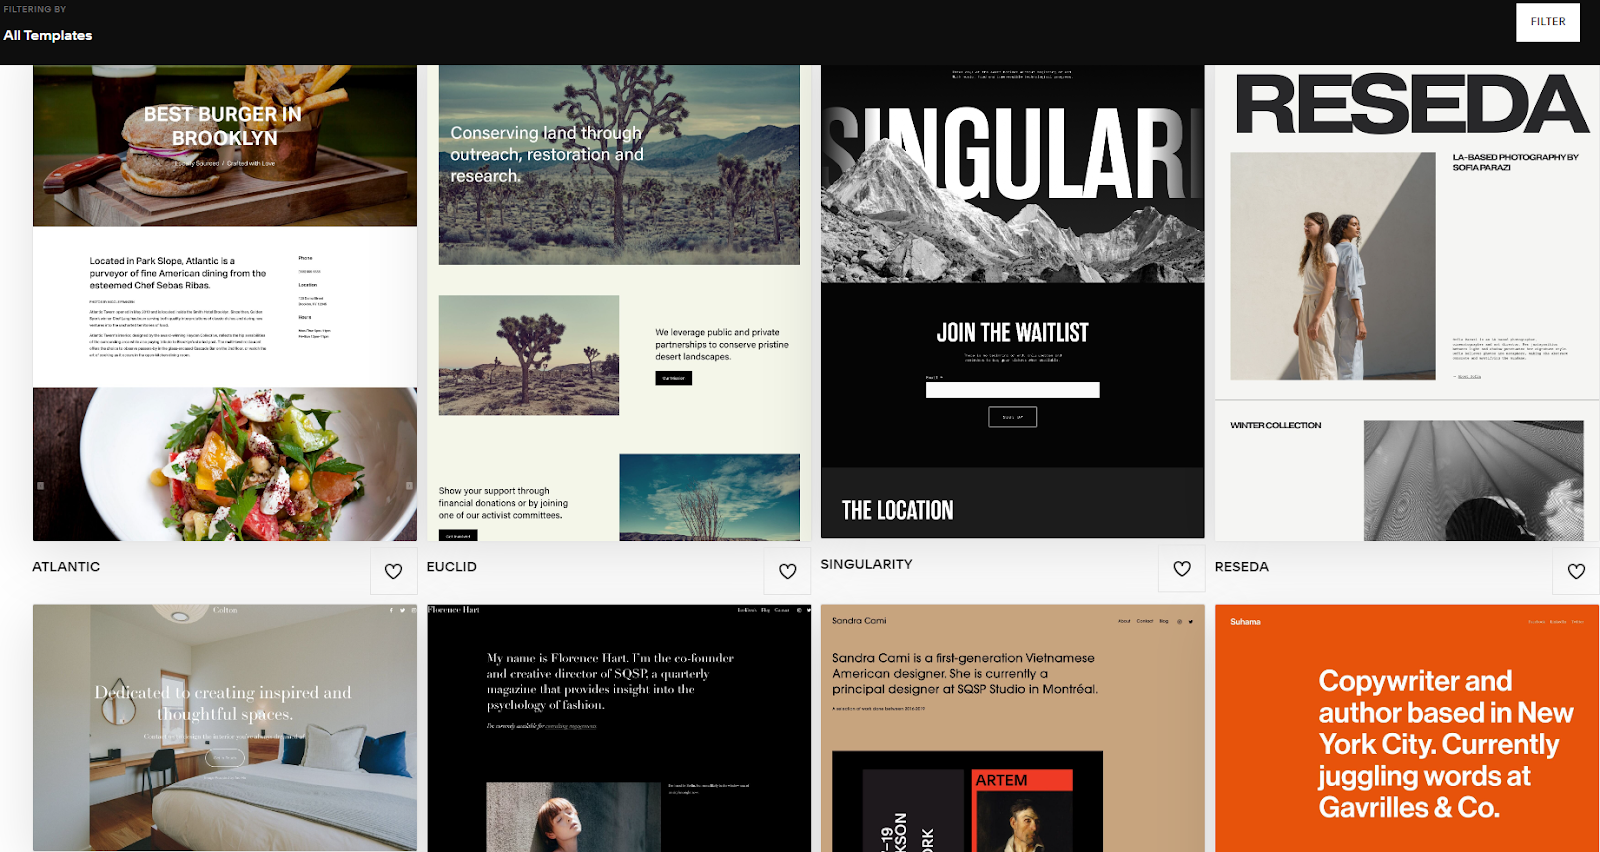
Step 4. Customize your template
Technically, you don’t have to make any customizations to your website template once you’ve chosen it – but regardless of how well-crafted a template is, customizing your website is what truly makes it your own and sets it apart from other websites (especially those using the exact same template). A good place to start would be changing your template’s colors and fonts to match your business branding. Although different builders will give you varied levels of customization, one of the huge advantages of using a builder is that they make customization rather easy. While each website builder will have its own unique editor, everything I’m about to demonstrate in Wix can be accomplished through similar steps in other builders.Changing fonts
Changing the fonts on Wix is simply a matter of clicking on the text you want to change and hitting the Edit Text button. You can edit each text box separately or use the Save Theme option to apply your font changes across your whole website. With Wix, you can choose different fonts for different text types – for instance, you can choose one font for Heading 1 to use as your main heading (like in the template I’m demonstrating below), and another font for your sub-headings. You can even have a different font for paragraph styles, if you like.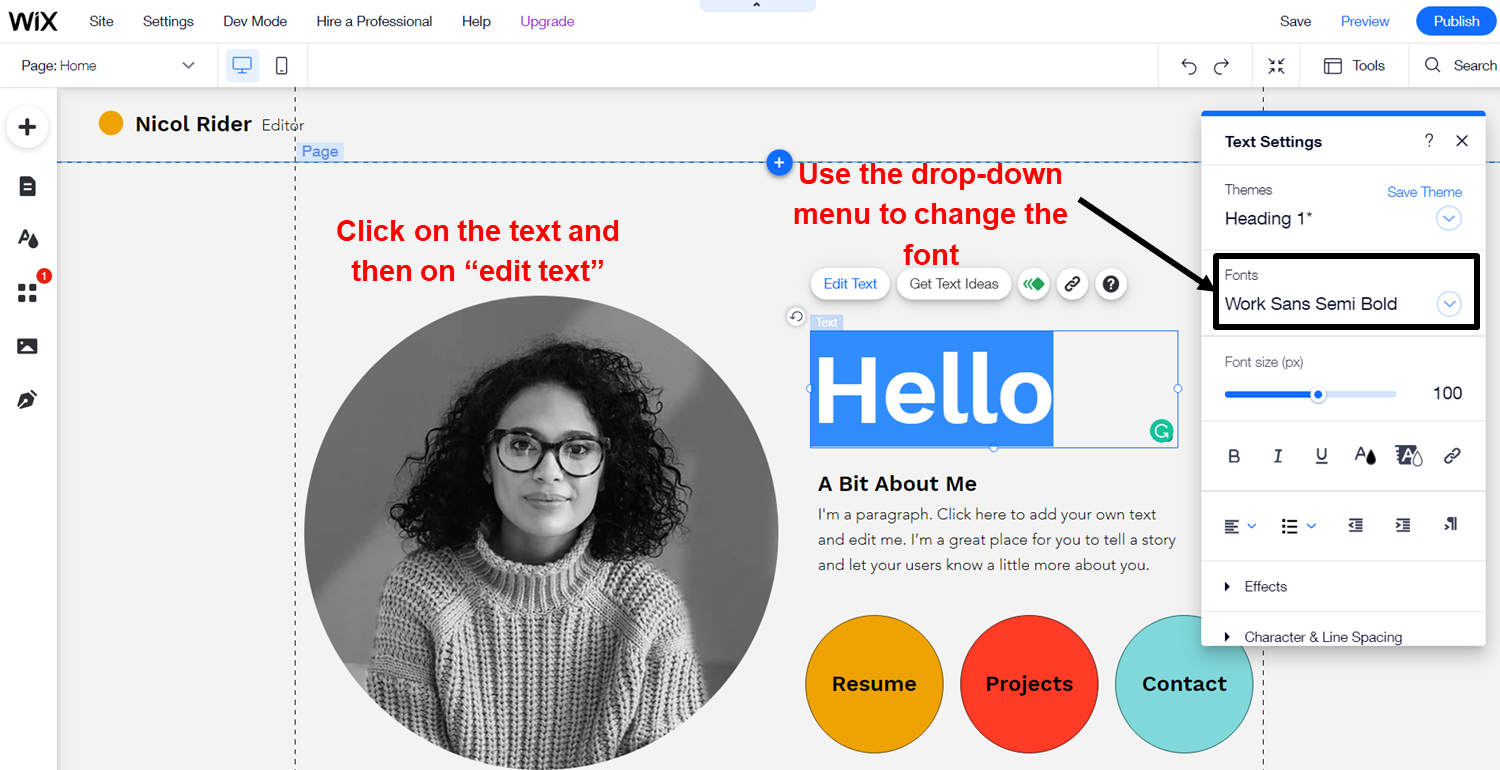
Changing colors
You can easily change the color of your fonts in the text settings box, but it’s just as easy to change the color of other elements, like backgrounds of columns. For example, you can use the color picker tool as demonstrated in the screenshot below.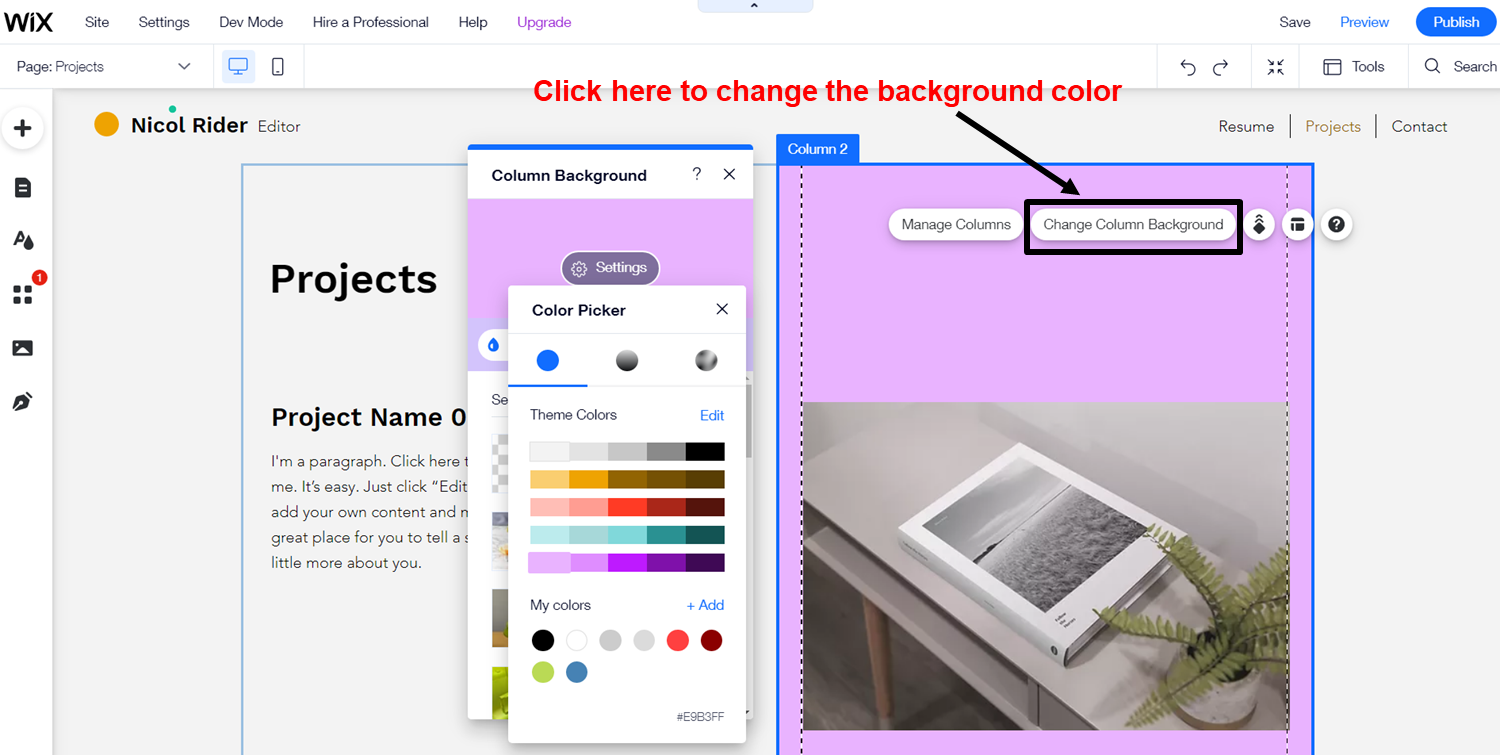
Moving elements around on your pages
Drag-and-drop editors make rearranging your page’s content a simple matter of, well, dragging it from one place to another. Wix is unique in the amount of control it gives you over arranging your page’s layout, but other drag-and-drop editors will give you similar features. Other editors may offer an up/down button method for moving sections around on your web page. Block editors work like a middle point between the two, with pre-made blocks (text, image, video, columns, etc.) that you can arrange in a grid, giving you more flexibility than just moving content up or down, but not as much room to play around with as a drag-and-drop editor.
Step 5. Add your own content
When it comes to adding your own content, all you have to do is replace the “placeholder” text and images in your template with your own text and media. It might take some time if you have a lot of content, but the overall process is really simple. If you don’t have your own images, most website builders offer some kind of image bank that allows you to instantly add free images to your site.How to add text
You can add new text sections to your web pages in just a few clicks. In Wix, you use the Add function in the left toolbar and then select Text in the pop-out menu.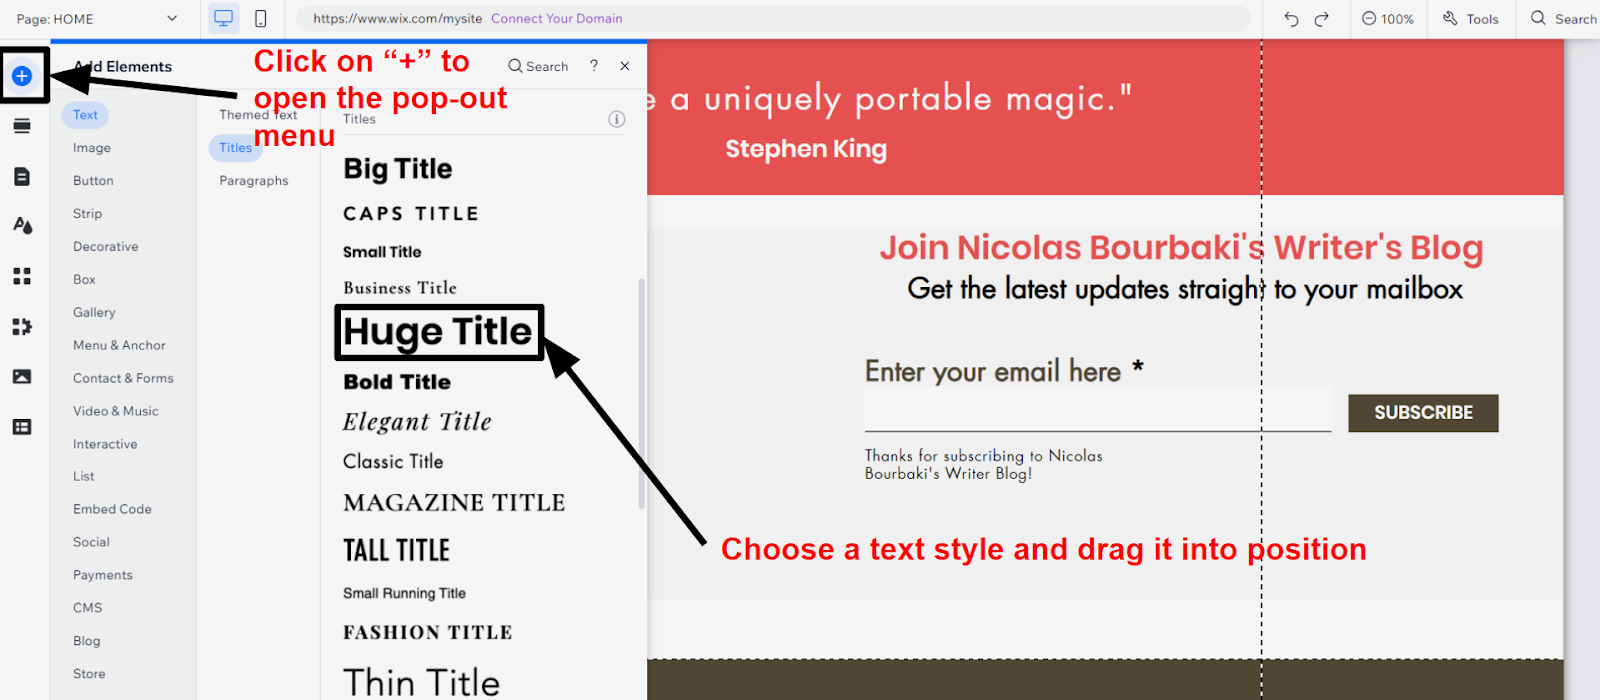
How to add an image
Like adding text to your website, adding images is incredibly easy to do with Wix. Open the Add menu and select Image (directly below Text). You can upload your own images, use free Wix images and illustrations, search the Unsplash images database, or choose premium stock images from Shutterstock (for an added fee). Then, all you have to do is place the image where you want it on your page.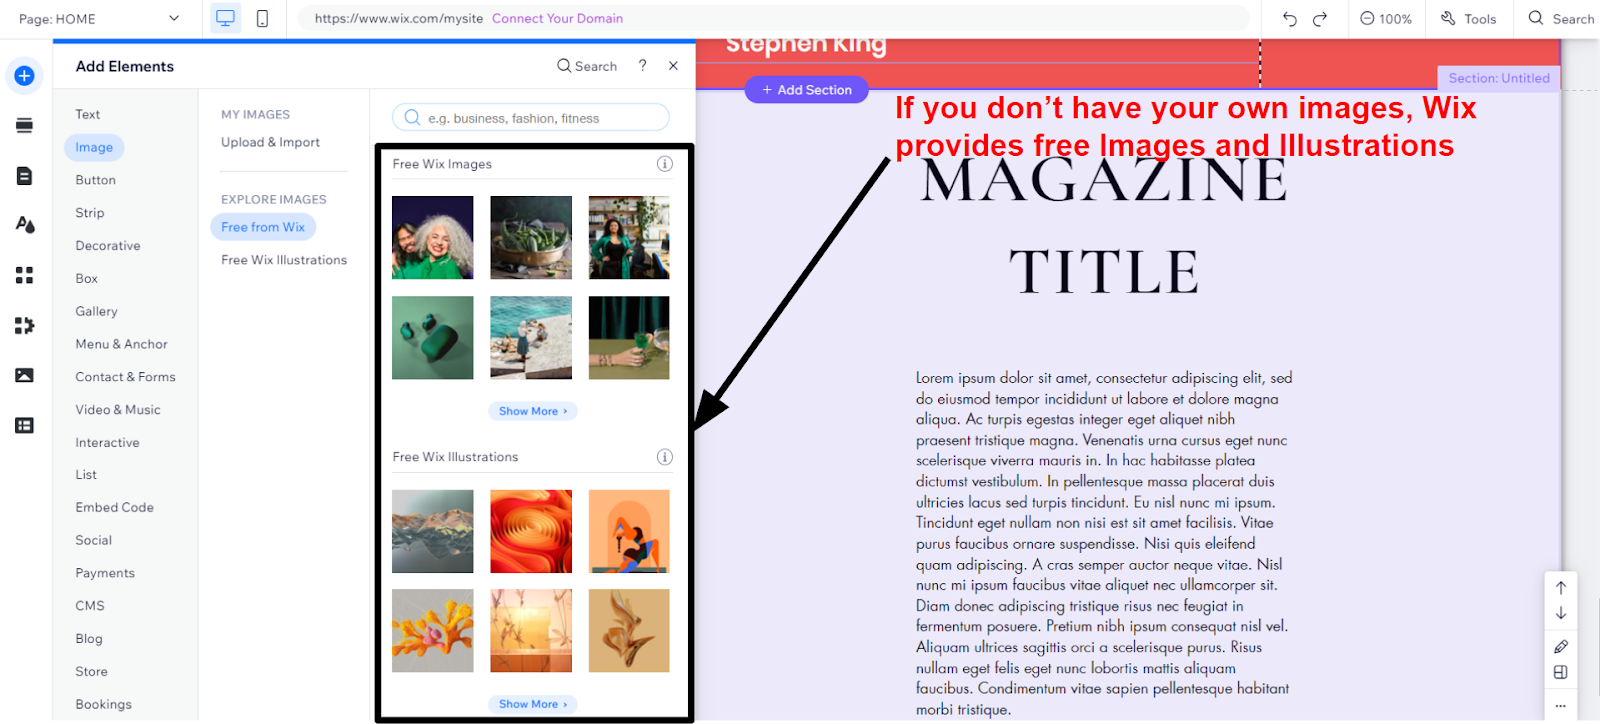
How to add a page to your website
Most templates will come with several pre-designed pages, such as Home, About Us, and Contact. If you want to add more pages – a Services or My Work page, for example – you can do this by clicking the Menus and Pages button on the left toolbar and selecting the Add Page button at the bottom of the pop-out menu.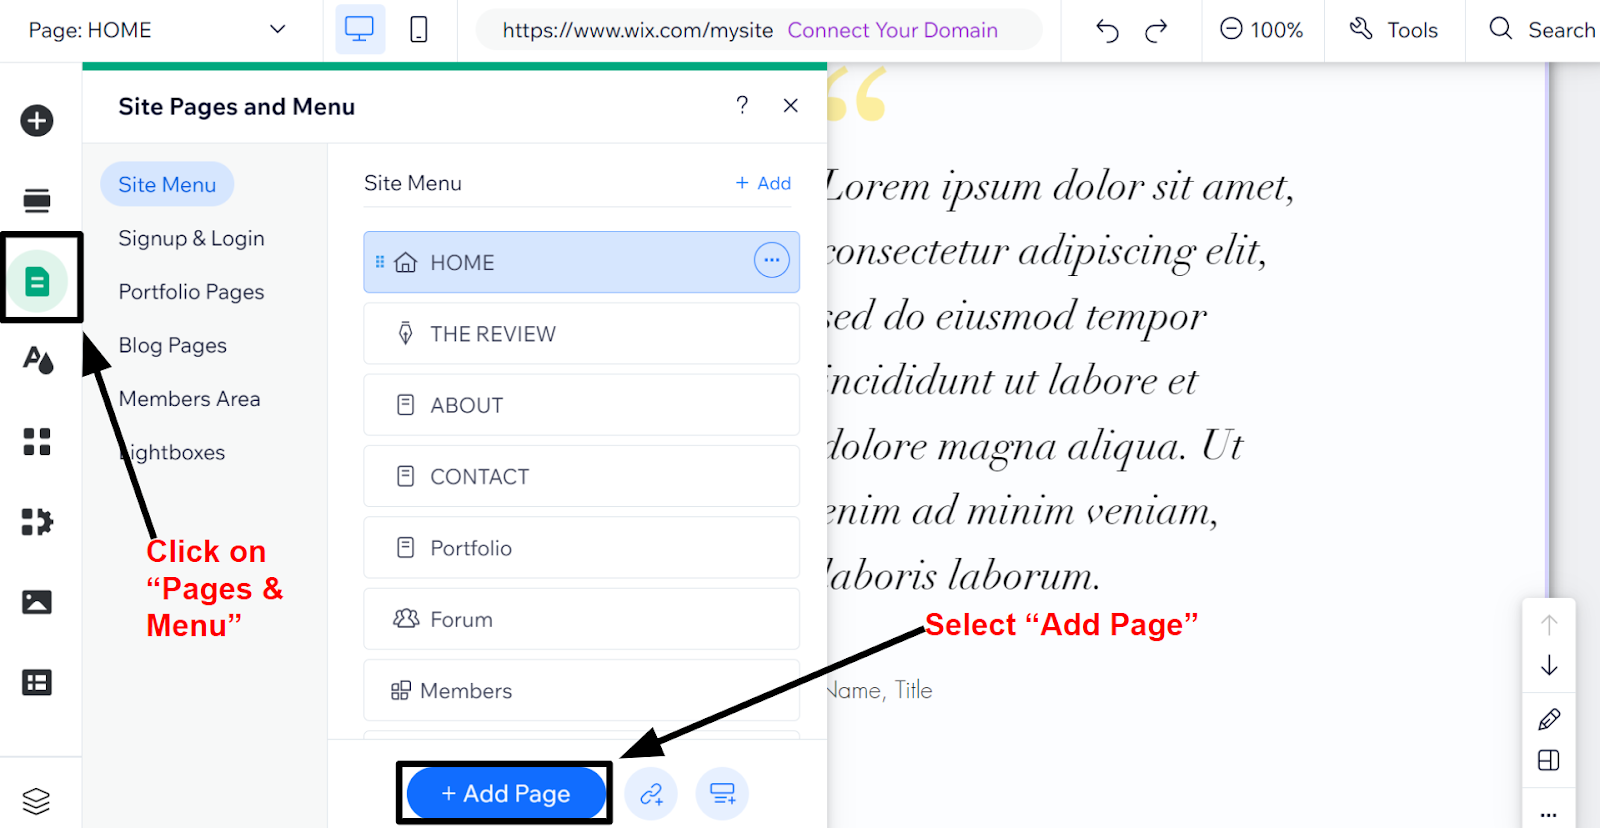
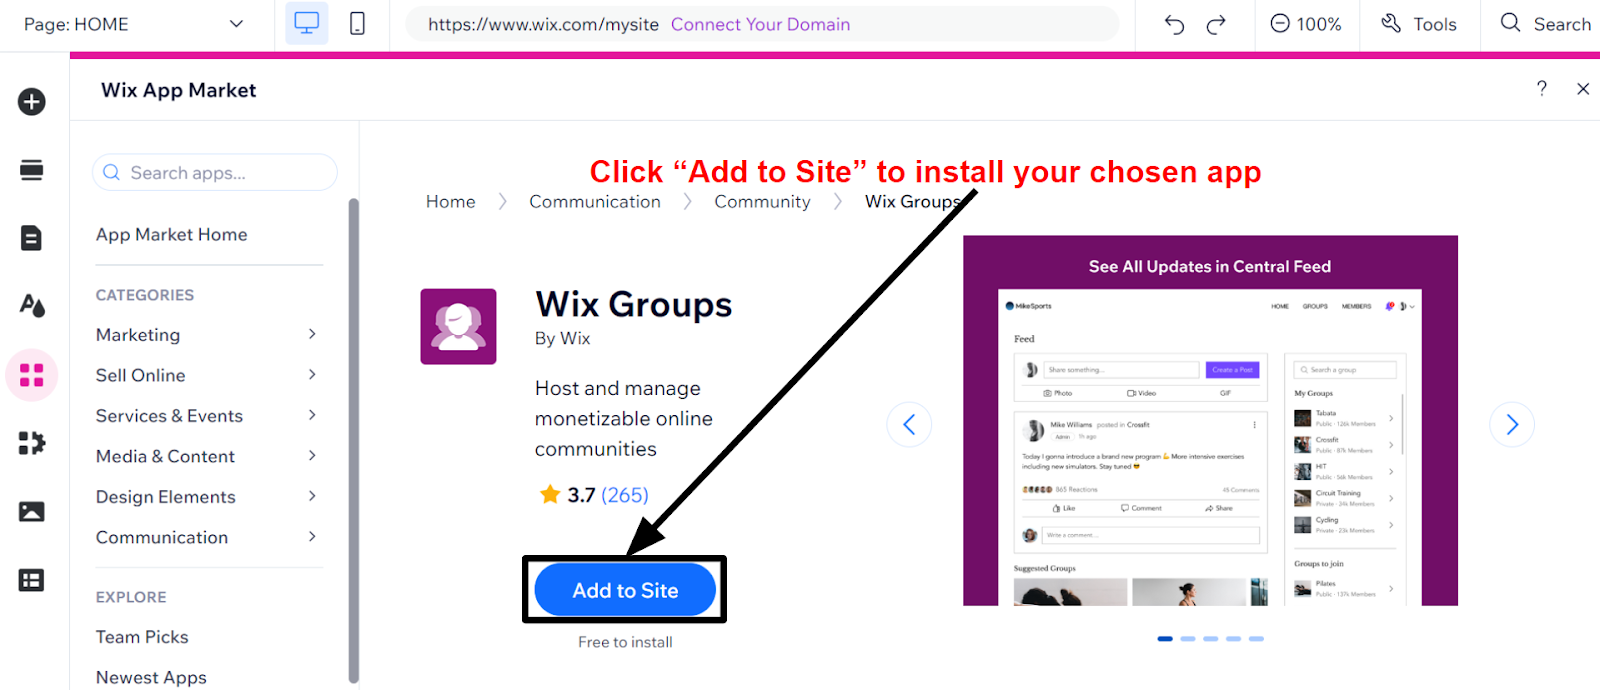
Step 6. Add apps
Apps are third-party or native integrations that help expand the functionality of your site. Although not all website builders have apps, some builders like Wix have hundreds of apps to choose from. Many of them are free, and even the paid apps often come with a free version or a free trial period. You can use apps to add extra features to your website in a matter of minutes. For instance, Wix’s app market allows you to add features like online booking, live chat, newsletter signup, social media integration, and much more to your site.
Step 7. Choose a domain name
Before you publish your website, you’ll need to choose a domain name. If you’re on a free plan, you’ll have to use a sub-domain (e.g. yourusername.wixsites.com/yourwebsitename). Most website builders will give you the option of registering and setting up your domain name. That means that all you have to worry about is choosing the best domain name for your website. Having the right domain name is absolutely crucial though, so don’t rush this step! If you sign up for an annual paid plan, the majority of builders will include a free custom domain name for the first year.Step 8. Preview and publish your website
Now that you’ve added all your content and chosen your domain name, it’s time to get your website online. With most website builders, this is really just a matter of clicking a button (or two). Don’t rush to hit the Publish button yet – it’s always a good idea to use the Preview option to make sure you’re happy with your site before going live. Previewing allows you to see your site the same way your visitors will, without the distractions of the editor. Besides, if there’s any spot where you forgot to add your content, or any blank pages you forgot to fill, previewing your site can help you catch those small details before anyone else does. Most builders will also let you preview the mobile version of your site. Always make sure that your site works and looks good on mobile devices too.
Build Your Dream Site With a Website Builder
Website builders are a great place to start when you’re a beginner. But not all builders will give you the flexibility and tools you need to create a successful website. Here are our top recommendations.Our Website Builder Recommendations
Not sure which builder to choose? Here are some recommendations for different purposes.- If you’re looking for full design freedom and easy editing capabilities, Wix is my go-to recommendation because of its flexibility and functionality. The free plan allows you to build a fully functional website (notwithstanding some limitations). Even with a free plan, you can enjoy reliable web hosting and around-the-clock maintenance and security.
- If you need a dazzling online store with advanced e-commerce functionalities like inventory tracking, product variations, and business analytics, you can’t go wrong with Shopify. It has hundreds of apps and tons of tools to help you boost your sales.
- If you’re in the market for an easy-to-use builder that still delivers a professional-looking site in minutes, try Hostinger Website Builder. It offers drag-and-drop widgets perfect for crafting a small e-commerce site or blog, and it’s one of the most budget-friendly options available.