
While Wix doesn’t allow you to swap templates directly, you can still refresh your site with a new design. This guide will walk you through the process, from choosing a new template to transferring content.
Short on Time? These Are the Steps to Change a Wix Template
- Visit Wix Templates.
- Choose a new template and click Edit to add it to your account.
- Copy sections or pages from your current site to the new template.
- Transfer media, blog posts, contacts, and Wix Stores product lists.
- Transfer your Premium plan, domain, and business email as needed.
This guide helps you move elements from your current site to a new template. However, please note that these features can’t be transferred and must be set up again manually:
- Site theme, design, and layout
- Search engine optimization (SEO) settings and tracking tools
- Third-party Premium apps
- Site members
- Wix business solution apps (e.g., Wix Stores, Wix Bookings, Wix Restaurants)
- Wix Pro Gallery
- Email marketing campaigns, history, and statistics
- Marketing integrations
- Element and page codes
Before proceeding, consider whether moving to a new template is the right approach. If your site includes business-related tools like online stores, bookings, or memberships, it may be better to redesign your existing site by changing section layouts and site theme.
Step 1. Choose a New Wix Template
Wix has over 2,000 designer-made templates, so if your current site isn’t quite right, starting fresh with a new one gives you full creative freedom. You can swap in your content, customize the design, and make it your own.
- Visit Wix Templates.


- Filter by category or type keywords in the search bar to find a template design that fits your brand.
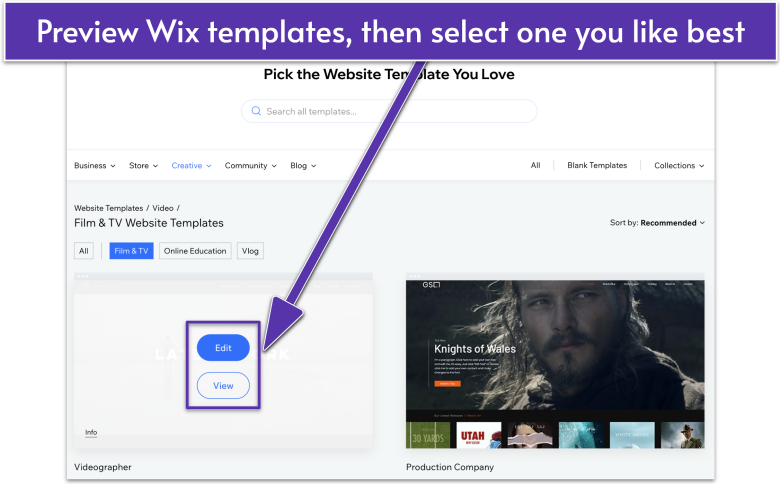
- Hover over a template and click View to explore its layout and features.
- Once you find the template you like, hover over it and click Edit to add a new site to your Wix account.
Step 2. Transfer Your Current Site’s Sections and Pages to the New Site
Wix makes it easy to move sections and pages from your existing site to a new template. You can do this by copy-pasting them where needed.
How To Copy and Paste a Section in Wix
- Open both your new template and your current site in separate tabs.
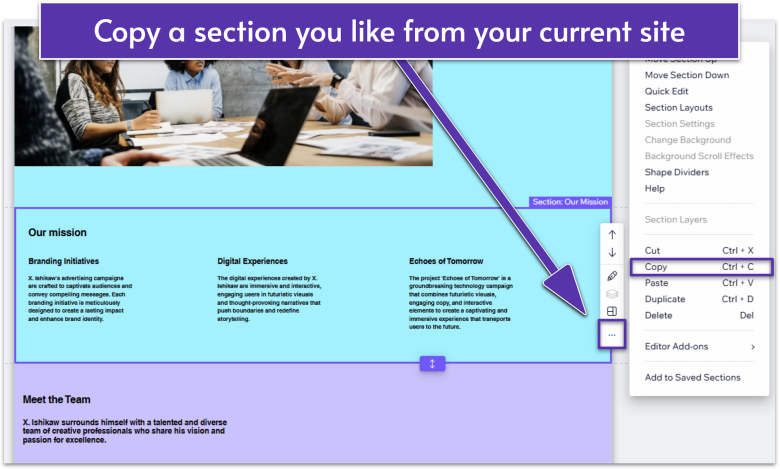
- Hover over the current site section you want to copy. It should be outlined in purple, not blue, which means you’re selecting an element inside the section. You’ll also see the label “Section” (e.g., “Section: Welcome,” “Section: Services”) in purple.
- Click the More Actions button in the toolbar on the right side of the selected section.
- From the dropdown menu, select Copy.
To copy content using shortcut keys:
- On Windows, press Ctrl + C
- On Mac, press Command (⌘) + C
- In the new template, go to the page where you want to place the section.
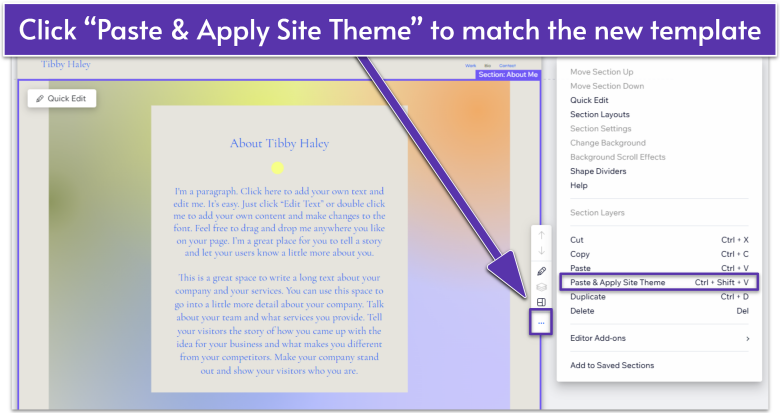
- Click the More Actions button again and select Paste & Apply Site Theme.
Why not use Paste?
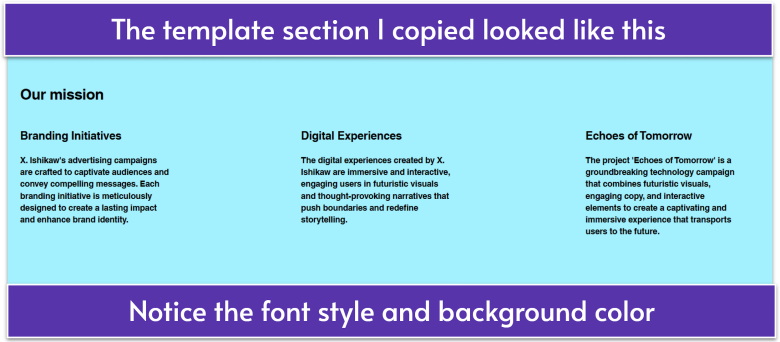
Selecting Paste & Apply Site Theme ensures that your copied section automatically matches your new template’s fonts, colors, and styles. With Paste, you’ll have to adjust everything manually, which can take hours!

Tip: Wix provides the option to save reusable sections and elements, so you don’t have to copy and paste each time.
How To Copy and Paste a Page in Wix

- In your current site, click Pages & Menu in the left sidebar of the Wix Editor.
- Find the page you want to copy under Site Menu.
- Click the More Actions button next to your selected page.
- Select Copy from the dropdown menu.

- In the new template, go to Pages & Menu .
- In Site Menu, right-click (Windows) or Control + Click (Mac) in the empty area below the page list.
- Select Paste & Apply Site Theme.


Keep in mind that some pages created by Wix apps cannot be copied (e.g., Wix Stores’ category, product, and cart pages).
Step 3. Transfer Content From Your Old Site
If you’re starting fresh with a new template but want to keep some of your current site’s content, you’ll need to transfer it manually. While you can copy and paste sections and pages to maintain your site’s design, the following content must be moved separately:
- Images and videos. Import media from your current site’s Media Manager by selecting Upload Media > My Wix Account, then choosing files to transfer.
- Blog posts. The Wix Blog app lets you import blog posts from your old Wix site to the new one. Set up 301 redirects in the URL Redirect Manager to maintain SEO rankings.
- Contacts. Export your contact list from your current site and import it into the new template manually.
- Wix Store products. Export your product list from Wix Stores as a CSV file, then upload it to your new site’s store.
Step 4. Transfer Your Wix Premium Plan
If your existing site has a Premium plan, you can transfer it to your new site in just a few clicks. When you transfer a Premium plan, any Wix domain and business email connected to that plan will also transfer automatically.
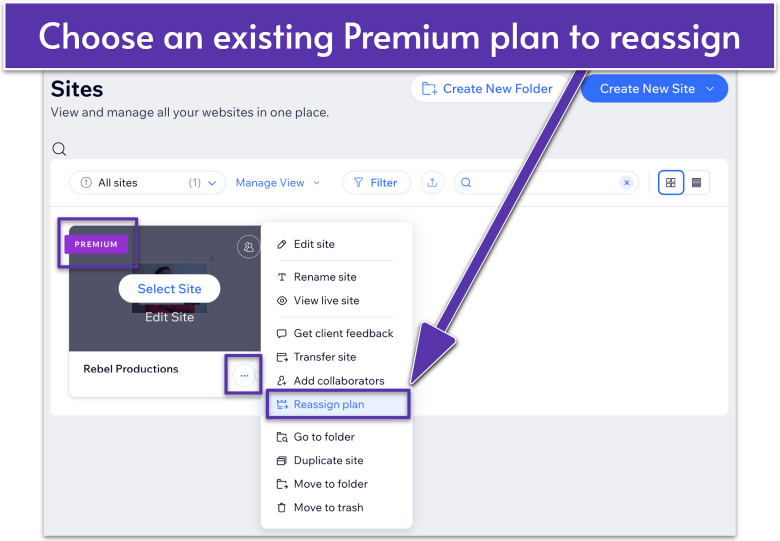
- Go to your Sites page.
- Look for the site your Premium plan is currently assigned to (site marked with a purple Premium badge).
- Click More Actions and select Reassign Plan.
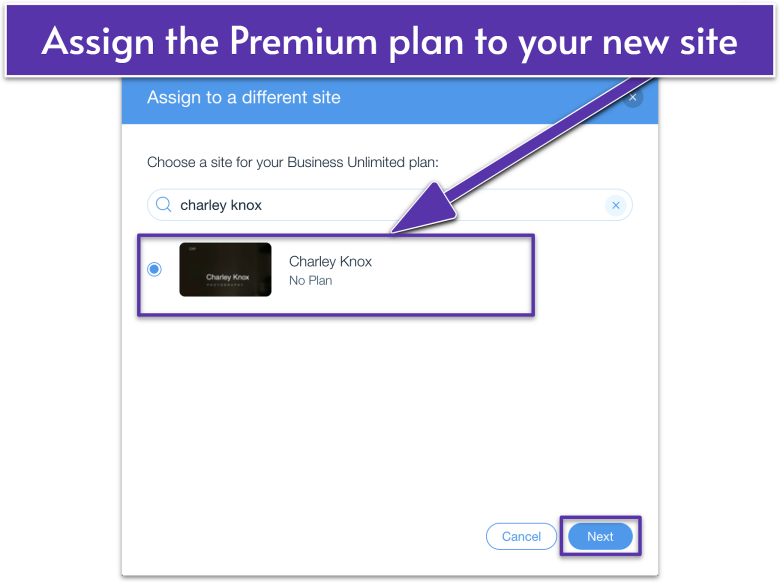
- Choose your new site and click Next.
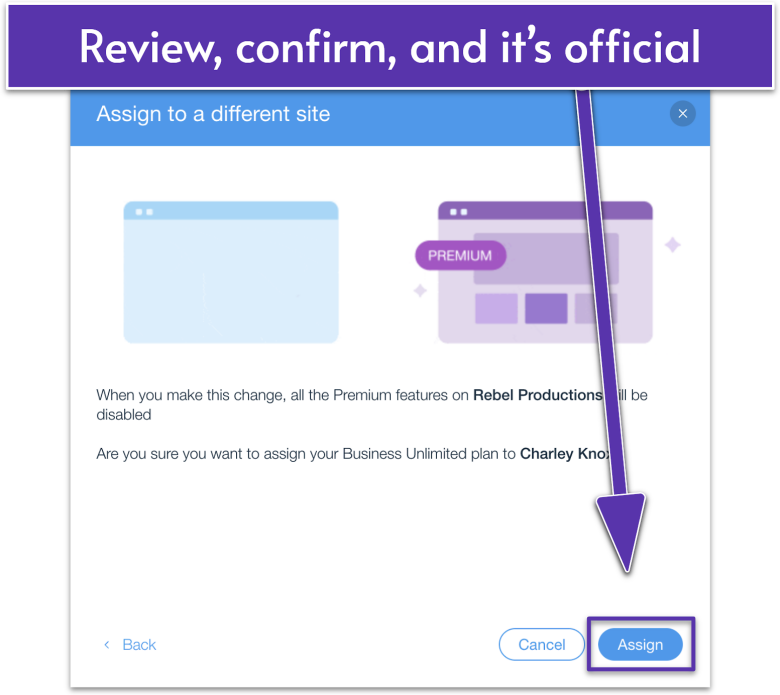
- Review the changes and click Assign to confirm the transfer.
Step 5. Transfer Your Domain to Your New Site
If you purchased your domain through Wix, it automatically transfers when you move your Premium plan. No extra steps required!
However, if your domain is registered with a third-party provider, you’ll need to update the DNS settings manually to point it to your new site. Wix has a Domain Assistant that’ll walk you through this process step by step.
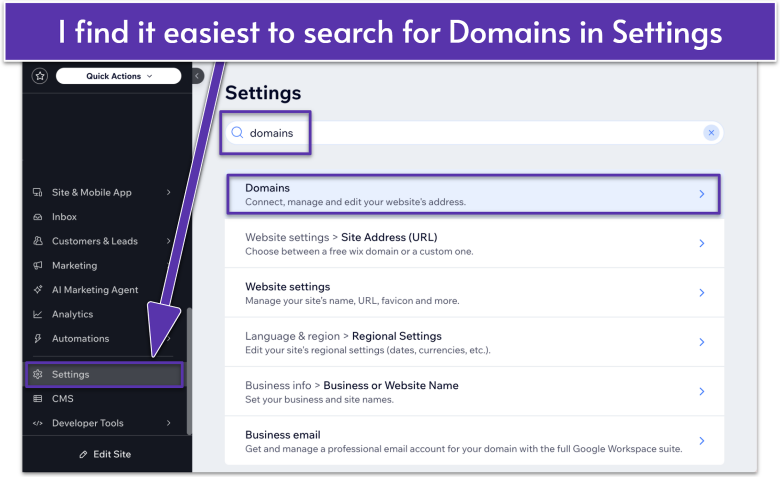
- Click Settings in the left sidebar of your new site’s dashboard.
- Scroll down to Site, domain & SEO settings and click Domains. You can also use the search bar to find the Domains tab.
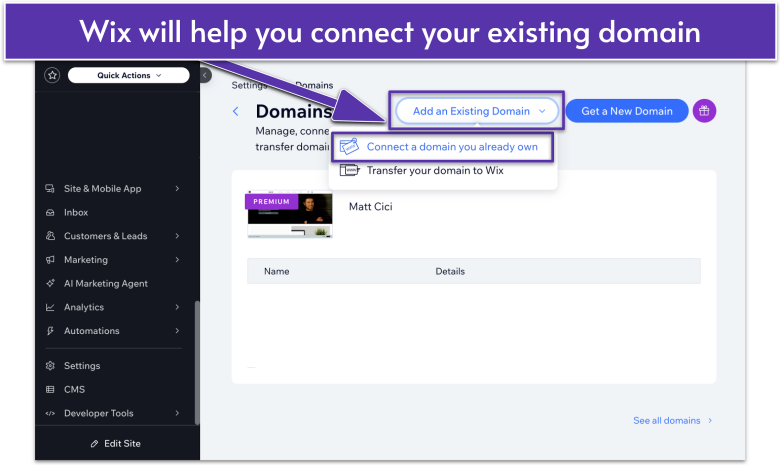
- Click Add an Existing Domain.
- Select Connect a domain you already own in the dropdown.
- Choose the site you want to connect your domain to, then click Continue.
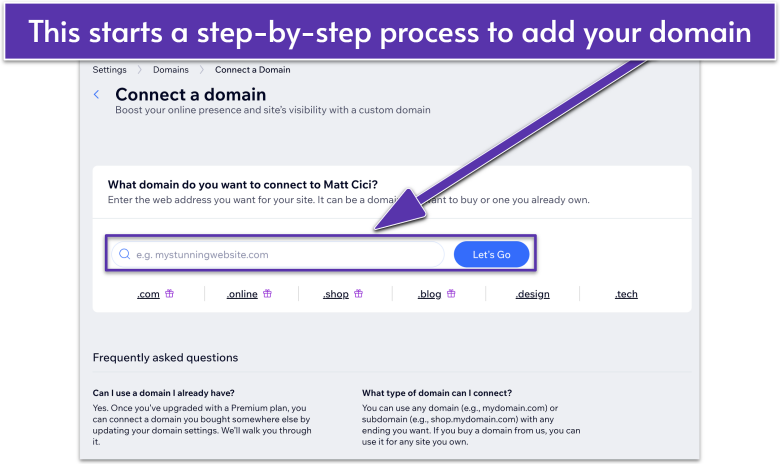
- Enter your domain name in the search bar and click Let’s Go.
- Click Yes, I own this domain.
- Follow the prompts to connect your domain either automatically or manually.
Step 6. Transfer Your Business Email to Your New Site
If you have a Google Workspace or another business email linked to your Wix site, it will transfer along with your domain. However, if you experience issues with email routing after transferring, reach out to Wix Support or your email provider for assistance.
Your New Wix Design Is Ready to Shine
Changing your Wix template doesn’t have to be overwhelming. Though templates can’t be switched once you’ve started, Wix gives you tools to help you transfer your existing content and create a website that better fits your vision.
Take your time, explore your design options, and enjoy the process of making your website truly yours. I can’t wait to see what you build!