

To access the “Local Business” version of this module, please click here.
“Testing” our site at this stage will consist of more than just reviewing it again to ensure we’re happy with its content (though I can’t overstate how important it is to do that, too). Instead, we’ll put our site through several specialized tests that will let us see more clearly if we missed anything.
I’ll be using our photography sample site to illustrate some of the steps below, but you’ll be following the exact same steps regardless of which site you’re building.
8.1 Wix Studio’s Accessibility Wizard
Besides protecting your site from evil spells, the Wix accessibility wizard can help you ensure you’ve optimized your site for people who might need special accommodations, such as those with visual, motor, or cognitive impairments. Not only is this important on its own, but many of the suggestions and notes from the accessibility wizard, such as adding alt tags to images, will also be crucial to ensure your site’s SEO performance.
Let’s start by running the accessibility wizard on our site to identify any areas for improvement.
Step 1: Open the accessibility wizard tool
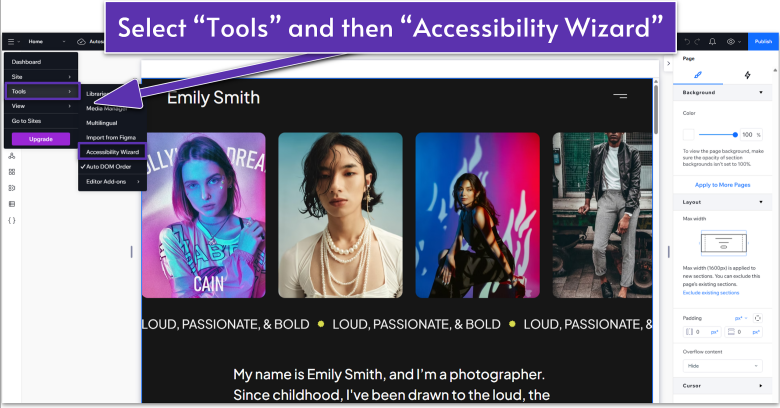
- Head over to the menu on the upper-left corner of your dashboard and go to “Tools.”
- Click on “Accessibility Wizard.”
Step 2: Scan your site for issues
The accessibility wizard should automatically scan your website for potential issues, but you can always press the “Scan Again” button to re-scan the page for the latest notifications or to ensure that you’ve successfully fixed a previously detected issue.
Step 3: Add alt tags to images
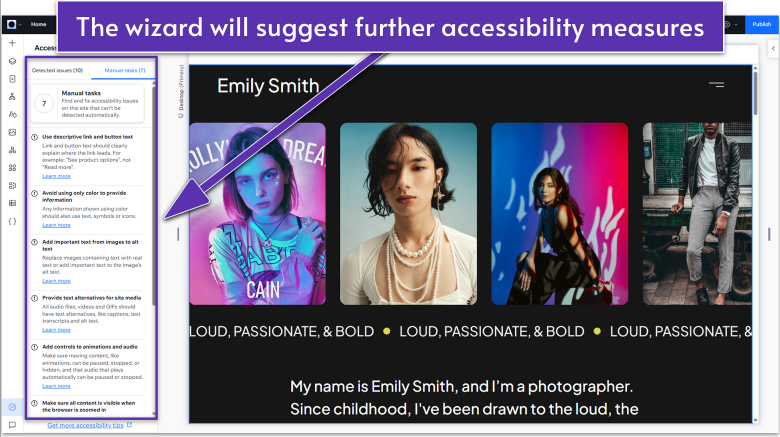
After scanning our site, I noticed that the main issue the wizard displays is a lack of alt text for images. As I write that, I’m now realizing that I’ve thrown out that term a lot without explaining what it means, so let’s take a slight detour:
Alt text or alt tags are brief descriptions of the content of each image file on your site. You might have seen examples of alt tags whenever the images on a website failed to load, and instead, you get a pixelated square next to a description of what would be in the image.
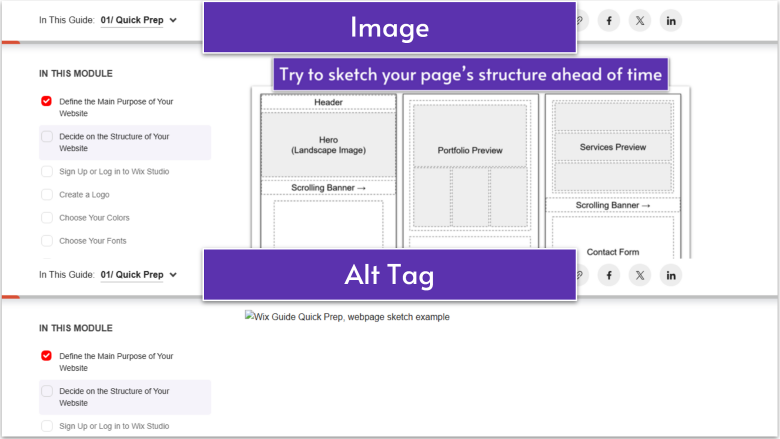
Alt tags are essential so visually impaired people can properly browse your site, but they also help search engines identify an image’s content.
All that to say that every image on your website needs to have an alt tag. Luckily, we can add them directly from the accessibility wizard.
On the accessibility wizard, identify any page that displays “issues.”
- Select “Add alt text to images.”
- Select “Get Started.”
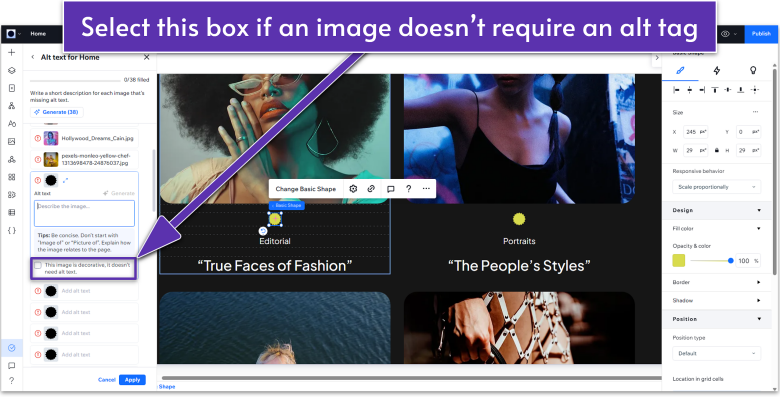
- Click on the pencil icon ( ) next to the image.
- Write down a brief and precise description of the image’s contents.

- If an image is purely there for visual flair and isn’t essential for navigation, you can simply check the “This image is decorative, it doesn’t need alt text” box.
- Repeat the process for all images on your site.
Step 4: Fix other issues
The accessibility wizard might also show issues such as a lack of a descriptive SEO title on your page, poor heading structure, or poor color contrast. These should not present a problem since we’ve covered each of these in previous sections in our guide, but if you need to solve or modify any of these aspects, simply click on the issue description on the wizard and you’ll be able to see a quick drop-down menu where you can make any necessary changes directly.
Step 5: Manual Tasks
Wix will also display a list of non-automated tasks that you can take into account to improve your site’s accessibility. These are much more subjective and are left up to your judgment, but I recommend checking anyway, in case you find something worthwhile.
8.2 Functional Testing
After we’re done with the Wix site checker, we should also perform some functional testing, i.e., ensuring that all forms, buttons, navigation, and other functions work as intended. Below, we’ll go over some of the steps you should follow for this, and we’ll do it directly from the editor.
However, if you’ve already connected your site to a custom URL, I recommend opening it from an incognito tab and testing all the functionalities there. That way, you can thoroughly test the experience from a visitor’s point of view.
Form Testing
Let’s start by making sure that all the forms on our site work as intended and deliver the information to the adequate channels. To do this, we should start by configuring the form submission settings.
Step 1: Find the first form on your site
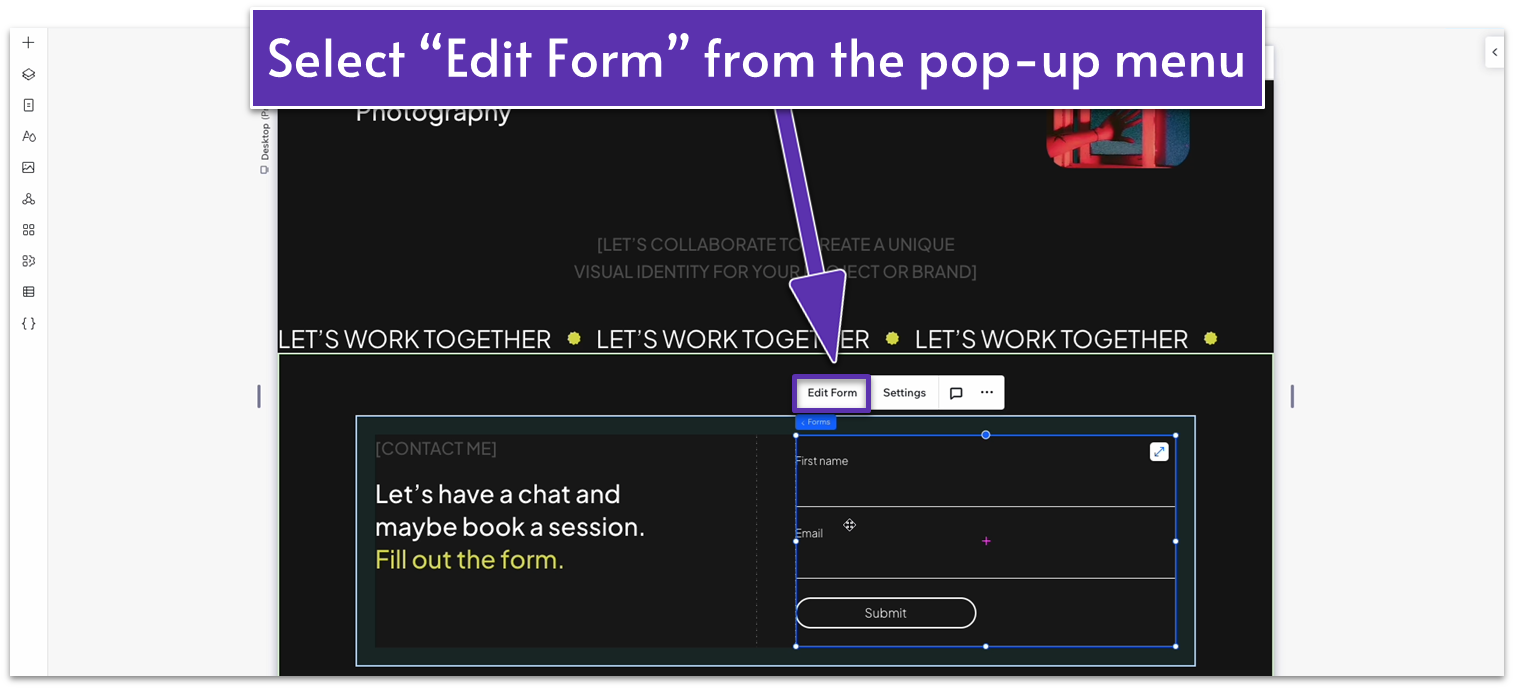
In this case, it will be the contact form at the bottom of the homepage.
Step 2: Open the form’s “Notifications and automations” menu
- Click on the form and then select the “Edit Form” option on the pop-up menu.
- On the form dashboard, head over to the “Settings” menu.
- Scroll down to “Notifications and automations” and click the “edit” button.
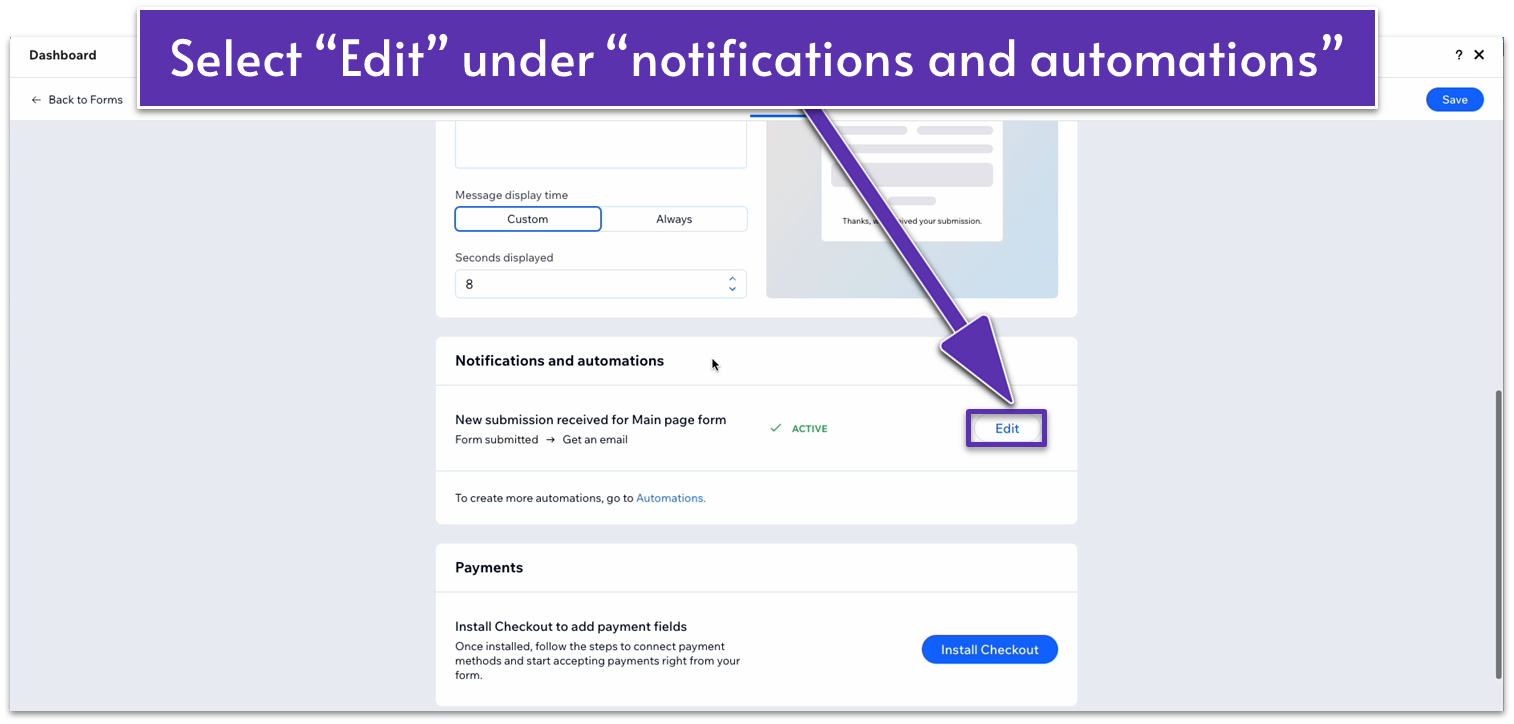
You can edit a series of automations on how your forms behave on submission. Feel free to tinker around here if you want to add more in-depth customization for your forms. At the moment, we’ll just change the basic behavior of the form so the information goes to a specified email address.
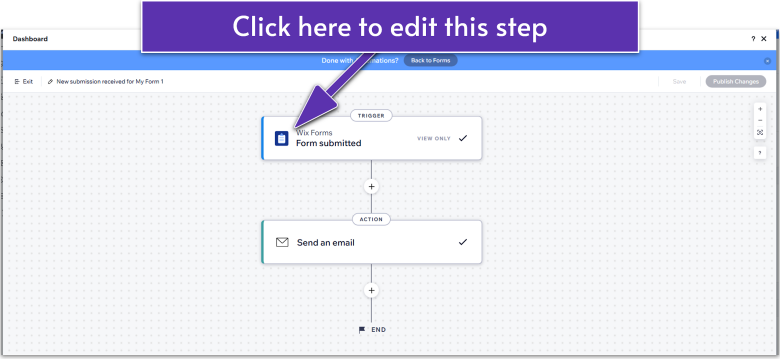
Step 3: Edit the behavior of submitted forms
- On the automations dashboard, click on the first node to edit its behavior.
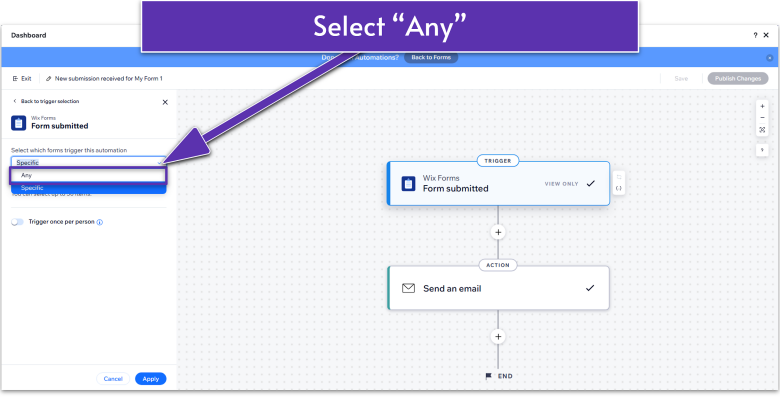
- On the pop-up menu on the left side, change “Select which forms trigger this automation” to “Any.”
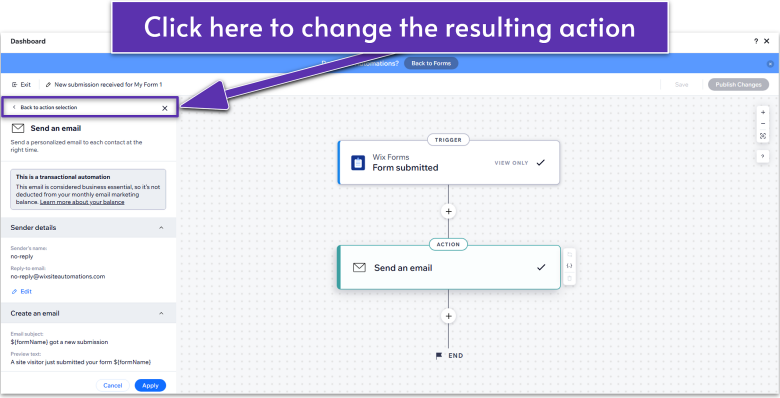
- Now, click on the last node to edit the action behavior.
- If you want to change the action triggered by the last step, select “Back to action selection” on the left-hand menu.
- There, you can select which action you want to trigger whenever a user submits a form.
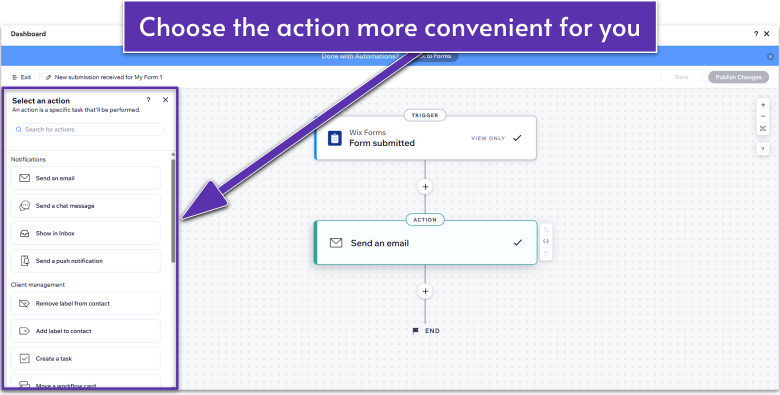
- At the moment, we’re happy with the “Send an email” action, so we’ll leave it unchanged.
- On the pop-up menu for the “Send an email” action, add a sender name and email under “sender details.” Users who receive emails from you will reply to this address.
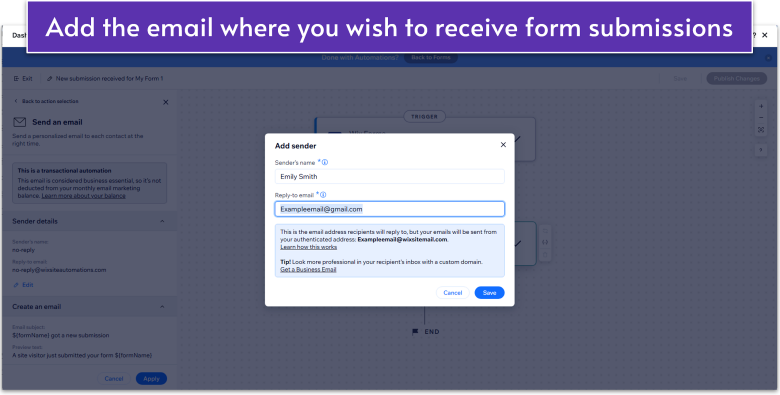
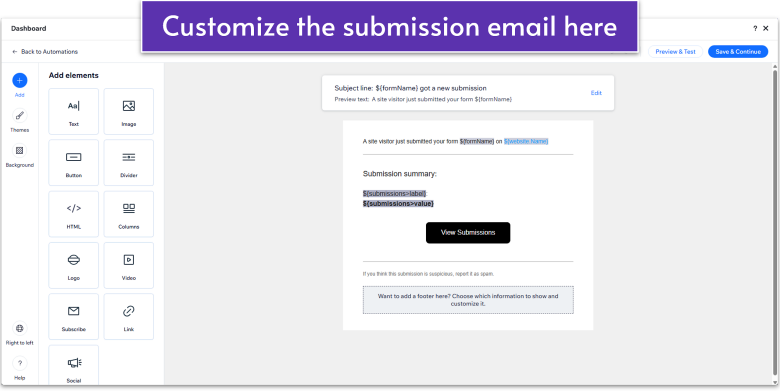
- Below, select the edit button next to the pencil icon ( ) to edit the message you’ll receive after a form is submitted.

- There, you’ll be able to edit the message and appearance of the submission email.
- If you want to receive the answers to a different email address than the one associated with your Wix account, scroll down to “Set recipients” and then click on the “Add Recipients” button ( ).
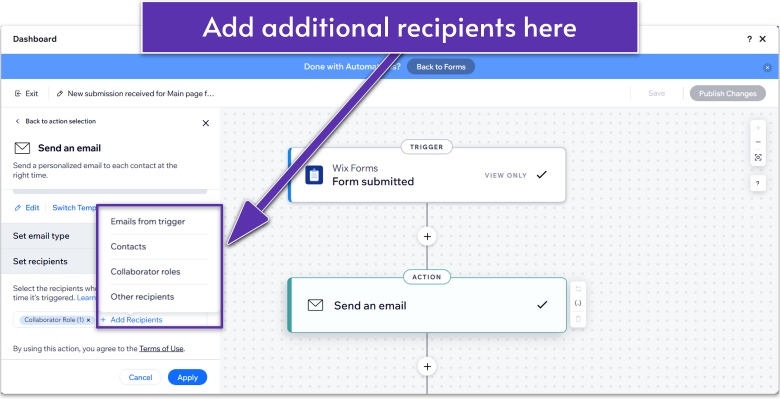
Remember to save your changes to exit and re-publish the site if needed.
Step 4: Submit a form from your incognito tab
Submit a form to your website from the incognito tab where you have your site open. Then, check the email address you associated with the form to ensure that you received the entirety of the information you submitted. If you do, that means the form is working as intended.
Navigation Testing
We want to make sure that your site’s navigation is excellent. Start by making a list of all the different links, buttons, and any other form of navigation throughout your site, as well as where they should lead to. Once your list is ready, open your incognito tab and test each one to ensure they work as intended.
If you notice that all the links work but there’s something you could do to improve navigation on this step, write it down and implement it after you’re done checking everything else.
Button and CTA Verification
Now, let’s test all buttons and call-to-actions. Again, start by making a list of all buttons and other interactable elements on your site, then, using the incognito window, make sure they all work as they should.
Media Functionality
Finally, take a closer look at your site’s images, video, and other visual elements. Ensure they are all working as intended. The images should look clear, sharp, and properly fit in with the rest of your site.
8.3 Cross-Browser Testing
A lot of websites behave differently across various browsers and devices. To ensure your website runs smoothly as often as possible, you should test it using several browsers.
It is essential to mention that the most popular web browsers are Chromium-based (which means they are built on the same foundations as Google Chrome), so they’ll behave similarly.
To be as exhaustive as possible, we should incorporate the most popular non-Chromium browsers out there. So, make sure to test your website at least on the following browsers:
- Google Chrome. The most popular browser out there, most of your desktop users will be using this one.
- Safari. The default browser for Apple devices (not Chromium-based).
- Firefox. The most popular non-Chromium browser out there.
Other than that, you could try the following Chromium-based browsers, though it’s a lot more likely that if your website works on Chrome, it will also work on:
- Opera
- Vivaldi
- Microsoft Edge
You should also try mobile compatibility on the mobile versions of some of these browsers. Of course, you can also check the mobile view of your site directly from Wix Studio by selecting the “preview” tool and then changing the view from the list of common devices offered in Studio.
You don’t have to test compatibility with every browser and device known to humans. As long as you check that your site works on a decent sample size of devices and browsers, you can safely assume it’ll work on the ones you haven’t checked yet.
8.4 SEO Testing
Since we performed our SEO testing in the last module (the Wix SEO checklist), we’ll only take this step to double-check that we implemented the best SEO practices on our site. More specifically:
- Meta Tags & Descriptions: Check that all your pages have the proper title tags, meta descriptions, and alt text for images.
- Keyword Usage: Ensure your target keywords are strategically placed in headers, content, meta descriptions, and URLs.
- Structured Data: Search for Google Rich Results Test and input your URL. You’re checking that your site’s structure is properly implemented so search engines can understand its content.
- SEO-Friendly URLs: Confirm that your URLs are short, readable, and contain relevant keywords.
8.5 Set up Marketing Analytics
Once your site is live and functioning, you want to be able to monitor its performance and the behavior of your users. Wix offers the option to connect with several marketing analytics tools that help you do that. Since we’re nearly ready to publish our site, we want to set up marketing analytics beforehand so we can get accurate information from the second we get started.
Step 1: Head over to your Wix Studio Dashboard
- If you’re in the editor, click on the upper-left corner menu and select “Dashboard.”
Step 2: Head over to “Marketing Integrations”
- From your dashboard, head over to the “Settings” menu.
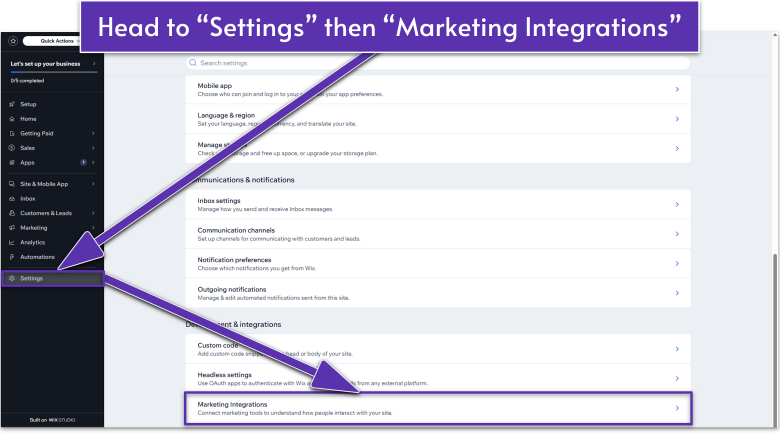
- Scroll down and click on “Marketing Integrations.”
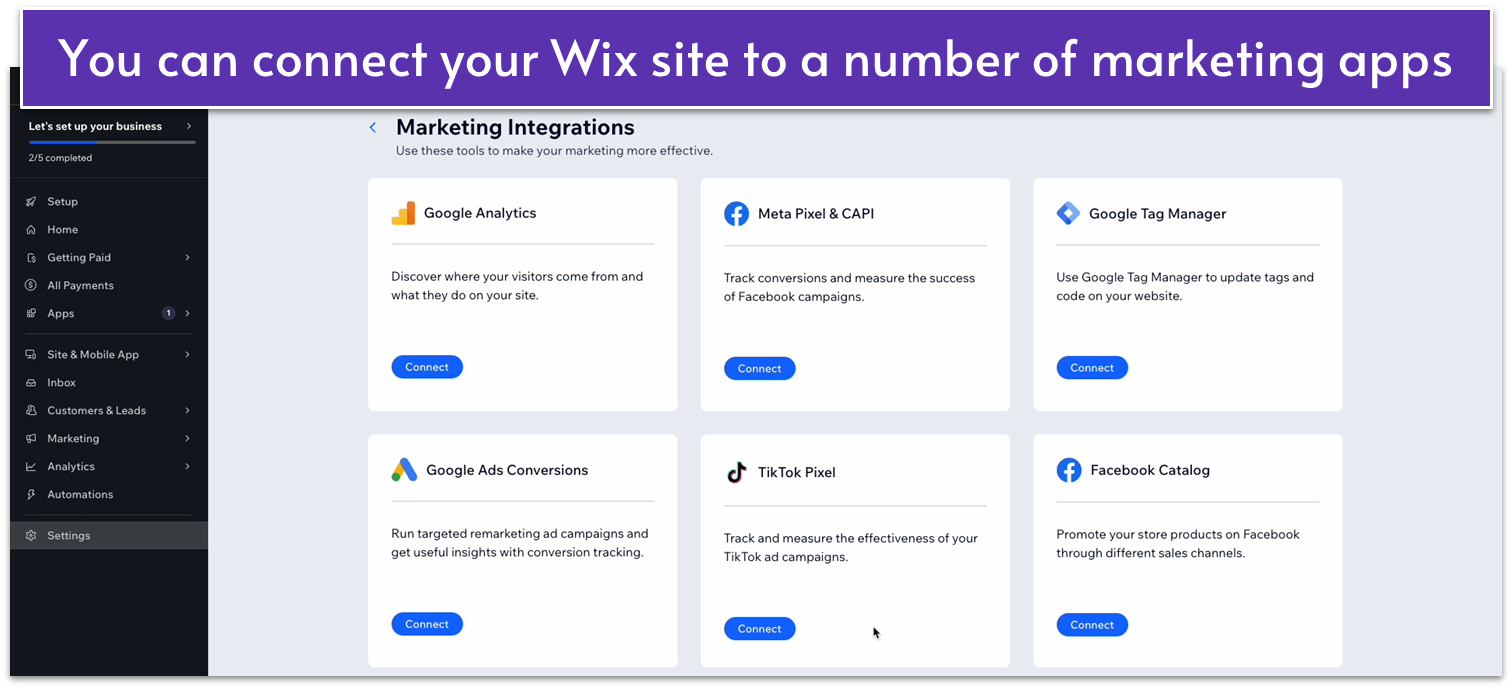
Step 3: Connect to your marketing integrations
You’ll have the option to connect to Google Analytics, Meta Pixel & CAPI, and more. You’ll have to be a user of these services in order to integrate them into your site.
8.6 Refining Content and Design
We’re almost done now. Our site is built, structured, and optimized, and we’ve connected it to a domain name. Before you call it a day, however, I recommend taking one last look at your work and making sure that you like what you see, maybe even showing it to friends and asking for their opinions. We’ve been tinkering with the site a lot, so this isn’t the point of making huge changes to your site, but you can adjust some details to ensure you get everything just right.
Regarding this step, the web designer in charge of our sample recommends:
- Adjusting spacing & alignment: Ensure proper spacing between text and elements. Align images, text boxes, and buttons to create a clean, professional appearance.
- Enhancing CTAs: Refine the placement, text, and design of call-to-action buttons for better visibility and higher conversion rates.
- Double-checking typography and colors: Check for consistency in font sizes and colors. Make sure the typography aligns with your brand identity and is easy to read across devices.
This is also the time to check that list you started at the beginning of this guide, where you’ve added things you’re not quite 100% happy with on the way. Now that you have a functional site up and running, you can take your time to bring your copy, images, or whatever it is you believe needs work up to standard.
8.7 Post-Launch Testing
Testing and refining aren’t over just because we publish our site. We should monitor the following factors continuously through our website’s life cycle:
- Monitor Performance: Keep a good eye on your site’s performance and test regularly. If there are dips in traffic or issues reported by users, you should investigate the cause of the problem and endeavor to fix it.
- Test for Scalability: As your site grows, you might notice dips in performance. This might indicate that you need to upgrade your plan to accommodate its growing demands. Wix offers plenty of scalability options for when you reach that point.
- Continuous Updates: Even if your site is mostly static, try to update it from time to time. This doesn’t mean making major overhauls every week, though. Just upload new content, swap out your images and videos, or occasionally change up the copy a little to ensure your site remains relevant in search engine results.
We’re trying to build a website that will last here, so planning ahead is essential. Keeping your site updated and testing regularly will ensure that your site keeps performing for a long time to come.
8.8 Congratulations on Publishing Your Site!
Here’s where we part ways, at least for now. On behalf of the entire team that worked on this guide, allow me to thank you for taking on this journey with us. We wish you the best of luck on your site and hope that, by now, you won’t need it.
