
Upgrading to a Wix Premium plan gives you access to powerful features like a custom domain, more storage, e-commerce tools, and the ability to remove Wix ads. In this guide, you’ll learn exactly how to upgrade, with screenshots and expert tips to help you choose the right plan for your site.
Short on Time? Quick Steps to Upgrade Your Wix Site
- Choose the site you want to upgrade.
- Click Upgrade at the top of the dashboard.
- Select the best premium plan for your needs.
- Choose a billing cycle.
- Enter your payment info.
- Connect your domain (optional).
- Publish your site.
Step 1. Choose the Site You Want to Upgrade
Each site on Wix has its own plan, so upgrades are site-specific. If you manage multiple sites, you’ll land on the site selector screen first.
If you only have one site in your account, you can skip this step and go straight to the next one.
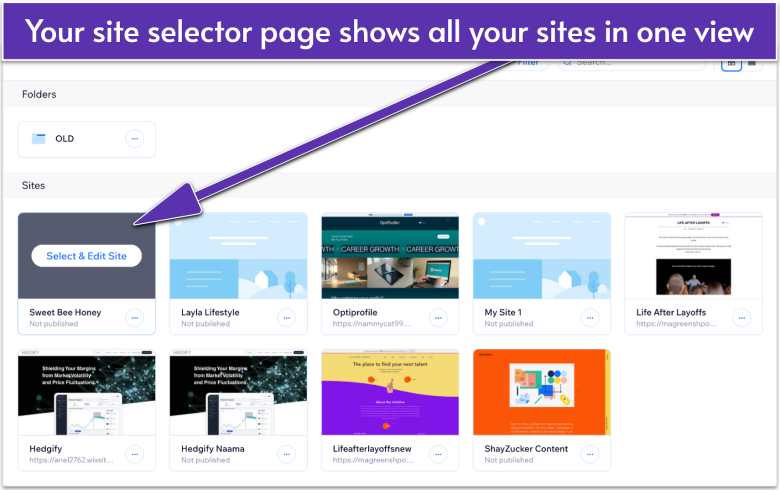
- In your site selector page, hover over the site you want.
- Click Select & Edit Site to go to the site’s main dashboard.
Step 2. Click “Upgrade” at the Top of the Dashboard
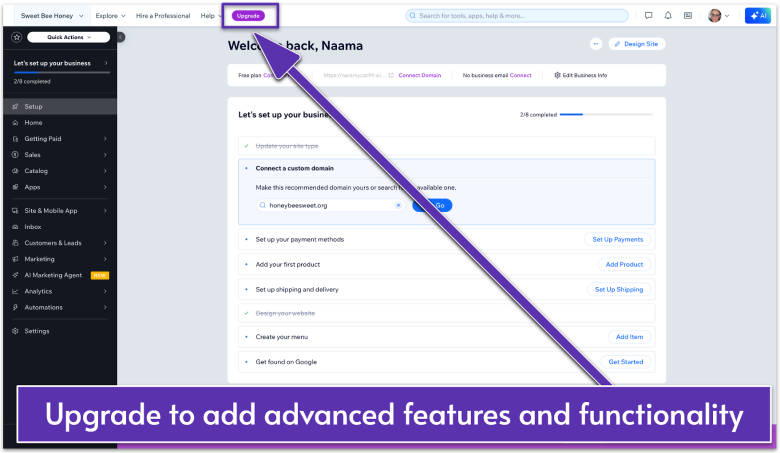
In your site dashboard, click the purple Upgrade button in the panel at the top of the screen. This will open the plan selection menu.
Step 3. Select the Best Premium Plan for Your Needs
On the pricing page, you’ll see all the available Wix plans along with their monthly or yearly prices. Each plan includes different features, so what you choose will depend on what you need.
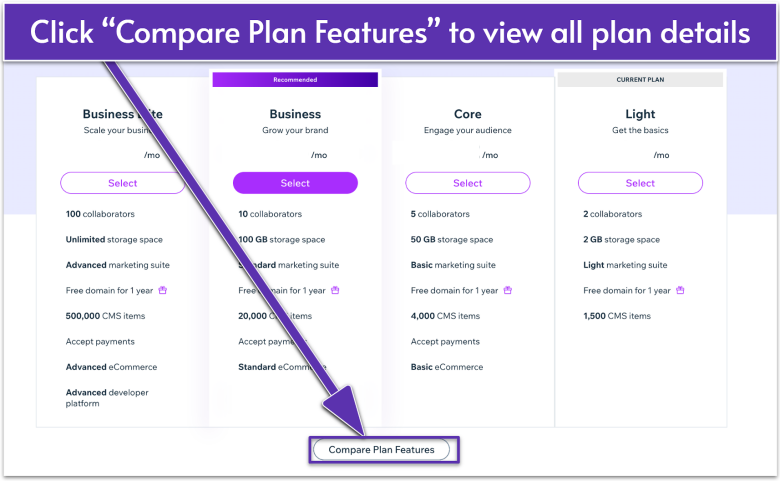
- Compare what’s included in each. Hover over Compare Plan Features for a full breakdown.
- Click Select under the plan that fits your site’s needs.
Here’s a quick breakdown of Wix Premium plans:
| Plan | Best for | Unlocked features | Price |
|---|---|---|---|
| Light | Freelancers, portfolio sites, or personal projects that just need the basics without ads | Custom domain, no Wix ads, 2 GB storage, basic marketing tools, 24/7 support | $17.00 |
| Core | Small businesses or creators who want to start selling or grow their audience | Everything in Light, 50 GB storage, basic e-commerce (up to 50,000 items), abandoned cart recovery, up to 5 collaborators | $29.00 |
| Business | Growing brands that need more advanced e-commerce and team features | Everything in Core, 100 GB storage, advanced shipping and tax tools, product reviews, loyalty features, up to 10 collaborators | $39.00 |
| Business Elite | Large businesses, agencies, or high-traffic sites that need top performance and unlimited scale | Everything in Business, unlimited storage, advanced marketing, more currencies, VIP support, up to 100 collaborators | $0 |
Step 4. Choose a Billing Cycle
Wix offers multiple billing options for each plan: monthly, yearly, every two years, or every three years. Annual plans offer the best value and often include a free domain for one year.
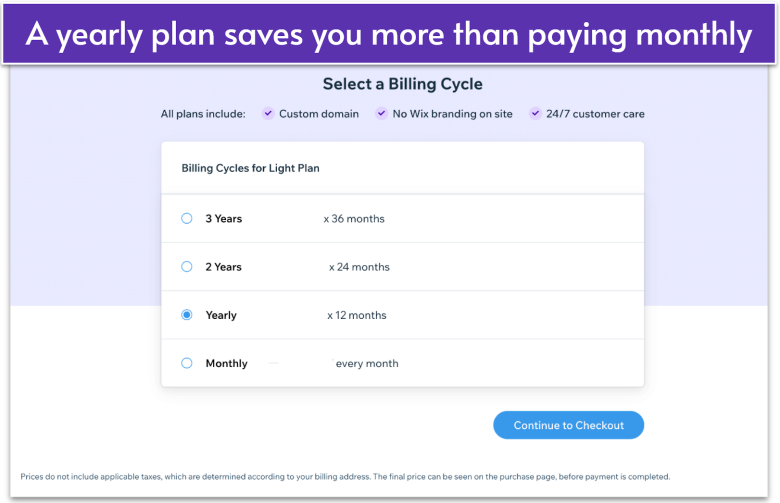
- Use the buttons to choose from monthly, yearly, or multi-year subscriptions.
- Click Continue to Checkout.
Step 5. Enter Your Payment Info
You’ll now complete the checkout process.
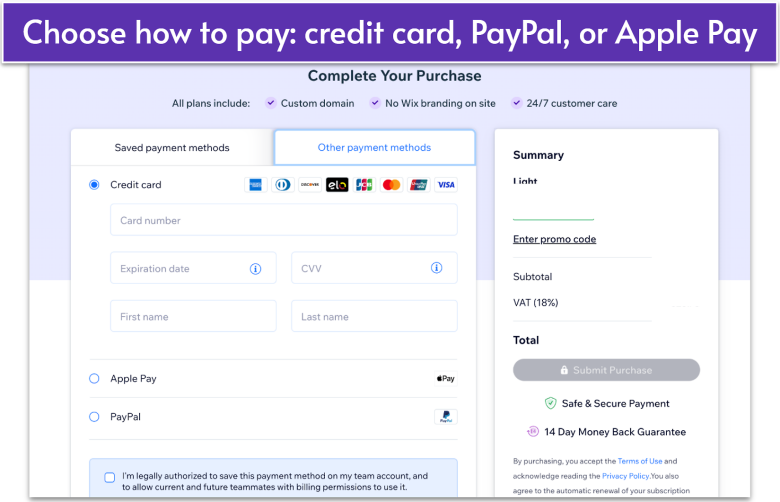
- Choose your payment method and enter your payment information.
- Complete your invoice details.
- Check to see if your order details are correct in the Summary box, then click Submit Purchase.
You should see a confirmation screen once your payment is successful.
Step 6. Set Up Your Domain (Optional)
After upgrading, you’ll be prompted to either search for a new domain for your site or connect a domain you already own. Each option will take you through a separate setup process.
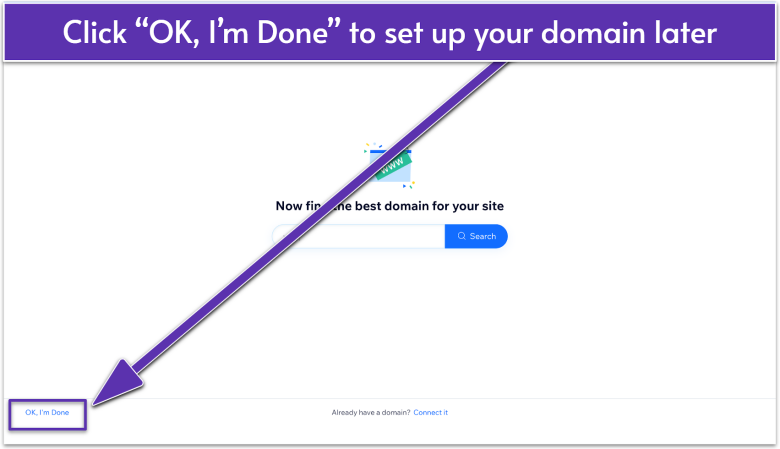
You can skip this step by clicking OK, I’m Done and return to it later from the Settings menu.
Step 7. Publish Your Site
Your site is now upgraded, but your changes won’t go live until you publish. Republishing removes Wix ads and connects your domain.
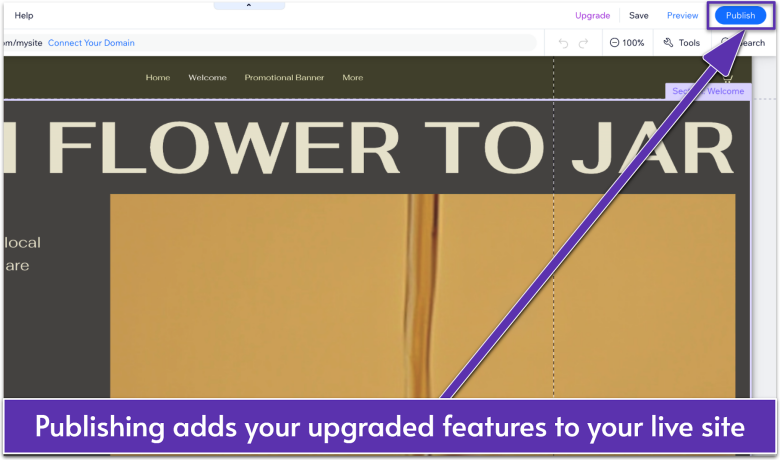
- Go to the Wix Editor.
- Click Publish in the top-right corner.
Now That You’ve Upgraded, What’s Next?
Congrats! You now have a Premium Wix site. From here, you can connect your domain for a professional URL and access advanced features like SEO tools, analytics, and online payments.
Your upgrade also gives you more space for content and unlocks extra features that make your site look and work better. Depending on your plan, you may also get tools for selling online, reaching a wider audience, and receiving dedicated support.